Language detection sounds like a small feature until real users get involved. One person writes “hola,” another mixes English and French in the same message, someone adds emojis, and someone else types Ukrainian words with Latin letters. A basic detector may still return a language code, but that result may not be reliable enough to route a support ticket, trigger translation, moderate user content, or power a multilingual AI workflow.
For this guide, we researched 10 language detection APIs and libraries based on what developers usually care about in production: supported languages, confidence scores, batch processing, pricing, setup time, deployment options, and how each tool fits into a larger AI pipeline.
We also looked at what happens after language detection. In many apps, detection is the first step before translation, summarization, moderation, classification, or localized response generation. That is where a unified model gateway like LLMAPI can help teams manage the next layer through one API connection instead of wiring every AI provider separately. LLMAPI gives developers access to 200+ models, centralized API key management, request routing, cost-aware analytics, provider breakdowns, and reliability monitoring through one gateway.
This guide was prepared by a technical content team with 6 years of experience researching APIs, AI infrastructure, SaaS platforms, and developer tools. Our work focuses on turning technical product documentation, pricing pages, and engineering use cases into practical buying guides for developers, product teams, and startup founders.
For this article, we reviewed official API documentation, pricing pages, vendor feature lists, and third-party research on LLM tool use, orchestration, SaaS security, code-mixed language identification, and multi-provider AI workflows. We compared each language detection option by the criteria that matter most in production: short-text handling, confidence scores, batch support, deployment model, pricing predictability, and how well the tool fits into a larger AI workflow.
We also treated vendor pages carefully. Official docs are useful for facts like pricing, supported languages, and response formats, while third-party research helps explain why these details matter in real systems.
| API / Tool | Best for | Deployment | Confidence score | Batch support | Free option | Main limitation |
| Google Cloud Translation | Translation-first workflows | Cloud API | Yes | Yes | Monthly free character credit | Can feel expensive for detection-only use |
| Amazon Comprehend | AWS NLP pipelines | Cloud API | Yes | Yes | 12-month free tier | Focuses on dominant language detection |
| Azure AI Language | Microsoft/Azure teams | Cloud API / container | Yes | Yes | Free tier available | Text-record billing needs planning |
| DetectLanguage.com | Lightweight standalone detection | Cloud API | Yes | Yes | 1,000 requests/day | Narrower NLP feature set |
| IBM Watson NLU | Broader enterprise text analytics | Cloud API | Yes | Yes | 30K NLU items/month | More setup than simple detection tools |
| Eden AI | Multi-provider testing and fallback | Unified API | Depends on provider | Yes | Trial/pay-as-you-go options | Adds another routing layer |
| LibreTranslate | Self-hosted translation and detection | Self-hosted API | Limited | Yes | Open source | Requires hosting and model upkeep |
| fastText | High-speed local language ID | Local model/library | Yes | Yes | Open source | Short/noisy text needs testing |
| Lingua | Short text and chat-style inputs | Local library | Yes | Yes | Open source | Smaller language coverage than fastText |
| LanguageTool API | Grammar apps with auto language handling | HTTP API | Limited | Limited | Public API limits | Built for proofreading, not bulk detection |
Google Cloud Translation pricing depends on the translation model and usage volume, with a monthly free character credit before paid tiers apply. Amazon Comprehend pricing is measured in character units for many NLP APIs, with minimum request sizes that matter for short-text workloads. DetectLanguage.com lists support for 216 languages, short text, batch requests, and free/premium plans.
If we had to choose one default option for most developer teams, we would start with Google Cloud Translation when language detection is tied to translation, and Amazon Comprehend when the product already runs on AWS. Both are mature, well-documented, and easier to trust in production than smaller tools.
For a simple standalone detector, DetectLanguage.com is easier to set up and more focused. It does one job without pulling in a full cloud NLP stack.
For privacy-sensitive or high-volume local workflows, fastText and Lingua are better choices than cloud APIs. fastText wins on language coverage and speed, while Lingua is more interesting for short text, chat messages, and small user inputs.
Some tools are more situational. IBM Watson NLU is powerful, though too heavy if the only task is language detection. LanguageTool API is useful for proofreading apps, though it is a weak fit for bulk language classification. Eden AI is useful for testing several providers through one interface, though it adds another layer between your app and the actual model.
So the short answer is:
| Need | Best choice |
| Translation workflows | Google Cloud Translation |
| AWS-native NLP pipelines | Amazon Comprehend |
| Azure enterprise workflows | Azure AI Language |
| Simple standalone language detection | DetectLanguage.com |
| Local high-volume processing | fastText |
| Local short-text detection | Lingua |
| Self-hosted translation + detection | LibreTranslate |
| Provider comparison and fallback | Eden AI |
| Grammar apps with auto-detection | LanguageTool API |
| Downstream LLM routing after detection | LLMAPI |
| Tool | Overall fit | Accuracy confidence | Setup effort | Cost predictability | Best use case | Our rating |
| Google Cloud Translation | Strong | High | Medium | Medium | Detection before translation | 9/10 |
| Amazon Comprehend | Strong | High | Medium | Strong | AWS-native NLP pipelines | 8.5/10 |
| Azure AI Language | Strong | High | Medium | Medium | Microsoft/Azure environments | 8/10 |
| DetectLanguage.com | Strong | Medium-High | Low | Strong | Simple standalone detection | 8/10 |
| fastText | Strong | Medium-High | Medium | Strong | Local high-volume processing | 8/10 |
| Lingua | Strong | Medium-High | Medium | Strong | Short local text detection | 8/10 |
| LibreTranslate | Good | Medium | High | Strong | Self-hosted translation workflows | 7/10 |
| Eden AI | Good | Depends on provider | Low | Medium | Multi-provider testing | 7/10 |
| IBM Watson NLU | Situational | High | High | Medium | Enterprise text analytics | 6.5/10 |
| LanguageTool API | Situational | Limited for detection-only use | Low | Medium | Grammar and writing tools | 6/10 |
These ratings are based on production fit, not raw model accuracy alone. A tool can be technically strong and still be the wrong choice if it is too expensive, too heavy, or built for a different workflow.
A language detection API takes a text input and returns the language it believes the text is written in. In a simple case, you send something like:
{
“text”: “Bonjour, comment puis-je vous aider?”
}
And the API returns something like:
{
“language”: “fr”,
“confidence”: 0.98
}
Most tools return short language codes like en, es, fr, or uk. That looks simple, but it matters. These codes decide which translation model gets called, which moderation rules apply, which support queue receives the ticket, and how content gets indexed.
Some APIs also return confidence scores. Google Cloud Translation documentation shows language detection responses with language codes and confidence values, while Azure AI Language documentation says its language detection feature returns the main language, ISO 639-1 code, readable name, confidence score, script name, and ISO 15924 script code.
Before choosing a tool, it helps to separate the main categories.
| Option | Best for | Tradeoff |
| Dedicated language detection API | Simple cloud-based detection | Another vendor to manage |
| Cloud NLP platform | Detection plus sentiment, entities, PII, or classification | Heavier setup |
| Open-source/local library | Privacy and low-cost high-volume processing | More maintenance |
| Self-hosted API | Private translation and detection workflows | You handle uptime and infrastructure |
| Unified AI gateway | Downstream AI workflows after detection | Works best as part of a larger model-routing setup |
This is also where LLMAPI fits into the bigger picture. We would treat LLMAPI as the next layer in the workflow. Once your app knows the language, LLMAPI can help route the text to translation, summarization, classification, moderation, or response generation models through one API gateway.
For our research, we focused on tools that developers can realistically use in production. We checked official documentation, pricing pages, response formats, language coverage, deployment options, and whether each tool has a clear use case.
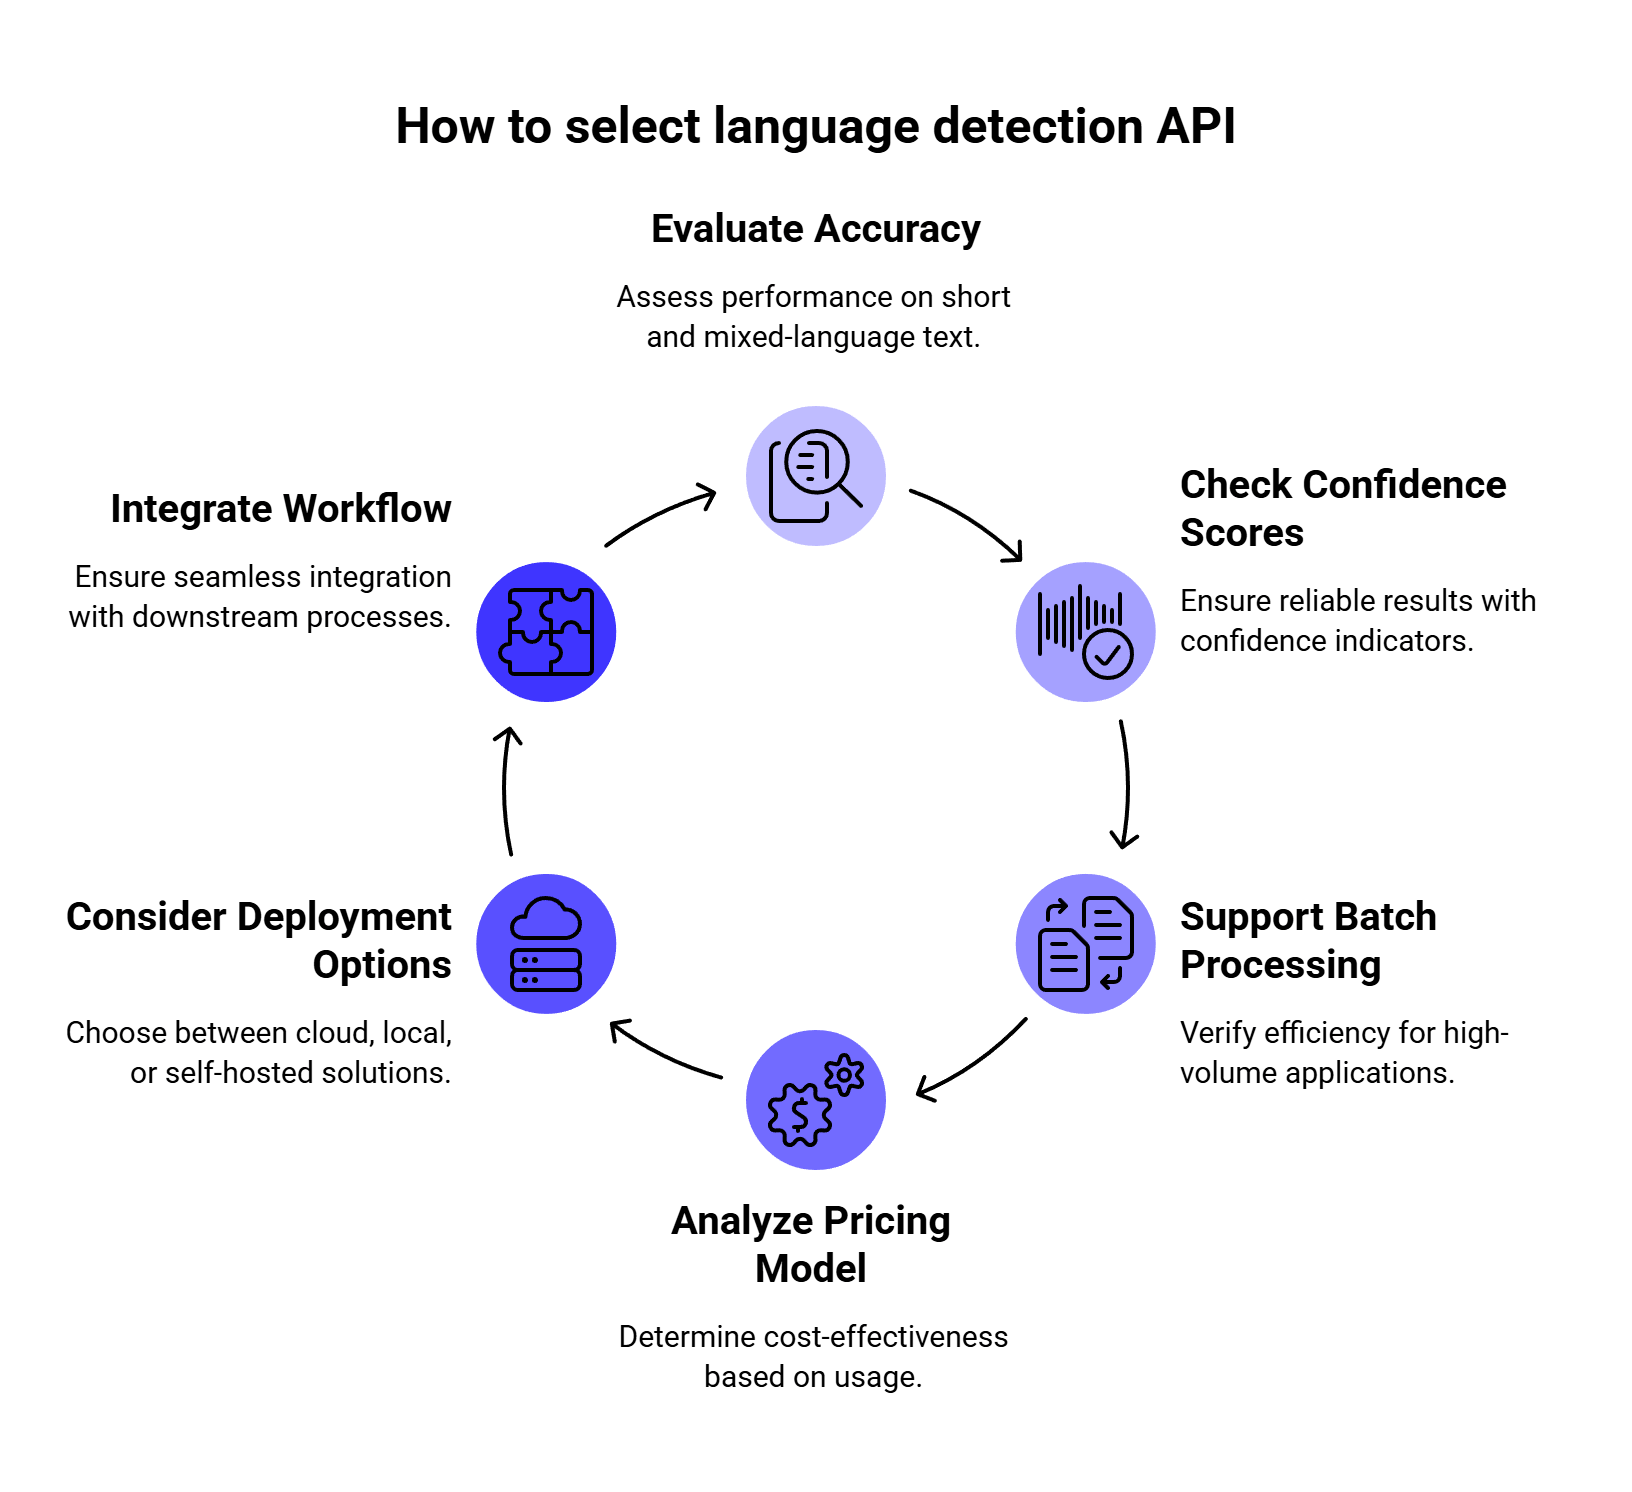
We paid attention to six things:
| What we checked | Why it matters |
| Accuracy on short text | Many real inputs are tiny: “hola,” “merci,” “дякую,” or “help pls.” |
| Confidence scores | Your app needs to know when a result is uncertain. |
| Batch support | High-volume apps rarely send one text string at a time. |
| Pricing model | Character-based, request-based, and record-based pricing can change the real cost a lot. |
| Deployment | Some teams are fine with cloud APIs, while others need local or self-hosted options. |
| Next-step workflow | Detection often leads into translation, moderation, summarization, or routing. |
We also looked at whether each tool detects the dominant language of a full text block or can support more complex language handling. This matters for code-switched messages like:
Hola, can you help me with my order?
Many APIs will return one main language for the whole input. For mixed-language content, developers may need to split text into smaller chunks and run detection on each segment.
This problem is bigger than a small edge case. Research on code-mixed text shows that online and social media content often mixes languages at sentence, word, and even sub-word level. The COMI-LINGUA dataset paper introduced a large manually annotated Hindi-English code-mixed dataset with 100,970 instances evaluated by three expert annotators, covering tasks such as language identification, matrix language identification, POS tagging, named entity recognition, and translation. That is why we do not recommend judging language detection tools only with clean paragraph-length samples.
Best for: teams that need language detection as part of a translation workflow.
Google Cloud Translation is one of the strongest choices when language detection sits right before machine translation. Your app can detect the source language, translate the text, and keep the full workflow inside Google Cloud.
We like it most for products that already handle localization, multilingual support, international documentation, marketplaces, or customer-facing translation. Google’s language detection documentation shows that its API returns detected languages with confidence values, which helps when a workflow needs to decide whether to translate automatically or send the input for review.
| Feature | Details |
| Deployment | Cloud API |
| Response | Language code + confidence |
| Best use case | Translation routing |
| Pricing | Character-based |
| Free usage | Monthly free character credit |
| Main drawback | Price can feel high for simple detection-only use |
Compared with Amazon Comprehend: Google Cloud Translation is the better fit when the next step is translation. Amazon Comprehend is stronger when the next step is broader AWS text analytics.
Compared with DetectLanguage.com: Google is heavier, though it gives you a stronger translation ecosystem. DetectLanguage.com is simpler for detection-only use.
We’d choose Google Cloud Translation if detection is part of a translation flow. For example, a support app can detect that a user wrote in German, translate the message into English for the support team, then generate a German reply.
We’d skip it if the app only needs low-cost standalone detection. For basic language identification, a lighter API or local library may be easier to justify.
Best for: AWS-native NLP pipelines.
Amazon Comprehend includes dominant language detection as part of its broader NLP feature set. It works well when language detection is one step before sentiment analysis, entity recognition, PII detection, classification, or document processing inside AWS.
Amazon’s dominant language documentation says Comprehend determines the dominant language of input text and uses RFC 5646-style identifiers. If a two-letter ISO 639-1 identifier exists, Comprehend uses it, with a regional subtag when needed. Otherwise, it uses an ISO 639-2 three-letter code.
| Feature | Details |
| Deployment | Cloud API |
| Response | Language code + confidence score |
| Best use case | AWS text analytics pipelines |
| Pricing | Character-unit based |
| Free usage | 12-month free tier |
| Main drawback | Dense code-switching may need preprocessing |
Compared with Google Cloud Translation: Comprehend is usually better for AWS-based analytics workflows. Google is better when translation is the main next step.
Compared with Azure AI Language: the best choice often depends on your cloud stack. AWS teams will usually move faster with Comprehend, while Microsoft-heavy teams will prefer Azure AI Language.
We’d choose Amazon Comprehend if your team already uses AWS and needs language detection inside a bigger NLP pipeline. It is especially useful for S3-based document processing, Lambda workflows, analytics jobs, and support data classification.
We’d watch out for short inputs and transliterated text. Amazon’s language documentation notes that Comprehend does not support phonetic language detection, so inputs like “arigato” or “nihao” may not be detected as Japanese or Chinese.
Best for: Microsoft and Azure-based teams.
Azure AI Language includes language detection as a prebuilt feature. Microsoft’s language detection overview says it can identify more than 100 languages in their primary script and returns the main language, ISO 639-1 code, readable name, confidence score, script name, and ISO 15924 script code.
This is useful for enterprise apps where language detection connects to Azure AI Search, Azure Functions, Microsoft compliance tooling, or internal data platforms.
| Feature | Details |
| Deployment | Cloud API or container |
| Response | Language name, code, confidence score, script data |
| Best use case | Azure-native enterprise apps |
| Pricing | Text-record based |
| Main benefit | Strong Microsoft ecosystem fit |
| Main drawback | Pricing needs payload planning |
One detail we like: Azure lets developers use a country/region hint to help with ambiguous text. Microsoft gives the example of “communication,” a word shared by English and French, where a France hint can help the model choose French.
Compared with Amazon Comprehend: Azure AI Language is the better choice for Microsoft environments. Comprehend is the better choice for AWS pipelines.
Compared with Google Cloud Translation: Azure is stronger for Azure-native text analytics, while Google is easier to justify when detection leads directly into translation.
We’d choose Azure AI Language if your app already lives in the Microsoft ecosystem and you want language detection close to the rest of your Azure services.
We’d watch out for many tiny inputs. Text-record pricing can become awkward if every short phrase counts as a separate record, so batching strategy matters.
Best for: simple standalone language detection.
DetectLanguage.com is one of the easiest options to understand. It focuses on language detection and avoids the extra weight of full NLP platforms. Its API documentation says the service returns JSON and provides official API clients for Ruby, Python, Node.js, Go, Java, PHP, .NET, Perl, and Crystal.
The service says it detects 216 languages, supports short texts and batch requests, and offers both free and premium plans.
| Feature | Details |
| Deployment | Cloud API |
| Response | JSON language detection result |
| Best use case | Lightweight standalone detection |
| Free plan | 1,000 requests/day |
| Paid plans | Start at $5/month |
| Main drawback | Fewer extra NLP features |
Compared with Google, AWS, and Azure: DetectLanguage.com is simpler and easier to set up. The tradeoff is that it does not give you the same broad NLP or cloud ecosystem.
Compared with fastText and Lingua: DetectLanguage.com is easier if you want a managed API. fastText and Lingua give you more control if you want local execution.
We’d choose DetectLanguage.com if the app needs quick language detection without setting up Google Cloud, AWS, or Azure. It is a good fit for smaller SaaS products, internal tools, CMS workflows, and simple routing tasks.
We’d skip it if the same text also needs deep NLP features like entity extraction, sentiment analysis, PII detection, or translation.
Best for: enterprise text analytics where language detection is part of a larger analysis workflow.
IBM Watson Natural Language Understanding is built for broader text analysis. IBM describes it as a service for extracting metadata from unstructured text, including categories, concepts, entities, keywords, sentiment, emotion, relations, and syntax.
This makes it more powerful than a simple detector, although that also means it may be more than you need for basic routing.
| Feature | Details |
| Deployment | Cloud API |
| Best use case | Enterprise content analytics |
| Free plan | 30,000 NLU items/month |
| Main benefit | Rich text analysis beyond detection |
| Main drawback | Too heavy for simple language checks |
IBM’s pricing documentation lists a Lite plan with 30,000 NLU items per month, which is useful for proofs of concept or small workloads.
Compared with Amazon Comprehend and Azure AI Language: Watson NLU is another enterprise text analytics tool, though AWS and Azure are usually easier choices for teams already committed to those clouds.
Compared with DetectLanguage.com: Watson NLU is much broader. DetectLanguage.com is cleaner for standalone detection.
We’d choose IBM Watson NLU if language detection is part of a wider enterprise analytics flow, such as analyzing customer feedback, documents, reviews, or knowledge base content.
We’d skip it if the only goal is “detect language, then route text.” A narrower API will usually be easier to set up and cheaper to run.
Best for: comparing multiple providers or adding fallback logic.
Eden AI gives developers a unified API for language detection and access to multiple AI providers through one platform. Its language detection page focuses on easy integration, model comparison, pay-per-use pricing, and switching between providers without managing many separate accounts.
This can be useful when you are still testing which provider works best for your inputs.
| Feature | Details |
| Deployment | Unified cloud API |
| Best use case | Provider comparison and fallback |
| Pricing | Pay-per-use / platform-based |
| Main benefit | Easier multi-provider testing |
| Main drawback | Adds another layer between your app and the model |
Compared with direct cloud APIs: Eden AI is better for testing and fallback. Direct APIs are cleaner when you already know which provider you want.
Compared with LLMAPI: Eden AI fits language detection provider comparison more directly. LLMAPI fits better after detection, when the app needs to route text to LLMs for translation, classification, moderation, summarization, or response generation.
We’d choose Eden AI if the team wants to compare several detection engines quickly or build a fallback flow when one provider returns a low-confidence result.
We’d skip it if the app is extremely latency-sensitive or the team prefers direct vendor contracts and direct API integrations.
Best for: self-hosted translation and detection workflows.
LibreTranslate is a free and open-source machine translation API powered by Argos Translate. Its documentation says it does not rely on proprietary providers such as Google or Azure, and the project can be self-hosted. The API usage guide also includes language detection and auto-detection workflows.
That makes it useful for teams that want an API-style setup while keeping text inside their own infrastructure.
| Feature | Details |
| Deployment | Self-hosted API |
| Best use case | Private translation and detection |
| Pricing | Open source + infrastructure cost |
| Main benefit | No third-party cloud API needed |
| Main drawback | You manage hosting, uptime, and quality |
Compared with Google Cloud Translation: LibreTranslate gives you more control over hosting and data flow. Google gives you a managed service with stronger cloud support.
Compared with fastText and Lingua: LibreTranslate is more API-style and translation-focused. fastText and Lingua are better when you only need local language identification.
We’d choose LibreTranslate if data privacy is a major concern and the app needs both language detection and translation in a self-hosted environment.
We’d skip it if the team wants managed uptime, enterprise support, and no server maintenance.
Best for: fast local language identification at scale.
fastText provides pre-trained language identification models that can recognize 176 languages. The official documentation says the models were trained on Wikipedia, Tatoeba, and SETimes data.
This is a strong option when sending every text input to an external API would be too slow, too expensive, or impossible for privacy reasons.
| Feature | Details |
| Deployment | Local model/library |
| Supported languages | 176 |
| Best use case | High-volume local detection |
| Pricing | Open source + local compute |
| Main benefit | Fast and low-cost at scale |
| Main drawback | Short/noisy inputs need testing |
Compared with Lingua: fastText has wider language coverage. Lingua is more attractive for short snippets and chat-style input.
Compared with cloud APIs: fastText avoids API latency and per-request costs. Cloud APIs are easier to manage if you do not want to handle local models.
We’d choose fastText if the workload involves large datasets, crawled pages, logs, document archives, or high-volume content filtering.
We’d test carefully before using it for one-word messages, slang, typos, emojis, or transliterated text. Local models can be very fast, but messy user input can still be weird. Tiny goblin inputs ruin everything, naturally.
Best for: short text, chat messages, and local detection.
Lingua is a local language detection library available for several ecosystems, including Python, Rust, Go, and JVM-based environments. The Python project describes Lingua as suitable for short text and mixed-language text.
That makes it one of the more interesting choices for apps that process chat messages, search queries, comments, and support snippets.
| Feature | Details |
| Deployment | Local library |
| Best use case | Short text detection |
| Pricing | Open source |
| Main benefit | Strong focus on short inputs |
| Main drawback | Smaller language coverage than fastText |
Compared with fastText: Lingua is the better first test for short text. fastText is better when you need broader language coverage and high-volume processing.
Compared with DetectLanguage.com: Lingua runs locally, which is better for privacy and internal processing. DetectLanguage.com is easier if you prefer a managed API.
We’d choose Lingua if the app needs local language detection for short user inputs and privacy matters.
We’d skip it if the main requirement is maximum language coverage across hundreds of languages.
Best for: writing tools that need grammar checking plus language auto-detection.
LanguageTool is mainly a grammar, spelling, and style checker. Its public HTTP API documentation lets developers send text to the /v2/check endpoint and use language=auto for automatic language handling.
LanguageTool is useful when language detection supports proofreading, spelling, and writing assistance.
| Feature | Details |
| Deployment | HTTP API |
| Best use case | Grammar, spelling, and writing apps |
| Language handling | Auto language option |
| Main benefit | Detection works inside proofreading flow |
| Main drawback | Not designed for bulk language classification |
Compared with dedicated detectors: LanguageTool is weaker for bulk classification, though very practical inside proofreading products.
Compared with cloud NLP platforms: LanguageTool is lighter and more writing-focused. Cloud NLP tools are better for analytics, routing, and data processing.
We’d choose LanguageTool API if the product is a writing assistant, editor, CMS plugin, browser extension, or grammar-checking tool.
We’d skip it if the app needs to classify millions of text records by language.
Language detection APIs look simple from the outside, but they often sit inside larger AI systems. Recent research helps explain why response structure, routing, security, and mixed-language handling matter.
Language detection APIs usually return structured output: language code, confidence score, alternatives, and sometimes script metadata. If that output goes into an LLM workflow, the model still has to read and use it correctly.
In the paper How Good Are LLMs at Processing Tool Outputs?, Kate et al. studied how well LLMs process tool outputs and evaluated 15 open and closed-weight models. Their results show that JSON processing remains difficult even for frontier models, and different response-processing strategies caused performance differences from 3% to 50%.
For language detection workflows, this means developers should avoid vague handoffs like “detect the language, then let the LLM figure out what to do.” A stronger setup uses clear JSON fields, confidence thresholds, fallback rules, and prompt templates that tell the model exactly how to handle low-confidence results.
Language detection often feeds into translation, moderation, summarization, support automation, and other LLM-powered tasks. In SaaS products, those workflows may run inside multi-tenant infrastructure.
In Security Challenges of LLM Integration in Multi-Tenant SaaS: Threats, Vulnerabilities, and Mitigations, Romankiv and Sytnikov identified 18 vulnerability classes and found that 12 of them had stronger impact in multi-tenant deployments than in single-tenant systems. The paper highlights cross-tenant data leakage, RAG poisoning, and shared tool infrastructure as especially important risks.
For developers, this matters because language detection is often connected to user-generated content. Once that content moves into LLM routing or automation, teams need proper API key management, tenant isolation, input filtering, output checks, logging, and monitoring.
Zhu’s 2026 survey, LLM-Based Multi-Agent Orchestration: A Survey of Frameworks, Communication Protocols, and Emerging Patterns, describes how modern AI systems are moving toward coordinated model workflows, communication protocols, and orchestration layers rather than isolated model calls.
That shift matters for language detection. A multilingual AI app may need to detect the language, choose a translation model, summarize the message, classify intent, send it to a CRM, and generate a localized reply. This is no longer one API call. It is a routed workflow.
A separate 2026 paper on multi-agent orchestration architectures and enterprise adoption makes a similar point: enterprise AI systems increasingly need planning, policy enforcement, state management, quality operations, and observability inside an orchestration layer. For production AI teams, this makes routing, monitoring, governance, and fallback logic more important than simply calling one model endpoint.
Code-mixed text is common in multilingual online communication. The COMI-LINGUA dataset paper introduced 100,970 expert-annotated Hindi-English code-mixed instances across tasks such as language identification, matrix language identification, POS tagging, named entity recognition, and translation.
Another study, L3Cube-HingCorpus and HingBERT, describes code-switching as more prominent on social media platforms and presents a large real Hindi-English code-mixed corpus with 52.93M sentences and 1.04B tokens. That scale shows why language detection systems should be tested beyond clean, single-language paragraphs.
This supports a practical point: teams should test language detection APIs with the kind of language their users actually write. Clean English, Spanish, or French paragraphs are easy. A message that mixes scripts, languages, slang, names, emojis, and transliteration is much harder.
Language detection is usually the first step. The real work often starts right after that.
A support platform may detect that a message is written in Spanish, translate it into English, summarize the issue, classify the ticket as urgent, and generate a Spanish reply for the customer. A content platform may detect the language first, then send the text to moderation, topic classification, SEO analysis, or localization.
That is why we would not choose a language detection API in isolation. The right tool depends on the next step.
If your app only needs to identify a language, a dedicated tool like DetectLanguage.com, fastText, or Lingua may be enough. If your app also needs translation, moderation, summarization, or LLM-based routing, a gateway like LLMAPI can make the rest of the workflow easier to manage.
LLMAPI is useful when language detection feeds into a bigger AI system.
For example, your app might use a dedicated language detector first. Then, based on the detected language, it can send the text to an LLM for translation, summarization, sentiment analysis, intent classification, moderation, or response generation.
Instead of connecting separately to every model provider, teams can use LLMAPI as a unified gateway for those downstream AI tasks. LLMAPI lets developers replace multiple API keys with one integration, route requests across 200+ models, track usage and spend, compare provider performance, and monitor reliability from one dashboard.
This is especially useful for multilingual apps because the “right” model may change depending on the task. A cheap, fast model may be enough for simple classification. A stronger model may be better for customer-facing replies, legal text, or nuanced translation review. With routing in place, teams can make those decisions without rebuilding the whole integration every time.
Research on multi-provider LLM workflows points in the same direction. The paper Prompto: An Open Source Library for Querying Large Language Models notes that LLMs often live behind different proprietary or self-hosted API endpoints, and interacting with several endpoints can require custom code that slows down comparison and experimentation. That is the exact kind of engineering mess a unified gateway is meant to reduce.
This is the classic use case. The app detects the source language, sends the text to a translation service, and returns the translated output.
This works well for support platforms, marketplaces, learning apps, travel apps, and international documentation portals.
Support teams can use language detection to route tickets to the right regional team or queue. Confidence scores matter here. If the score is low, the ticket can go to manual review instead of being routed incorrectly.
Moderation tools need to know the language before they apply rules. Profanity filters, toxicity models, and compliance rules may all vary by country, region, or language.
Search engines, knowledge bases, and content platforms can use language codes to index content properly and serve better localized results.
Data teams often use language detection before training NLP models or preparing multilingual datasets. It helps split corpora by language and remove irrelevant records.
Language detection can also decide which prompt, model, or provider gets used next. For example, a multilingual chatbot may detect the user’s language, select the right system prompt, call an LLM through LLMAPI, and return a localized response.
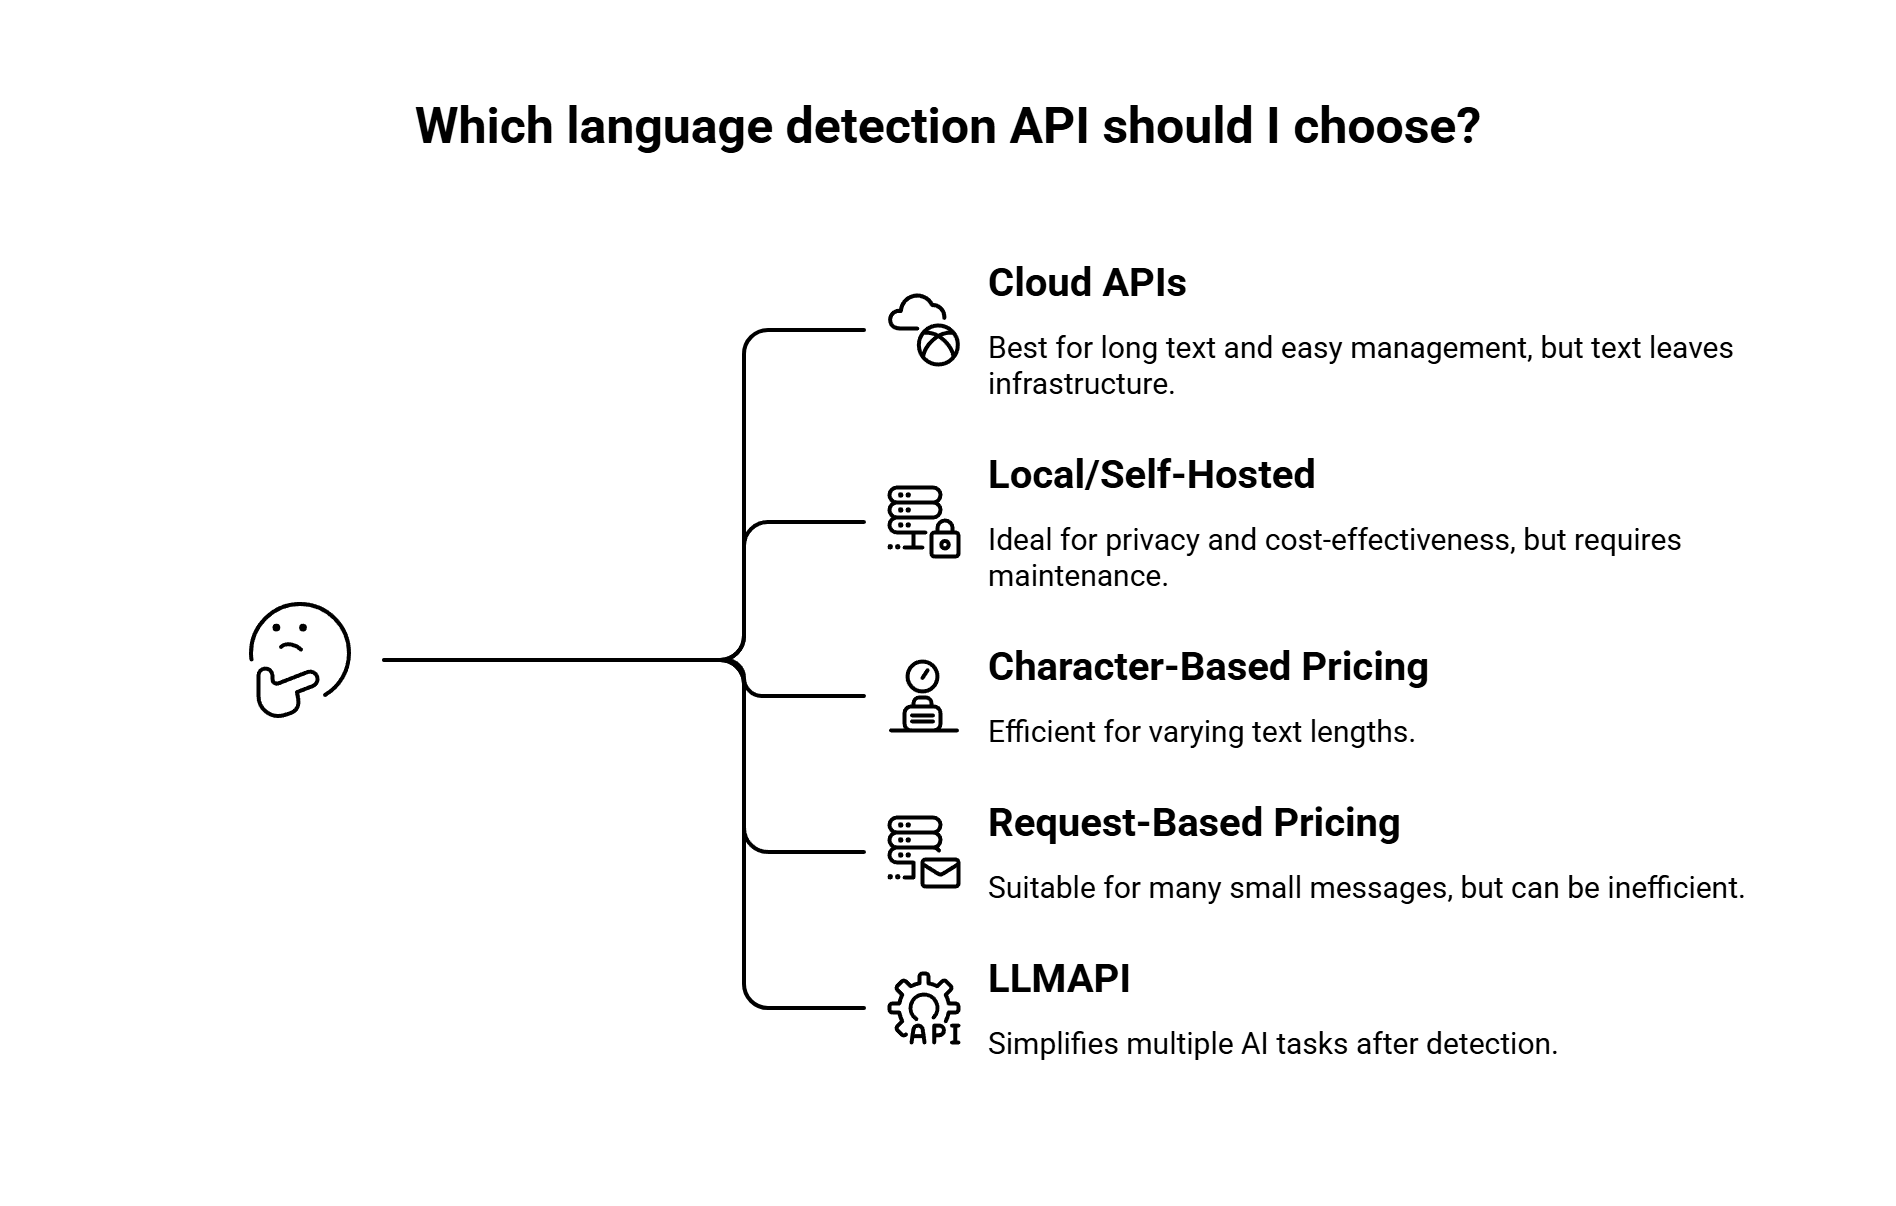
Start with your actual input.
If your app processes long text, such as support emails, documents, reviews, or articles, cloud APIs like Google Cloud Translation, Amazon Comprehend, and Azure AI Language are strong candidates. They have enough context to make better predictions.
If your app processes short text, such as chat messages, search queries, or one-word inputs, test Lingua, DetectLanguage.com, and fastText with your own examples before choosing.
Then check your privacy needs.
If text can leave your infrastructure, cloud APIs are easier to manage. If text must stay private, use local or self-hosted options like fastText, Lingua, or LibreTranslate.
Next, look at the pricing model.
Character-based pricing works well when text length varies. Request-based or record-based pricing may become inefficient when your app sends many tiny messages. Local libraries remove per-request API costs, though you still pay through infrastructure and maintenance.
Finally, think about the next step.
If detection leads straight to translation, Google Cloud Translation may be enough. If detection feeds into several AI tasks, such as translation, classification, moderation, and response generation, LLMAPI can help simplify the model layer after detection.
Before choosing a provider, run your own test set. Clean demo text is easy. Real user text is where language detection gets interesting.
| Test type | Example | Why it matters |
| Long text | 300-word article excerpt | Most APIs perform better with context |
| Short text | “дякую”, “merci”, “hola” | Short inputs are harder to classify |
| Mixed-language text | “Hola, I need help with my order” | Many APIs return the dominant language |
| Transliteration | “privit”, “spasibo” | Some tools struggle with phonetic text |
| Noisy text | “hellooo 😭 merciii” | UGC often includes typos and emojis |
| Similar languages | Croatian vs Serbian, Malay vs Indonesian | Closely related languages can confuse models |
| Support text | “My order arrived broken, necesito ayuda” | Real messages often mix languages and intent |
We’d also track these fields during testing:
| Metric | What to check |
| Correct language | Did the API return the expected language? |
| Confidence score | Was the score high enough to trust? |
| Alternative languages | Did the API return useful second choices? |
| Latency | Is it fast enough for live workflows? |
| Cost per 1M characters or requests | Does pricing still make sense at scale? |
| Failure behavior | What happens when the text is too short or unknown? |
For mixed-language apps, we would also add a token-level test. A full-text detector may return the dominant language, while a token-level language identifier can mark each word separately. That difference matters for social posts, chats, and multilingual support messages.
There is no single best option for every app. Google Cloud Translation is strong when detection leads into translation. Amazon Comprehend is a good fit for AWS pipelines. Azure AI Language works well for Microsoft-heavy teams. DetectLanguage.com is one of the simpler standalone APIs. For local processing, fastText and Lingua are usually the first tools we’d test.
Lingua is one of the strongest candidates for short text because it is designed for short and mixed-language inputs. DetectLanguage.com is also worth testing for short phrases and single words, since it positions itself around short text support.
Many APIs return the main or dominant language for the full input. For mixed-language content, developers often split the text into sentences or smaller chunks and detect the language of each segment.
If the app needs word-level detection, use or test tools designed for token-level language identification. Research on code-mixed text shows that mixed-language posts can switch languages at sentence, word, or sub-word level, so dominant-language detection may be too broad for some use cases.
Yes. fastText, Lingua, and LibreTranslate are open-source options. Managed APIs also have free tiers or credits. Google Cloud Translation lists a monthly free character credit, Amazon Comprehend offers a 12-month free tier, and DetectLanguage.com has a free plan with 1,000 requests/day.
Local and self-hosted tools are the safest starting point for privacy-sensitive workflows. fastText and Lingua run locally, while LibreTranslate can be self-hosted as an API.
LLMAPI is better understood as a unified gateway for AI models rather than a dedicated language detection API. It fits after the detection step, when your app needs to translate, summarize, classify, moderate, or generate content using different models through one integration.
Our main takeaway is simple: choose a language detection API based on the text you actually process.
If your app mostly handles long text and translation workflows, Google Cloud Translation is a strong fit. If your team already runs on AWS or Azure, Amazon Comprehend or Azure AI Language will usually be easier to plug into your stack. If you need a simple standalone detector, DetectLanguage.com keeps things lighter. If privacy or local processing matters most, fastText, Lingua, or LibreTranslate are worth testing.
The bigger point: language detection rarely stands alone. Once your app knows the language, it often needs to do something with that text — translate it, moderate it, summarize it, classify it, or generate a localized reply.
That is where LLMAPI can help with the next layer. Instead of managing separate integrations for every AI provider, teams can use one gateway to access 200+ models, manage API keys centrally, route requests, and keep better control over usage and cost.
Before you commit to any tool, test it with your real inputs. Clean demo text is easy. Short, messy, multilingual user content is where the right API actually proves itself.
Resumes come in every format: clean PDFs, DOCX files, two-column designs, scanned pages, plain emails, and even blurry CV photos. Older ATS keyword scrapers often struggled with that, especially when candidates used creative layouts or unusual formatting.
Modern resume parsing tools use OCR, NLP, and AI to turn messy files into structured candidate data, such as names, skills, work history, education, and certifications. That saves recruiters from manual entry and helps HR systems keep cleaner records.
For developers and recruiting teams, the right parser can make candidate data easier to search, filter, and compare. The wrong one can leave your ATS full of broken fields, missing dates, and messy text.
Below, we’ll cover how resume parsing OCR works, what to check before choosing a tool, and which platforms are worth comparing in 2026.
Companies use resume parsing OCR because hiring teams need clean candidate data fast. Legacy keyword matching can read simple text, but it often breaks when resumes come as scans, images, complex PDFs, or creative layouts. OCR adds the first layer: it turns visual text into machine-readable text. Then parsing models pull that text into structured fields.
A strong resume parsing API can take a PDF, scan, DOCX file, or image-based resume and turn it into a searchable candidate profile. Instead of a recruiter copying details by hand, the system extracts fields like:
This helps teams move faster, but it also reduces messy data entry. Manual input can create typos, missing dates, wrong job titles, or inconsistent skill tags. Automated parsing gives the ATS a cleaner starting point.
Some resumes do not contain normal selectable text. A candidate may upload a scanned PDF, a JPG, a photo of a printed CV, or a flattened design file. Older systems may read those files poorly or fail completely.
OCR helps your system “see” text inside these files. That means qualified candidates are less likely to disappear just because their resume format is awkward. This matters most for high-volume hiring, staffing firms, job boards, and global recruiting platforms where resumes arrive from many channels.
Resume OCR and parsing can also help teams standardize candidate data before review. Once the parser extracts raw information into JSON or another structured format, the system can show recruiters only the fields that matter for the role.
For example, a blind-screening workflow may hide:
That lets teams focus more on skills, experience, licenses, education, and role fit. The parser does not solve hiring bias by itself, of course. But it gives HR teams cleaner data to build fairer review workflows.
To choose the right tool, you need to know what “resume parsing” really means. A parser is not just reading words from a file. It usually works in two stages: first, it turns visual text into real text; then, it sorts that text into useful candidate fields.
When a candidate uploads a scanned PDF, JPG, PNG, or photo of a printed resume, the file may not contain selectable text. It is just an image made of pixels.
The OCR layer reads that image and converts the visible letters into machine-readable text. A basic OCR tool may only pull words from the page. A stronger resume OCR tool also reads the layout. That matters because resumes often use:
Layout-aware OCR helps the parser understand where each piece of text belongs. For example, it can tell that a date range belongs near one job entry, not the education section on the other side of the page. Without this layout logic, even accurate text extraction can still turn into scrambled candidate data.
After OCR extracts the text, the parser has to understand it. This is where NLP and AI models come in.
The AI layer reads the resume for context and turns messy text into structured fields. It can recognize that:
Then it maps that information into a clean format, often JSON, so your ATS or HR platform can use it.
A good parser does more than extract words. It connects related details. It should know which dates belong to which job, which skills came from which role, and which certifications are separate from education. That is the difference between a resume that looks readable and a candidate profile that your recruiting system can actually search, filter, and compare.
When you compare resume parsing tools, do not stop at the vendor’s best demo file. Every parser looks good when the resume is clean, simple, and neatly formatted. The real test is how it handles messy files, global candidates, and your ATS data structure.
Resumes often come in formats that are annoying to parse. Some are scanned PDFs. Some use two columns. Some have sidebars, icons, tables, text boxes, or graphic-heavy layouts. A weak parser may read all the text but place it in the wrong order.
Ask the vendor how their tool handles:
Also ask for accuracy numbers on these specific file types, not just “overall accuracy.” A parser that works well on simple DOCX resumes may still struggle with scanned or highly designed resumes.
If your hiring pipeline includes global candidates, language support matters. The OCR layer needs to read different alphabets, accents, and symbols correctly. The parser also needs to understand local resume patterns.
For example, a good tool should handle:
This matters because parsing errors can create bad candidate records. A wrong date format may make work history look incorrect. A broken character in a name can make duplicate matching harder. Tiny details, very annoying consequences.
A resume parser usually returns structured data, often as JSON. That data may include fields like name, email, phone, skills, work history, education, certifications, and links.
But every HR system stores candidate data a bit differently. Your ATS may use one field for “current title,” while your internal database may separate “latest role,” “seniority,” “department,” and “industry.”
Ask whether the API lets developers customize:
A rigid schema can work for a simple ATS integration. But if your HR platform has custom fields or complex matching logic, flexibility matters a lot.
Basic parsing extracts what the resume says. Stronger tools also clean and standardize the data.
For example, one candidate may write “ReactJS,” another may write “React.js,” and another may write “React.” A good parser can map those into one standard skill tag. The same idea applies to job titles, degrees, industries, certifications, and locations.
Look for enrichment features such as:
This helps recruiters search and compare candidates more fairly. Without enrichment, your database may treat “JavaScript,” “JS,” and “Javascript” as three different skills. And yes, that gets messy fast.
Based on parsing depth, developer documentation, market adoption, and HR-tech fit, these are five resume parsing OCR tools worth comparing in 2026.
RChilli is a strong enterprise resume parsing API built for ATS platforms, HR tech products, job boards, and large recruiting teams. It focuses on structured resume parsing, job parsing, taxonomy, matching, and data enrichment. RChilli lists resume parsing support for 40+ languages, 200+ resume data fields, OCR support, auto-column detection, and parsing across common document formats.
Key features:
Pricing: RChilli uses custom pricing for many plans. Third-party software directories list a starting price around $75/month, but enterprise pricing depends on volume, hosting, and feature needs.
Best for: Mid-size and enterprise HR platforms that need a reliable resume parsing API with multilingual support, OCR, and strong data standardization.
| Pros | Cons |
| Strong parsing depth across many resume fields | Setup and field mapping may feel heavy for small teams |
| Good support for scanned and complex resumes | Pricing may require a custom quote |
| Useful taxonomy for cleaner skill data | Less ideal if you need a very custom schema from day one |
| Works well for ATS and HR-tech integrations | Enterprise features may be more than a small team needs |
| Supports cloud and on-premise deployment | Requires developer time for proper integration |
Textkernel is a well-known option for global recruiting teams, staffing firms, and HR software vendors. It focuses on resume parsing, job parsing, semantic search, matching, and skills intelligence. Textkernel says its parser extracts, classifies, and enriches resume and job posting data, while its Sovren integration page notes parsing support for resumes in 29 languages and job postings in 9 languages.
Key features:
Pricing: Textkernel is mostly enterprise-focused. Some software directories list Parser pricing from around $99/month, but teams should request current pricing because costs can vary by volume, module, and contract type.
Best for: Global staffing agencies, enterprise HR teams, and platforms that need multilingual parsing plus semantic matching.
| Pros | Cons |
| Strong multilingual parsing and matching | Pricing is not always fully public |
| Good for international recruiting teams | Admin tools may feel complex at first |
| Useful skills and profession taxonomies | More platform-like than a tiny plug-and-play API |
| Strong fit for staffing and enterprise HR | Smaller teams may not need all features |
| Can enrich resume and job data | Setup may take planning across HR and dev teams |
Affinda is a developer-friendly resume parsing option with clean API documentation, document AI tools, confidence scores, and human review workflows. Its docs say it provides confidence scores for extracted data, which helps teams decide which fields are safe to auto-approve and which need review.
Key features:
Pricing: Affinda provides recruitment AI pricing through custom or flexible plans. Its pricing page says plans are built for recruitment software companies and job boards, with volume-based savings. Exact pricing should be confirmed with Affinda.
Best for: Startups, HR tech product teams, and developers who want a modern API with confidence scores and review-friendly workflows.
| Pros | Cons |
| Clean developer experience | Pricing may require a quote |
| Confidence scores help catch weak extractions | May need dev work for custom workflow design |
| Good fit for human-in-the-loop validation | Newer enterprise footprint than older vendors |
| Useful for job boards and HR software | Advanced setup can take planning |
| Flexible document AI features beyond resumes | Costs depend on volume and use case |
Skima AI is more than a standalone parser. It combines resume parsing with AI search, candidate matching, outreach, analytics, and recruiter workflow tools. Skima’s resume parser page highlights SOC 2 compliance, GDPR alignment, encryption, and secure storage, while its pricing page lists features such as AI search, resume parsing, AI matching scores, campaigns, segmentation, and analytics.
Key features:
Pricing: Skima uses SaaS-style pricing. Its pricing page lists platform plans and recruiting workflow features, but exact per-user or plan pricing may vary by package and contract.
Best for: Recruiting agencies and talent teams that want a full recruiter platform rather than only a parsing API.
| Pros | Cons |
| Combines parsing, search, matching, and outreach | Not the best fit if you only need a raw API |
| Recruiter-friendly interface | Per-user pricing can rise with team size |
| AI match scores help explain candidate fit | Less flexible than building your own parsing layer |
| Good security and compliance messaging | Platform may replace tools you already use |
| Useful for agencies and sourcing-heavy teams | API-only buyers may prefer Affinda or RChilli |
SuperParser is built as a cost-effective resume parsing API for HR tech platforms. It focuses on simple implementation, scalable parsing, and structured extraction. SuperParser says its API is based on years of work in skill taxonomy and resume parsing, while its pricing page lists 50 free credits per month and a Medium plan at $200/month billed annually, with $0.04 per call.
Key features:
Pricing: SuperParser offers 50 free credits each month. Its Medium plan lists 5,000 credits/month at $200/month billed annually, with a rate limit of 5 calls per second and $0.04 per call.
Best for: SMBs, bootstrapped startups, and HR tech teams that need affordable resume parsing at scale without a large enterprise platform.
| Pros | Cons |
| Clear and budget-friendly pricing | Feature set is simpler than larger platforms |
| Good fit for bulk parsing | No advanced visual review UI listed |
| Easy API-first approach | Fewer enterprise workflow tools |
| Free monthly credits for testing | Less known than RChilli or Textkernel |
| Works well for cost-sensitive HR tech products | May need extra tooling for enrichment and review |
Resume parsing looks simple from the outside: upload a CV, get clean candidate data back. In real HR systems, it gets messier. Developers often deal with broken reading order, mixed-up dates, weak schemas, and resumes that refuse to fit neat database fields. Layout-aware parsing has become a big deal because modern tools need to preserve reading order across multi-column resumes, headers, footers, and dense sections.
Two-column resumes can confuse older OCR systems. The parser may read straight across the page, so text from the left column gets mixed with text from the right column.
For example, it may combine:
The result is one ugly sentence that no ATS can use properly. Cute monster, terrible candidate profile.
The fix: Choose a vendor that clearly supports layout-aware OCR or layout-aware AI. This means the tool reads the page structure first, then extracts text in the right order.
Ask vendors whether they can handle:
If you build your own pipeline, use document AI or vision-language models that analyze the page spatially before extraction. A recent layout-aware resume parsing paper describes this exact need: the system combines PDF metadata with OCR content to rebuild a coherent reading order from varied, multi-column resume layouts.
A resume may list a degree date near the top, then work experience below it. A weak parser may connect the wrong date to the wrong section. Suddenly, a candidate’s graduation date becomes their latest job date, or a certification year gets treated like employment history.
That can mess up:
The fix: Avoid parsers that rely only on hardcoded regex rules. Regex can catch obvious date patterns, but it does not always understand where those dates belong.
Look for semantic parsing. Modern resume parsing systems use AI, NLP, and layout context to connect related details, such as date ranges, job titles, employers, and education sections. RChilli, for example, describes resume parsing as an AI framework that extracts, organizes, and enriches resume data with taxonomies, while Affinda says its platform handles structured and unstructured documents, scanned or digital, and learns from validated documents over time.
A good parser should return confidence scores or source references so your team can flag weak extractions before they enter the ATS.
Standard resume parsers usually extract common fields: name, email, phone, skills, education, work history, and certifications. That works for most roles.
But niche hiring can need much more specific data, such as:
A rigid parser may ignore these fields because they do not fit its default schema.
The fix: For standard ATS workflows, an off-the-shelf parser is usually fine. For niche extraction, use a more flexible AI layer that can map resume text into your own custom JSON schema.
A custom extraction prompt can ask the model to return fields like:
This is where a unified AI gateway can help. LLMAPI describes itself as an API gateway for large language models that acts as middleware between apps and different LLM providers. That kind of setup lets your backend route standard parsing tasks to one model and send niche extraction tasks to a heavier reasoning model when needed.
The cleaner approach is often hybrid:
Manual resume review breaks down fast when hiring volume gets high. A solid resume parsing OCR tool can take a lot of the repetitive data entry off your team’s plate, so recruiters can spend more time actually talking to candidates and less time cleaning up raw files.
But sometimes standard parsers still feel too rigid, especially if you need deeper candidate signals or more custom logic. That is where LLM API can fit in nicely. It gives teams one OpenAI-compatible API, multi-provider access, performance monitoring, secure key management, cost-aware analytics, provider and model breakdowns, and reliability tracking in one place. That can make it much easier to build a custom semantic parsing layer on top of OCR text without juggling a pile of separate integrations.
Why use LLM API for custom resume parsing workflows?
If you want to build a hiring workflow that feels more flexible than a standard parser, LLM API is a smart layer to explore. It helps you turn raw OCR output into something more structured, useful, and easier to manage as your platform grows.
OCR extracts raw text from an image or scanned PDF. Resume parsing comes after — it takes that messy text and organizes it into fields like skills, education, job titles, dates, and work history.
They’re much better than old rule-based parsers, especially on modern formats and non-standard layouts. Accuracy still varies by resume design (columns, graphics), language, and how clean the PDF is.
Normalize skills, not just extract them. Map variations like “JS” → JavaScript, “Py” → Python, and align skills to a consistent taxonomy so search and filters work reliably.
It simplifies the “LLM layer.” You extract text (OCR/parser), then send it through LLM API for semantic structuring (skills, roles, dates, bullet summaries) using one endpoint across multiple models.
Hiring workflows can spike hard. With routing and fallbacks, LLM API can shift requests to backup models when a provider is slow or down, which helps keep your parsing pipeline stable.
Computer vision is now a normal part of modern apps. Teams use it for quality checks, identity flows, retail shelves, crop monitoring, OCR, safety tools, and more.
But the provider matters. Some tools are better for basic image labels and text detection. Others fit custom object detection, video analysis, or stricter privacy needs. Pick the wrong one, and you may deal with high costs, slow API calls, or models that do not match your real images.
Google Cloud Vision covers image labeling, face and landmark detection, OCR, and explicit content detection. Amazon Rekognition supports image and video analysis plus custom labels for business-specific objects. Azure Vision supports image analysis, OCR, and face detection inside the Microsoft AI stack.
Below, we’ll break down how to compare providers, what traps to avoid, and which tools deserve a closer look in 2026.
When you compare computer vision providers, do not rely only on polished demos. A model can look great on sample images and still struggle with blurry photos, odd angles, poor lighting, busy backgrounds, or real customer data. Production is where the cute demo either works… or faceplants.
Start with the type of object or visual task you need to detect.
Pre-trained APIs work well for common tasks like OCR, image labels, face detection, landmarks, logos, and general object detection. Google Cloud Vision, for example, supports image labeling, face and landmark detection, OCR, and explicit content detection. Azure AI Vision also covers image analysis, OCR, and face detection.
But pre-trained models can fail when your object is too specific. A general model may know “metal part,” but it may not know “hairline crack on a turbine blade” or “wrong cap placement on this exact bottle type.” For those cases, look for custom model support. AWS Rekognition Custom Labels, Google Vertex AI, Azure Custom Vision, Roboflow, and similar tools can help train models on your own labeled images.
Cloud APIs are easy to start with. You send an image to the provider, get a response, and build from there. That works well for dashboards, back-office review tools, document processing, and apps with stable internet.
But cloud-only vision can break in places with weak networks. Think farms, warehouses, factory floors, delivery routes, drones, or mobile apps in remote areas. In those cases, edge deployment matters. The model runs on the device itself, so the app can still work without a round trip to the cloud.
Look for export formats like TensorFlow Lite, ONNX, CoreML, or mobile SDK support. Google’s LiteRT, built on TensorFlow Lite, is made for on-device ML and edge deployment, with a focus on low latency and privacy.
Latency is the time between sending an image and getting a result. For some apps, a short wait is fine. For others, even half a second can be too slow.
A retail shelf audit app can wait a moment. A factory defect detector on a fast production line cannot. A security camera that flags suspicious movement needs fast results. A drone that reacts to obstacles needs even faster results.
When testing providers, measure latency with your real image size, your real traffic volume, and your real deployment setup. Also check batch speed, cold starts, rate limits, and how the API acts under load. Pretty benchmarks are nice. Real workload tests are better.
Computer vision data can be sensitive. It may include faces, license plates, medical images, security footage, ID documents, or proprietary product designs. That means privacy rules should be part of the provider choice from day one.
Check whether the provider supports compliance needs such as SOC, HIPAA, PCI, FedRAMP, or region-specific data controls. Amazon Rekognition, for example, is assessed under several AWS compliance programs, including SOC, PCI, FedRAMP, and HIPAA.
Also check data retention rules. Ask whether your images are stored, for how long, where they are stored, and whether they can be used to train models. For sensitive workflows, look for private processing options, strict access controls, audit logs, encryption, and zero-data-retention terms where available.
Many computer vision prototypes look great in a demo, then fall apart in production. The usual reasons? Weak data workflows, rigid platforms, and pricing that looks fine for images but gets scary once video enters the chat.
Avoid platforms that trap your team inside one closed workflow. If the provider forces you to use its own storage, labeling tools, and deployment setup, make sure you can still export your raw images, labels, annotations, and model assets.
This matters because your needs may change later. You may want to retrain the model in another tool, move to edge deployment, or compare results with a different provider. If you cannot export your dataset or annotations cleanly, migration turns into a whole tiny nightmare.
Before you commit, check for support for common formats like COCO, Pascal VOC, YOLO, ONNX, TensorFlow Lite, or CoreML. Also ask whether your trained model weights can leave the platform, or whether only the API endpoint is available.
A model is only as strong as the data behind it. Avoid providers that only offer an inference API but give you no way to review mistakes, track weak spots, relabel edge cases, or refresh the dataset over time.
This becomes a big issue once your app sees real-world images. Lighting changes. Camera angles change. New product packaging appears. A warehouse adds new shelf layouts. A defect looks different on a new material. That is data drift, and it can quietly lower model accuracy.
A stronger provider should help you close the loop: collect failed predictions, send uncertain cases for human review, relabel them, and retrain the model. AWS Rekognition, for example, prices image and video analysis separately, while custom workflows may also involve storage, labeling, review, and retraining costs, so the full data loop matters, not just the first API call.
Computer vision pricing can shift fast depending on what you process. Some tools charge per image. Others charge by video minute, GPU hour, or model runtime. That difference matters a lot once you move from occasional image uploads to video streams.
For example, Google Cloud Vision pricing is based on units of 1,000 requests for features such as label detection or OCR. Amazon Rekognition also charges for image analysis and video analysis, with video often priced per minute. AWS notes that content moderation can cost $0.10 per minute for video or $0.001 per image, and even a 60-second video can create many frame-level costs depending on how you process it.
Before launch, calculate costs with your real usage pattern:
This is where many teams get surprised. A few thousand images per month may be cheap. A 30 FPS video workflow across several cameras can become expensive very quickly.
There is no one-size-fits-all computer vision provider. The right pick depends on your data volume, model type, deployment setup, and privacy rules.
If you need to process millions of images for standard tasks, start with the big cloud providers. Google Cloud Vision is a strong fit for OCR, image labels, face detection, landmark detection, logos, and explicit content checks. AWS Rekognition works well for image and video analysis, content moderation, face analysis, and custom label workflows inside AWS.
This route makes sense when you want stable APIs, strong documentation, cloud security, and simple scaling. It is a good fit for apps that need common vision features without a full custom ML team.
If you need to build your own dataset, label images, train a custom object detection model, and deploy it to cloud or edge devices, Roboflow is the cleaner fit. It supports custom training workflows and offers deployment paths for edge devices, private cloud, and Roboflow-hosted inference.
This is useful for niche use cases like manufacturing defects, shelf product detection, crop disease, sports analytics, medical device images, or anything a general model will not understand out of the box.
If you work in government, defense, healthcare, insurance, or another tightly controlled field, look at platforms built for private deployment and broader AI workflows. Clarifai positions itself as a full-stack AI platform for image, video, text, and audio data, with support for flexible model deployment. Its government-focused listings also highlight NLP, computer vision, and MLOps for unstructured data.
This route makes sense when data cannot casually move through public APIs, or when your team needs vision, language, and audio models under one controlled system.
Based on adoption, feature depth, model support, and developer experience in 2026, these are five strong computer vision platforms to compare.
Roboflow is one of the best options for teams that need to create custom computer vision models without piecemeal ML infrastructure. It covers the full workflow: image upload, annotation, dataset versions, model train, tests, and deploy. Roboflow Universe also gives access to a large public library of datasets and pre-trained models, with 750k+ datasets and 175k+ pre-trained models listed on its site.
Key features:
Price: Free public plan with $60/month in credits. Core plan starts at $99/month, or $79/month when billed annually. Enterprise plans use custom quotes.
Best for: Engineering teams and data science teams that need custom object detection for niche use cases, such as defects, crops, shelf products, parts, or field images.
| Pros | Cons |
| Strong end-to-end CV workflow | Mostly focused on vision, not full multimodal AI |
| Good annotation and dataset tools | Private projects need a paid plan |
| Many deploy options: cloud, edge, and on-prem | Costs can rise with larger private datasets |
| Large public dataset and model library | Still needs some ML knowledge |
| Useful for custom object detection projects | Enterprise features require custom sales plans |
Google Cloud Vision AI is a strong pre-trained API for common image tasks. It can detect labels, faces, landmarks, logos, text, and explicit content. It works well when your team needs fast access to ready-made vision features without a custom model from day one.
Key features:
Price: Pay-as-you-go based on feature use and request volume. Google Cloud Vision prices common features by units of 1,000 requests, with separate rates for tasks like label detection, OCR, and object localization.
Best for: E-commerce apps, document apps, content moderation systems, media tools, and teams already active in Google Cloud.
| Pros | Cons |
| Strong pre-trained models for common tasks | Google Cloud setup can feel heavy |
| Good OCR and image label tools | IAM and project setup may take time |
| Scales well for high-volume apps | Custom workflows may cost more |
| Useful content moderation features | Less ideal for very niche object detection |
| Fits neatly inside GCP workflows | Vendor lock-in can become a concern |
Amazon Rekognition is built for image and video analysis inside AWS. It is a strong choice for teams that already use S3, Lambda, Kinesis, or other AWS tools. It supports tasks like label detection, face analysis, face comparison, content moderation, PPE detection, and custom labels.
Key features:
Price: Pay-as-you-go (starts around $0.001 per image; custom video pricing).
Best for: Security platforms, media teams, industrial safety apps, surveillance workflows, and AWS-heavy enterprise systems.
| Pros | Cons |
| Strong for video and AWS workflows | AWS Console can feel clunky |
| Good face and safety-related features | Video costs can be hard to forecast |
| Works well with S3, Lambda, and Kinesis | Custom model flow is less friendly than Roboflow |
| Useful for content moderation | Not the simplest pick for small apps |
| Good fit for enterprise security use cases | AWS knowledge helps a lot |
Azure AI Vision is a strong fit for companies that already use Microsoft tools. It supports image tags, OCR, face detection, object detection, captions, dense captions, and spatial analysis. Microsoft also lists web and container options, which can help teams with stricter data control needs.
Key features:
Price: Tiered pay-as-you-go (generous free tier of 5,000 transactions/month).
Best for: Healthcare, finance, enterprise IT teams, Microsoft-stack users, and teams that need OCR, image analysis, or container-based deployment.
| Pros | Cons |
| Good OCR and image analysis tools | Azure portal has a learning curve |
| Free tier for early tests | Setup can feel heavier than API-first tools |
| Strong enterprise and compliance fit | Some advanced features are preview-only |
| Container options support private workflows | Custom model projects may need more setup |
| Works well with Microsoft ecosystem | Less simple for non-Azure teams |
Clarifai is a full-stack AI platform for vision, language, audio, and multimodal models. It is useful for teams that need more than a single CV endpoint. Clarifai supports shared cloud, dedicated cloud, VPC, on-prem, air-gapped, and edge-style deployment options, which makes it a strong choice for stricter enterprise or government workflows.
Key features:
Price: Clarifai offers a Pay As You Go plan with no monthly commitment. Its listed custom detection model rate is $0.005/request, while enterprise plans use custom rates and can include VPC, on-prem, and air-gapped deployment options.
Best for: Government, defense, regulated industries, and teams that want vision, text, audio, and model deployment under one platform.
| Pros | Cons |
| Strong multimodal platform | UI can feel dense because there are many tools |
| Flexible deployment: cloud, VPC, on-prem, edge | Enterprise plans need custom quotes |
| Good fit for strict data control needs | More platform than simple CV apps need |
| Supports custom models and workflows | Takes time to learn the full system |
| Useful for government and regulated sectors | Public dataset ecosystem is not as broad as Roboflow Universe |
Picking a computer vision provider matters, but most real products do not stop at detection. You might use a vision model to spot a damaged part, read a label, or classify an image, then need an LLM to explain what happened, write a report, or trigger the next step in a workflow.
That is where the LLM API fits in nicely. While you keep your dedicated vision tools for the visual part, llmapi.ai gives you one OpenAI-compatible API for the reasoning and text side. It also brings multi-provider access, performance monitoring, secure key management, cost-aware analytics, provider and model breakdowns, and reliability tracking into one place.
Why pair vision tools with the LLM API?
If you want an app that can both see clearly and do something useful with that visual data, the LLM API is a smart layer to add. It helps keep the AI side more flexible without turning your stack into a mess.
Pre-trained APIs (like Google Cloud Vision) recognize common objects out of the box. Custom object detection (Roboflow-style) means you upload and label your own images so the model learns niche things specific to your business (like a particular defect on a machine part).
Latency is the time from image → result. For a normal web app, ~1 second can be fine. For robotics or autonomous systems, latency often needs to be tens of milliseconds. That’s why cloud APIs are risky for real-time control loops.
Vision models extract signals (objects, text, damage types). LLMs turn those signals into something useful (summaries, decisions, user-friendly explanations). LLM API helps by giving you one endpoint to access multiple LLMs for the reasoning layer.
If you depend on one provider, your pipeline can fail. Routing through LLM API lets you use load balancing and fallbacks, so requests can shift to a backup model during outages.
Edge deployment runs the model on the device (phone, drone, factory camera) instead of the cloud. It’s useful when you need low latency, more privacy, or your environment has unreliable internet.
Computer vision is much easier to use now. You do not need a big ML team just to add OCR, face analysis, object detection, or image moderation to your product. With API4AI, you can call ready-made vision APIs over HTTP and plug them straight into your workflow. API4AI offers cloud APIs for OCR, NSFW detection, face analysis, object detection, background removal, and more.
That makes it useful for both startups and bigger product teams. Instead of training models from scratch, you can test and ship visual features much faster with prebuilt endpoints. API4AI also provides docs, API keys, and demo access for some services, which makes the setup easier.
So the appeal is pretty simple: less infrastructure, faster integration, and a practical way to add computer vision to real apps.
In a real product workflow, data moves from one step to the next, and each step adds value. API4AI fits in as the visual-processing part of that flow. Since it uses a cloud-based HTTP REST API with a shared RESTful design across services, you can plug it into pretty much any stack that can make web requests. API4AI also offers ready-made APIs for things like NSFW recognition, image anonymization, background removal, brand recognition, object detection, face analysis, and OCR.
Here is where that gets useful in practice:
API4AI offers a set of focused endpoints, so you can pick the exact visual feature your app needs instead of building everything from scratch. Its API gallery currently highlights services such as OCR, face analysis, image anonymization, NSFW recognition, brand recognition, background removal, image labeling, and object detection.
So the main idea is simple: you get a menu of smaller APIs, each built for a specific job, which usually makes it easier to slot API4AI into real product workflows.
API4AI is easy to plug in, but it has the usual trade-offs you get with any cloud API platform. Its biggest strengths are the simple REST API, broad computer vision API catalog, and a developer portal where you can get keys, set up billing, and monitor usage. At the same time, it is still a cloud-first service, so offline or edge-heavy use cases are not really the point. API4AI’s own site also shows docs, demos, and pay-as-you-go access rather than a deep enterprise analytics layer.
| Pros | Cons |
| Fast setup: standard REST API, quick to test. | Cloud-only fit: not ideal for offline or edge use. |
| Broad API range: OCR, NSFW, face, background removal, brand detection, more. | Lighter docs depth: clear docs, less advanced troubleshooting. |
| Pay-as-you-go: useful for uneven usage. | Basic dashboard: functional, but not analytics-heavy. |
| Easy automation: works well in broader workflows. | Moderation edge cases: NSFW can still misread art or medical images. |
| Good for testing: demos help before full integration. |
So the short version is simple: API4AI is strong when you want fast, cloud-based computer vision without building models yourself. It is less ideal if you need offline deployment, deep enterprise analytics, or very custom moderation review workflows.
A solid AI stack usually needs more than one tool. One part handles images. Another runs the workflow. Another does the reasoning.
If your app needs to detect objects, blur faces, remove backgrounds, recognize brands, or pull text from images, API4AI is the right layer for that job. Its API catalog includes OCR, NSFW detection, face analysis, background removal, brand recognition, and object detection through standard REST endpoints.
If you do not want to build every backend step yourself, V7 Go fits better as the workflow layer. V7 positions it as a tool for automation, project coordination, and integrations, including Slack. So you can connect inputs, route tasks, and automate image-processing steps without stitching every handoff together from scratch.
Once API4AI extracts the raw data, you still need a model layer to make sense of it. That is where LLMAPI fits. LLMAPI describes itself as an OpenAI-compatible gateway that gives you one endpoint for multiple model providers. So you can take OCR output, image tags, or structured JSON from API4AI and send it into one LLM layer for summarizing, classifying, or turning it into a cleaner final output.
So the split is pretty simple:
That setup keeps your stack cleaner and makes each tool do one job well.
Computer vision APIs are useful, but the same few problems show up in production again and again.
Do not run heavy vision calls on the main request path. Accept the upload fast, then process it in the background with a task queue. Celery is built for exactly this kind of asynchronous job processing.
Clean the image before you send it. Common fixes are:
OpenCV’s docs cover thresholding and other preprocessing steps that help a lot with OCR quality.
Retry with exponential backoff instead of failing the whole request flow. Google’s docs recommend exponential backoff with jitter for 429 errors and other transient failures.
So the practical version is simple:
API4AI makes the vision part a lot easier. You can plug in things like OCR, background removal, or image anonymization without building that whole pipeline yourself. That saves time and cuts a lot of annoying setup work.
Then comes the fun part. Once your app can read text from an image or clean up a file, you can send that output into an LLM to summarize it, explain it, classify it, or turn it into a next step in a workflow. That is where the stack starts feeling actually smart, not just automated.
LLM API fits nicely into that second layer. It gives you one OpenAI-compatible API, multi-provider access, and tools for routing, monitoring, and cost tracking, so the reasoning side is easier to manage as your app grows.
Why pair API4AI with LLM API?
If you want to build an app that can both see and think without making your backend messy, LLM API is a smart next step to explore.
API4AI is a cloud computer vision platform with ready-to-use REST APIs for things like OCR, background removal, face detection, and content moderation.
Most cloud vision APIs process images and don’t keep them by default, but the only safe answer is: check API4AI’s current Terms + Data Processing docs (especially if you’re dealing with GDPR/CCPA or anything sensitive).
OCR usually gives you raw text (and sometimes bounding boxes), but not meaning. A clean workflow is:
Kind of. API4AI is built for image requests, so video is usually handled by extracting frames (like 1 fps or 5 fps) and sending those frames. For true low-latency “live” use cases, edge/on-device models are usually a better fit.
Keep it split:
That way you don’t tangle vision logic with your LLM routing and model switching.
User-generated images help platforms grow, but they also create real risk. Social apps, marketplaces, forums, and dating products all need a way to catch explicit sexual content, graphic violence, hate symbols, and other unsafe uploads before they spread. Major platforms now treat image moderation as a standard safety layer, not an extra.
That is why AI moderation matters. User reports are too slow on their own. Modern moderation tools can scan images automatically and flag unsafe content before or after upload. Below, we look at why companies use these systems, how they work, which tools stand out, and what problems teams run into most often.
Human review still matters, but it cannot carry the whole job anymore. At scale, image moderation needs to happen before harmful content spreads, not after someone reports it.
Here is why AI has become a core part of that stack:
Human moderation is reactive. By the time a person reviews a report, the image may already be live, shared, screenshotted, or amplified. AI moderation tools can scan images at upload time and flag or block risky content right away. Google Cloud Vision’s SafeSearch, for example, returns likelihood scores for categories such as adult, violence, and racy content, which makes pre-publish filtering possible.
This part matters a lot. Research and reporting continue to show that repeated exposure to disturbing content can lead to psychological distress, secondary trauma, and PTSD-like symptoms in human moderators. AI helps by filtering obvious cases first, so people can spend more time on edge cases and policy judgment instead of raw volume.
Human teams do not scale overnight when a platform suddenly jumps in usage. Cloud moderation APIs are built for that kind of load. AWS positions Rekognition as a highly scalable image and video analysis service for content moderation, and major cloud vendors treat moderation as production infrastructure rather than a manual workflow add-on.
People get tired, drift in judgment, and interpret borderline content differently across shifts. AI gives you the same model logic on the first upload and the millionth. That does not mean perfect fairness or zero mistakes, but it does mean more consistent first-pass screening across large volumes of content. Google’s SafeSearch and AWS moderation labels both expose structured category outputs that make policy-based automation easier to apply consistently.
The real win is not “AI replaces moderators.” The better model is: AI handles the obvious stuff fast, and humans focus on nuanced, borderline, or escalated cases. That is also how modern moderation APIs are generally used in practice across images and other media.
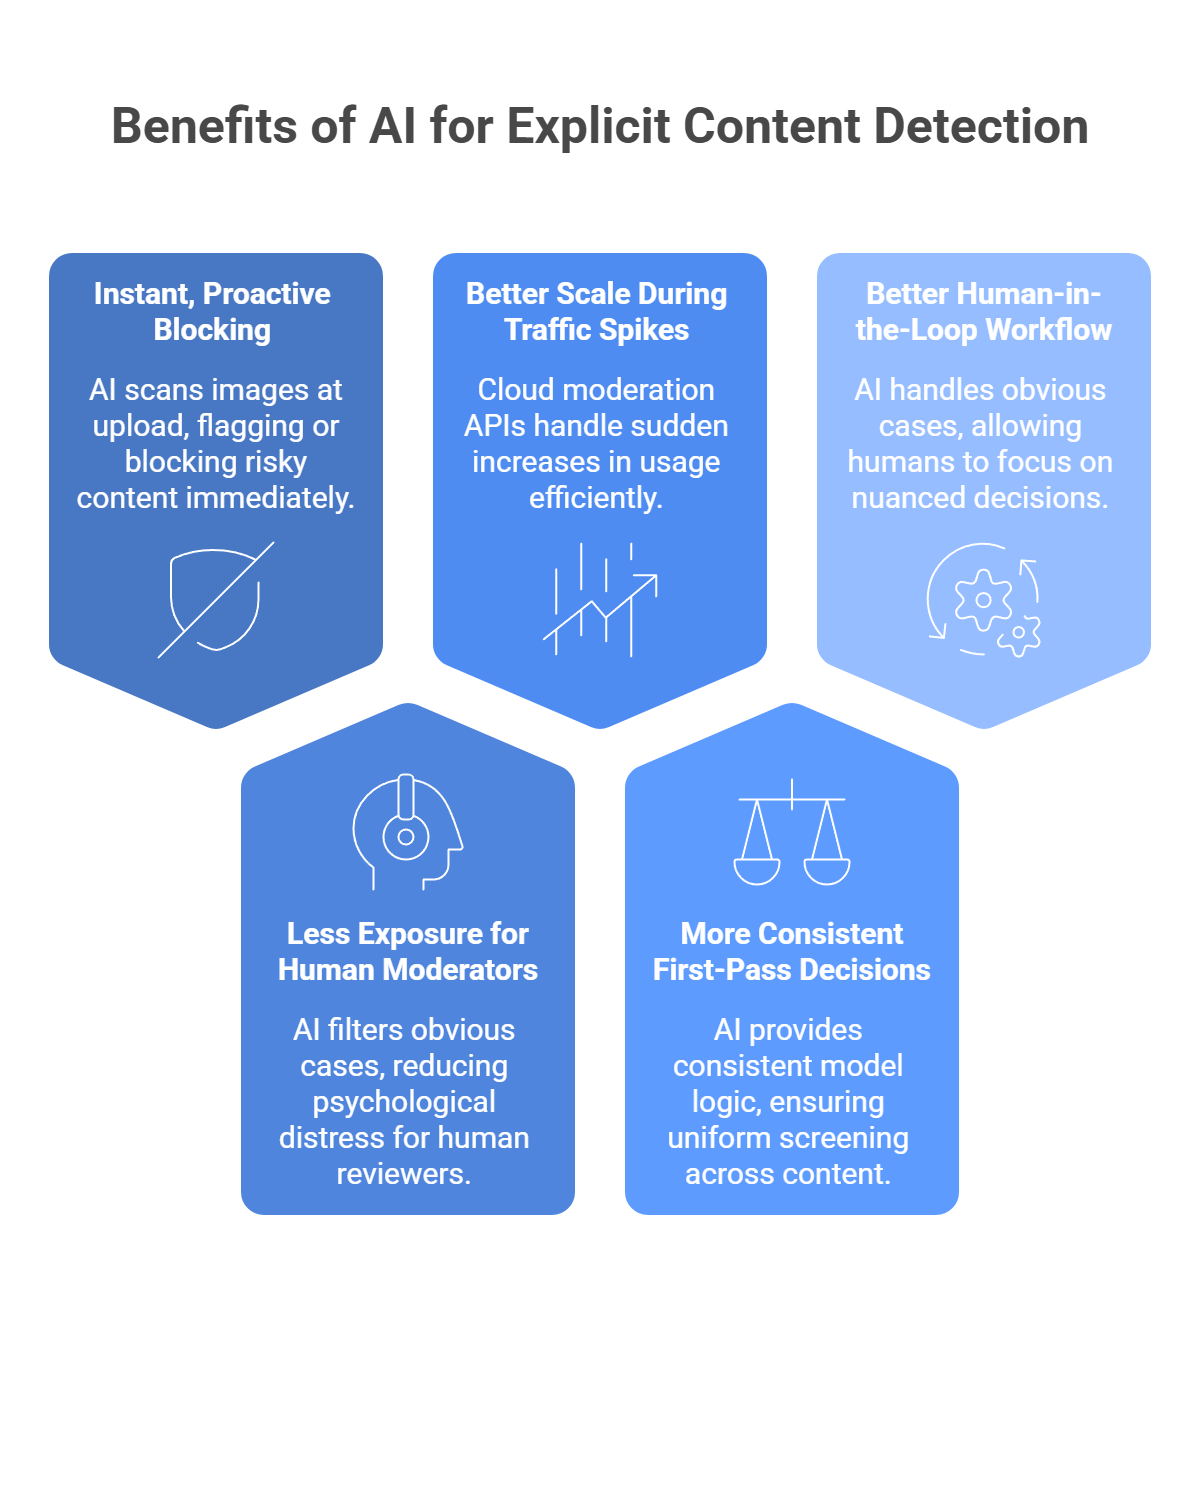
AI image moderation does not “look” at a photo like a person does. It turns the image into numeric data, then checks that data for patterns linked to unsafe content.
When a user uploads an image, the system converts it into arrays of pixel values. The model reads those values and looks for patterns in color, texture, edges, shapes, and layout.
It does not just look for one thing like exposed skin. It checks for a mix of signals, such as:
That matters because one image may be unsafe due to nudity, another due to violence, and another due to hateful imagery.
Context is a big part of moderation. For example:
So the model tries to score categories, not just label an image as “good” or “bad.”
Many moderation stacks add object detection on top of category scoring. That helps the system spot specific items in the image, such as:
In some cases, the model can also mark where those objects appear in the frame.
Most moderation APIs do not make the final decision for you. They return scores or likelihood levels for categories such as:
Your backend then uses those scores to decide what happens next.
A common setup looks like this:
That middle step matters because some images are too borderline for a model to judge well on its own.
The best moderation systems do not rely on AI alone. They use AI for speed, then send edge cases to people.
That works better because:
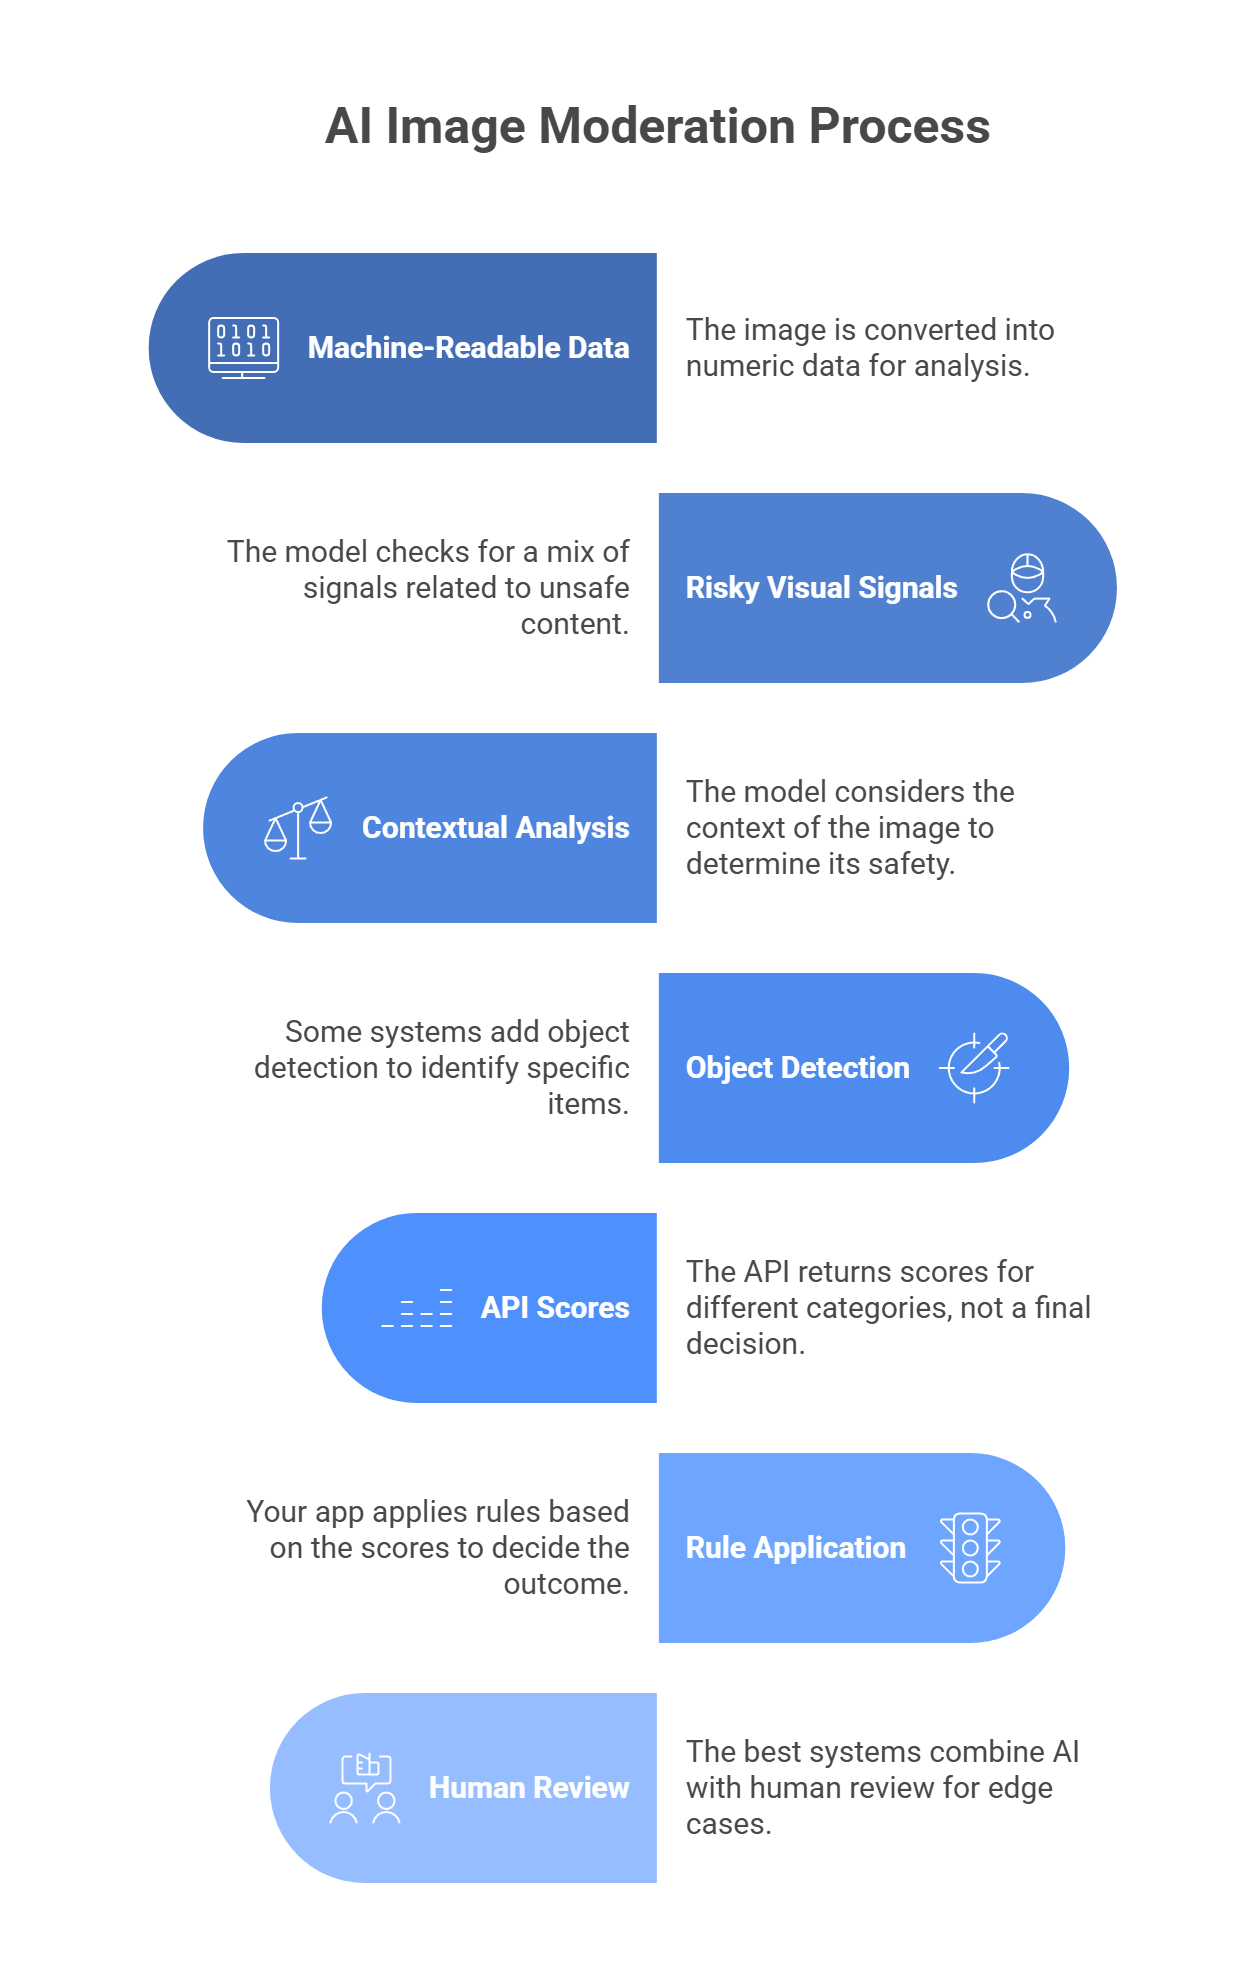
The right moderation tool depends on three things: speed, category depth, and context handling. If your app needs to scan uploads before they go live, latency matters a lot. If your policy has separate rules for nudity, violence, drugs, hate symbols, or scams, you need more than a basic NSFW score. And if text, captions, or post intent matter, you may need a multimodal setup instead of a plain image classifier. Google SafeSearch, for example, gives fast category-level likelihoods for adult, spoof, medical, violence, and racy, while Amazon Rekognition returns a much deeper moderation taxonomy with confidence scores.
A simple way to choose:
Not every moderation tool solves the same problem. Some are better for huge social apps. Some fit companies already deep in one cloud. Some are strongest when context matters as much as the image itself.
Best for: Social media and gaming platforms
Why choose it: Hive is a strong pick when basic NSFW checks are not enough. It is built for platforms that need deeper classification across harmful visual content, manipulated media, and policy-heavy moderation at scale. That makes it a better fit for large UGC products than a simple adult-content filter.
Best for: AWS-heavy enterprise stacks
Why choose it: Rekognition makes the most sense when your product already lives on AWS. It gives you image and video moderation, deep label categories, and easy ties into the rest of your AWS workflow. It is practical, scalable, and easier to justify when S3 and other AWS services are already part of your stack.
Best for: Broad, general-purpose apps
Why choose it: SafeSearch is the clean, simple option. It returns clear likelihood scores for a handful of moderation categories, which makes it easy to plug into web apps, marketplaces, and standard upload flows without much complexity.
Best for: Startups that want speed and focused moderation APIs
Why choose it: Sightengine is useful when moderation is a core product need and you want a tool built around that job. It goes beyond explicit imagery and also covers things like spam, scams, and fraud signals, which is helpful for fast-moving UGC products.
Best for: Context-aware moderation
Why choose it: Sometimes the image looks harmless, but the post is still dangerous once you add the caption or surrounding text. That is where multimodal moderation stands out. A setup through LLMAPI can evaluate the image and text together, which helps with threats, harassment, impersonation, and other cases where raw visual scoring misses the real problem.
Automated moderation works well, but it is never perfect. Most teams run into the same problems: false positives, hidden harmful files, encryption conflicts, and content that is technically sensitive but still allowed.
The fix: Do not rely on a hard safe/unsafe output. Use tools that return category scores or likelihood levels, then build thresholds around them. Google SafeSearch, for example, returns graded likelihoods for adult, racy, violence, medical, and spoof, not one flat answer. That lets you set rules like:
That is much safer than banning every image that triggers a moderate signal.
The fix: Visual AI is not enough on its own. Pair image moderation with hash matching and file-level checks. Microsoft says it uses PhotoDNA and MD5 hash-matching technologies to detect known illegal and harmful image content, including previously identified child sexual exploitation material. That matters because a file can look normal on the surface while still matching known illegal content at the hash level.
The fix: If your app uses E2EE, server-side scanning may conflict with your privacy model. In those cases, one option is on-device moderation before encryption, using lightweight vision models that run locally on the user’s device. I did not find a strong official source in this search that specifically confirms YOLOv8 as a standard moderation choice for this use case, so I would frame that as an implementation option rather than a settled best practice. The main point is that moderation may need to happen on-device if the server is not supposed to see the image contents at all.
The fix: Choose a tool with category depth. Google SafeSearch is useful here because it separates medical from adult and racy, and it also includes a spoof category. That gives you more room to write smarter policy rules instead of treating all nudity or all graphic imagery the same way. For harder edge cases, multimodal review helps because the caption, product category, or page context can explain why the image is allowed.
AI moderation works best when it looks at the full context, not just one file in isolation. An image can be paired with captions, comments, or surrounding text that completely changes how risky the content really is. That is why more teams are moving beyond simple binary image checks and toward moderation flows that can reason across multiple inputs.
If you are building that kind of system, managing separate providers for every text and multimodal task can get messy fast. A unified layer like LLM API gives you one OpenAI-compatible API with access to many models, so you can handle the generative and multimodal side of your safety stack in one place. It also adds routing, cost controls, team keys, and visibility into model performance and errors, which helps when moderation volume starts to grow.
Why use LLM API for moderation workflows?
If you want your moderation pipeline to stay more flexible, scalable, and easier to manage, LLM API is a strong layer to add. It helps you keep the AI side of trust and safety more unified without boxing your platform into one provider.
It scans images for patterns tied to categories like nudity/sexual content, graphic violence, hate symbols, drugs, and self-harm. The output is usually confidence scores per category, not just a simple yes/no.
No. AI is great for catching obvious stuff at upload, but humans are still needed for grey-area posts, appeals, and policy edge cases (context matters a lot).
Basic vision tools mostly judge pixels. With LLM API, you can route images to multimodal models and ask more specific, policy-style questions (for example: “Does this violate our bullying rules?”). That can reduce false positives when context is important.
If you rely on one provider, you either block everything or let risky uploads through. Routing through LLM API lets you set up fallbacks, so moderation can switch to another model when the primary one fails.
Use category-based scoring (for example, “racy” vs “explicit”) instead of a single “unsafe” label. Then your app can allow borderline content in appropriate contexts while still blocking truly explicit images.
Most people have seen this happen. You ask AI to write an email, blog post, or review, and the result sounds polished but flat. The grammar is fine. The structure is fine. But the voice feels stiff, repetitive, and easy to spot.
That is a problem because faster content does not always mean better content. Google’s guidance still focuses on helpful, reliable, people-first writing, not mass-produced copy that adds little value.
This is where AI humanizers come in. These tools rewrite AI-heavy text so it sounds more natural, more varied, and closer to how real people actually speak. The goal is not just to swap a few words. It is to fix rhythm, tone, flow, and phrasing so the result feels less mechanical.
Whether you are a marketer who wants stronger audience connection or a developer building support flows that need warmth and clarity, human-like language matters more now. Here is what AI humanizers do, how they work, and what to watch out for.
An AI humanizer works best as part of a simple workflow. It is not a magic button. You still need a solid draft, the right tone settings, and a quick human review at the end. Google’s guidance also keeps the focus on helpful, reliable, people-first content, which means the goal is not to “hide AI.” The goal is to make the text more useful and natural for real readers.
First, create the base draft with your AI tool, whether that is ChatGPT, Claude, or something else. At this stage, focus on the core pieces:
Do not worry too much yet about flow or personality. The main goal here is to get the content on the page in a usable shape.
Next, paste the draft into your AI humanizer and choose the settings that match the piece.
Usually, that means:
This step matters more than people think. If the settings are off, the output may sound smoother but wrong for the audience.
Now let the tool rewrite the text.
A good humanizer does more than swap words around. It usually helps by:
That is the part that makes the draft easier to read.
This step should never be skipped. Even a strong humanizer can:
So do one clean read-through and check:
Google’s content guidance still points toward unique, helpful, people-first writing, so the final check is where you make sure the piece still says something real and useful.
If you want to keep it practical, use this order every time:
That keeps the process fast without letting the tool do too much on its own.
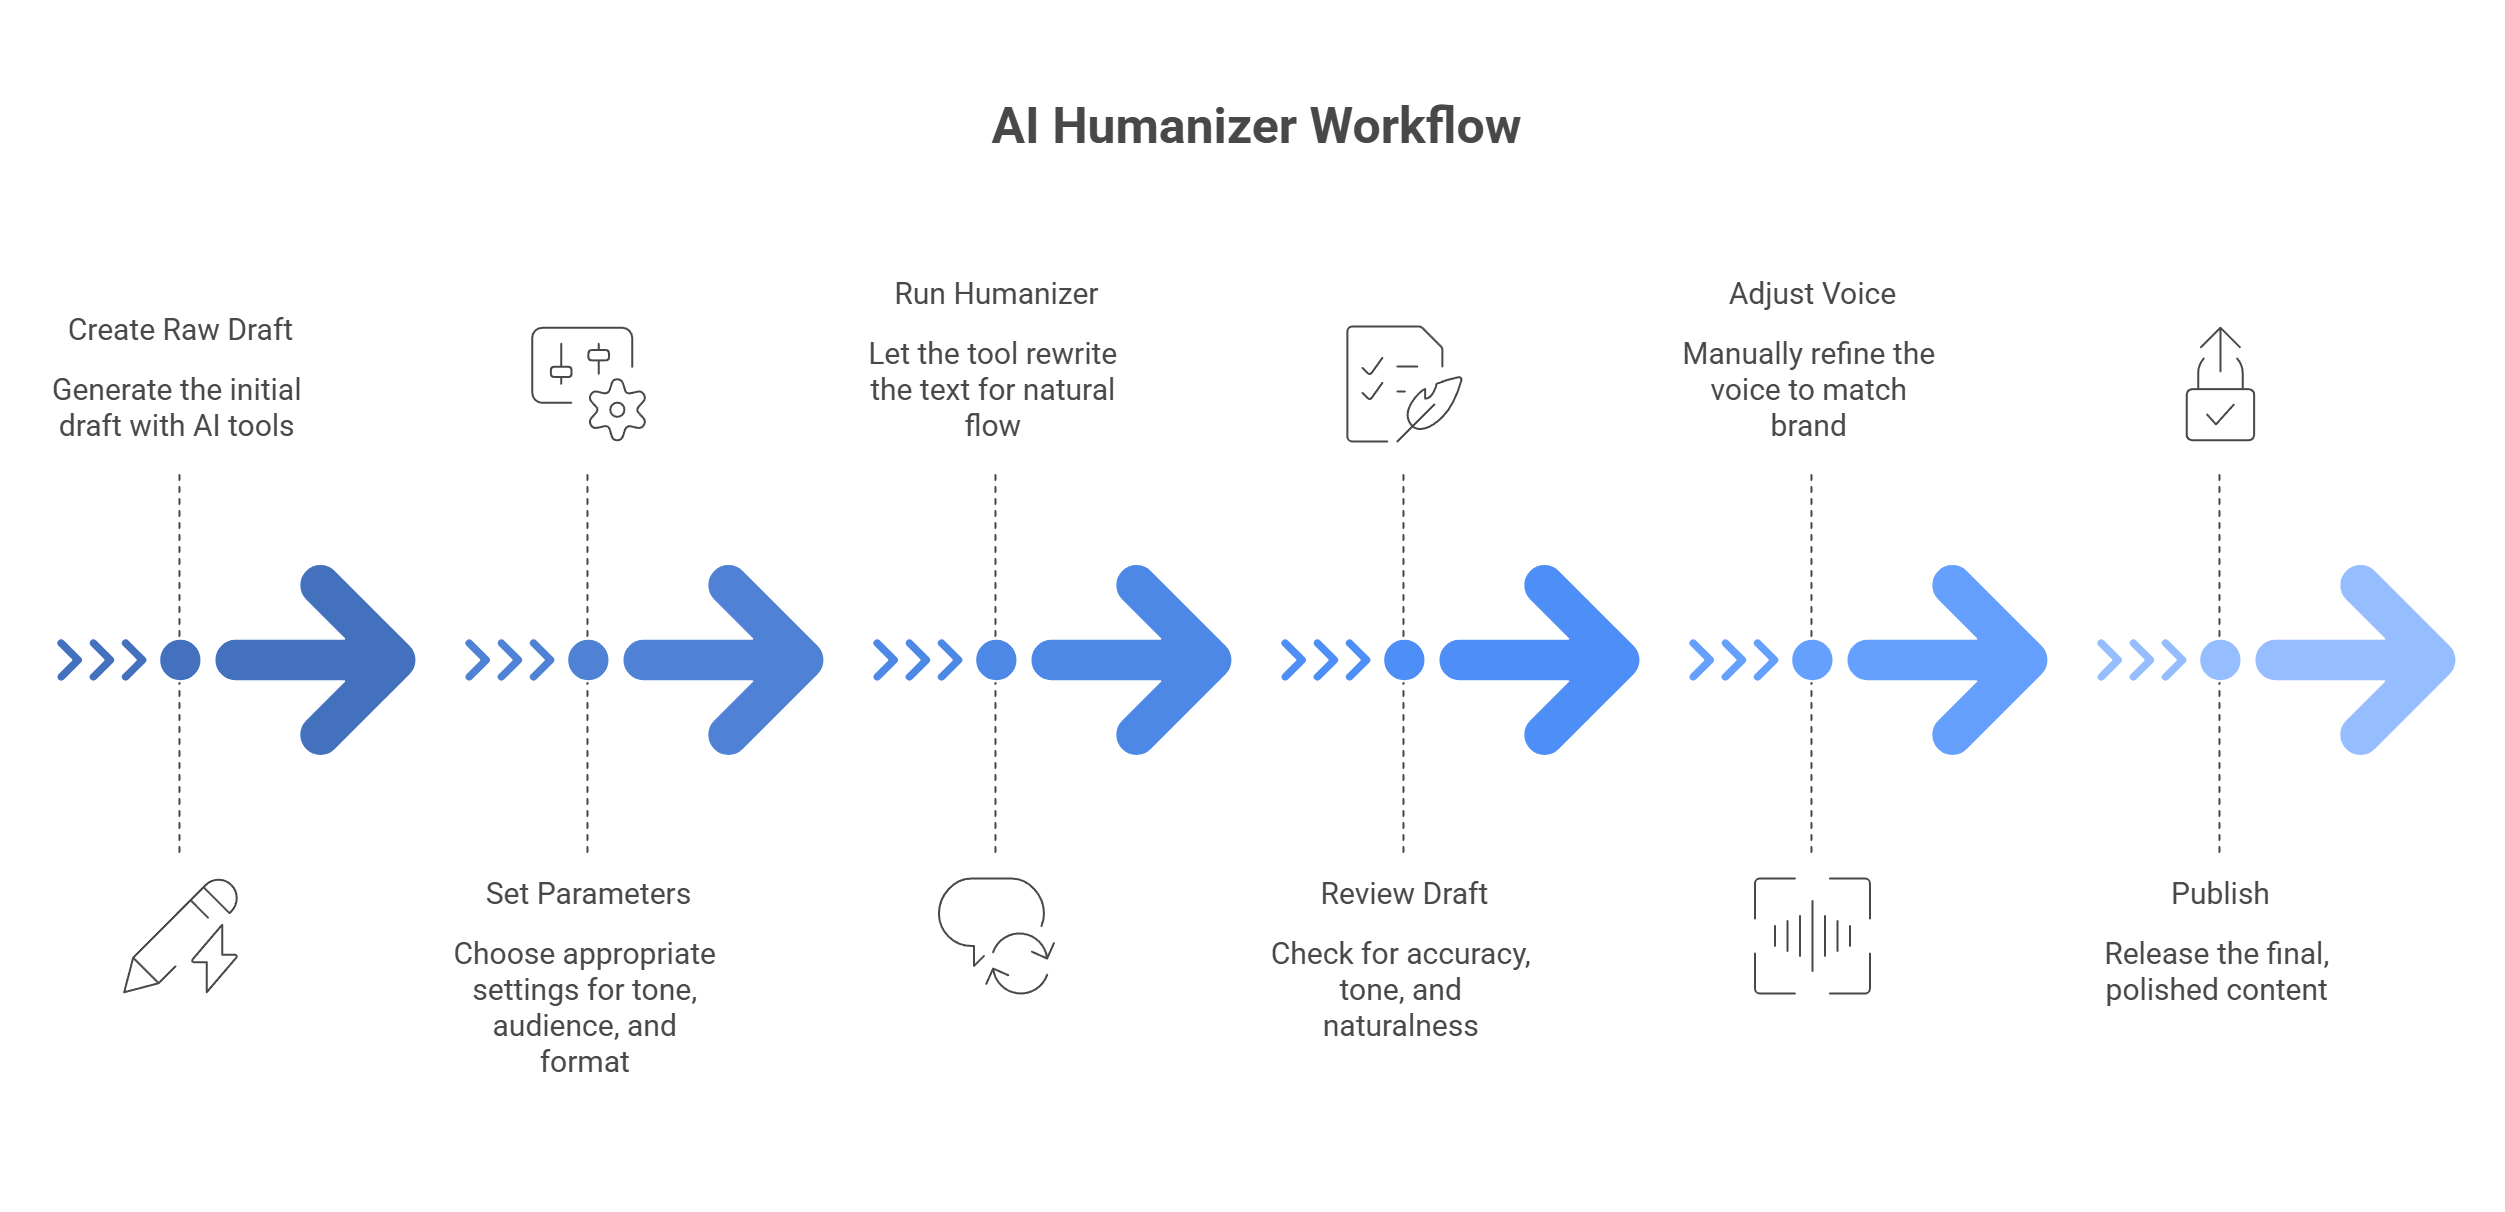
When AI text sounds stiff, you usually have four choices: leave it alone, edit it by hand, run it through a basic paraphraser, or use an AI humanizer. In most cases, the humanizer gives you the best balance of speed, readability, and tone control. That lines up with how major writing tools now position these products: humanizers focus on more natural, engaging language, while Google’s guidance still centers on people-first, useful content rather than text that simply looks polished on the surface.
Raw AI drafts are often clean, but they can still sound flat, repetitive, and too symmetrical. The wording may be correct while the rhythm feels off. That is usually where readers lose interest.
A humanizer helps by:
That matters because content should feel useful and human to the reader, not just technically correct. Google’s public guidance keeps pushing that same idea: focus on content made for people first.
Manual editing can work well, but it takes time. If the draft is packed with awkward AI phrasing, you can spend so long fixing tone, flow, and repetition that writing from scratch starts to feel easier.
A humanizer gives you a faster first pass. It can:
That does not remove the need for review. Even writing tools that promote humanizing and paraphrasing still note that outputs can miss nuance, drift from your intended tone, or need a final check for accuracy.
Older spinners mostly swap words. A sentence changes on the surface, but the structure often stays stiff. The result may look different while still sounding unnatural.
That is the big difference:
Modern paraphrasing tools can absolutely help with clarity, but even they admit that outputs may still sound less natural without light editing. Humanizers are built more directly for that problem.
This is the option people forget to compare. Sometimes the draft is not terrible, so it gets published as-is. That usually saves time in the moment but creates weaker copy.
What often slips through:
A humanizer is useful here because it helps you move from “acceptable” to “actually readable” without a full rewrite.
They tend to be most useful when the draft already has the right facts and structure, but the voice feels off.
Good use cases:
In these cases, the goal is usually not to rewrite the whole idea. It is to make the writing feel smoother, more natural, and easier for real people to stay with.
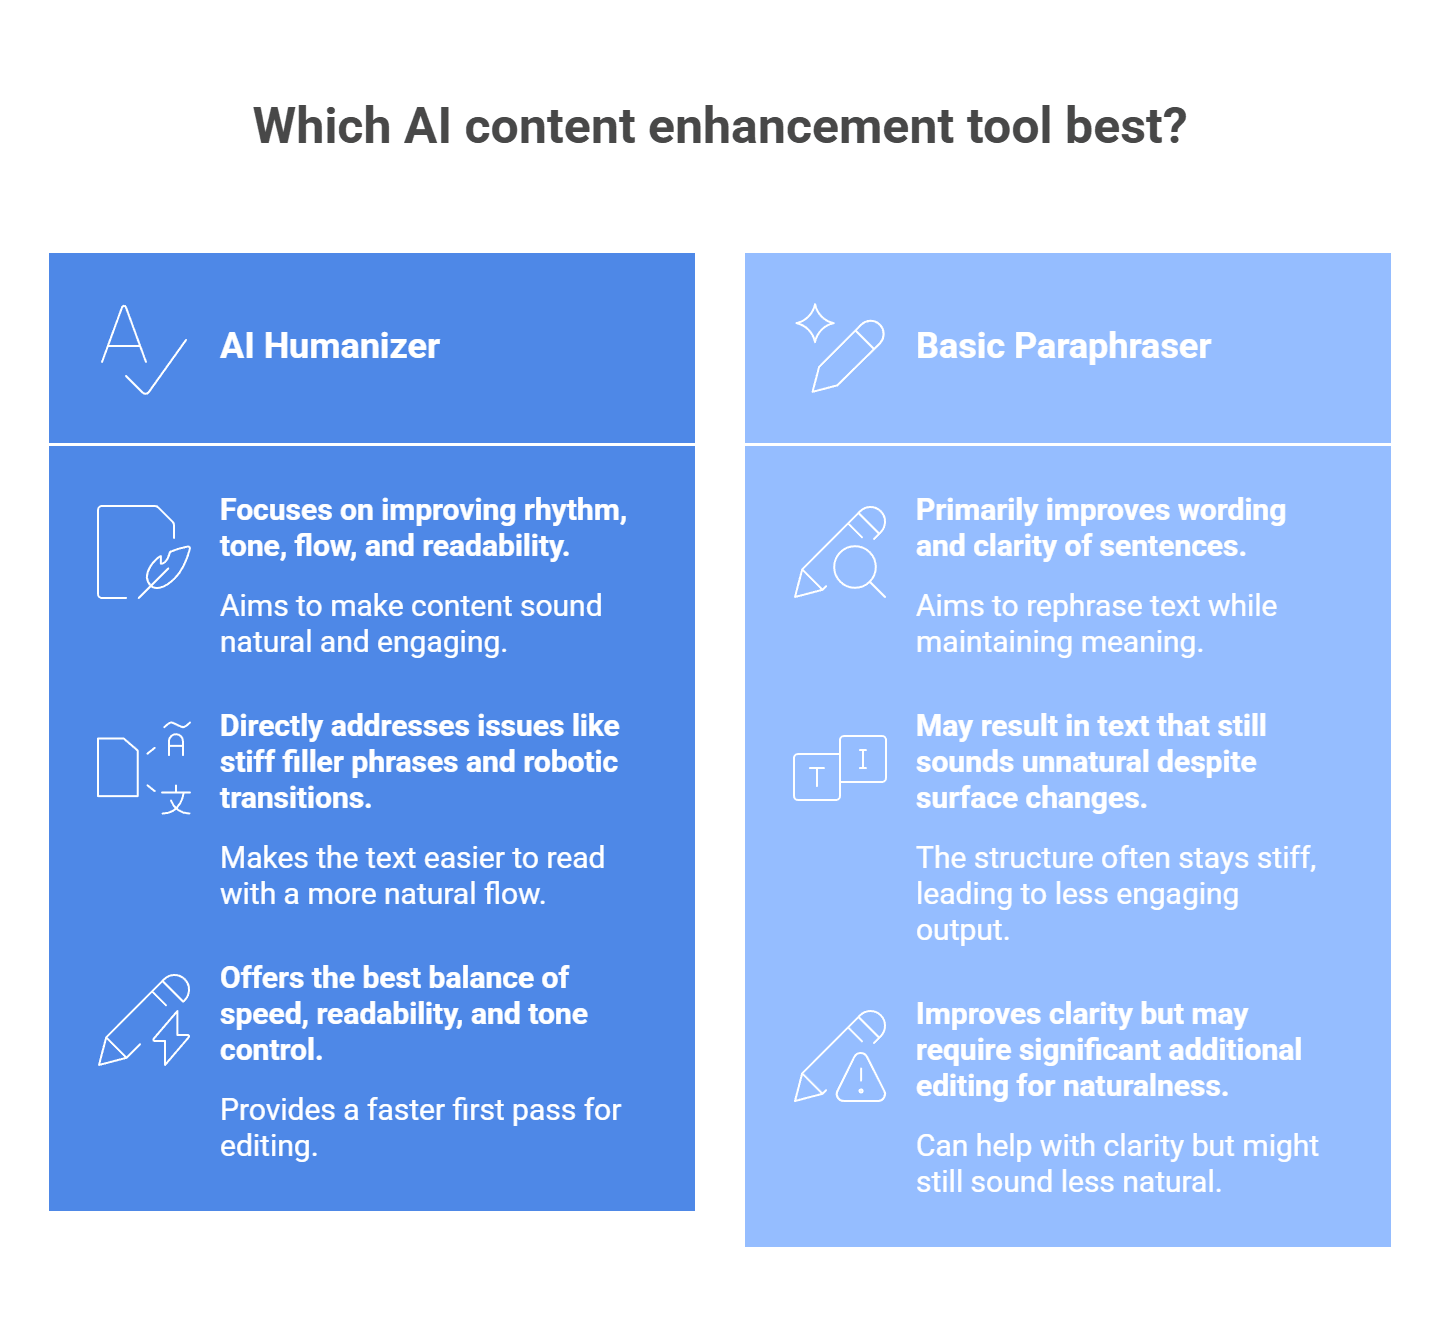
The biggest advantage is not that AI humanizers are magical. It is that they sit in the middle:
That is why they often end up as the most practical option. You still need a human check at the end, but the draft you start from is usually much stronger.
The best AI humanizer depends on what you need most. Some tools are better for polished business writing. Some are built for student-friendly rewrites. Some focus on quick cleanup with no signup. Before you pick one, check these things first:
One more thing: do not choose a tool only because it claims to “beat detectors.” That is weak buying logic. A better test is whether the output sounds natural, keeps the meaning, and still fits your use case and rules. Grammarly, for example, frames its humanizer around clearer, more natural writing, while Scribbr focuses on removing AI-like patterns without changing the message too much.
Grammarly is the safest pick if your main goal is professional polish. Its humanizer is built to make AI-assisted writing sound more natural, sincere, and engaging without changing what you mean. That makes it a strong choice for emails, blog drafts, proposals, and other work where clarity matters more than heavy rewriting.
Why choose it: Pick Grammarly if you want cleaner, more readable writing and already like Grammarly’s broader writing tools.
Walter Writes is more aggressive. It pitches itself as a tool that rewrites AI text into more natural language and openly markets itself around AI detection concerns. It also supports uploaded documents and different use cases, including student and academic pages. That makes it a stronger fit for users who want deeper text changes, not just light cleanup.
Why choose it: Choose Walter Writes if your text needs a heavier rewrite and you want the output to feel less obviously AI-shaped.
Scribbr’s tool is more focused on natural phrasing with a clean, simple interface. It says the goal is to spot AI-like patterns and replace them with more natural wording while keeping the original message intact. Since Scribbr already serves students and academic writers, this one makes the most sense for essays, papers, and more formal writing where you still want the text to sound human.
Why choose it: Choose Scribbr if you want a more academic-friendly tone and do not want the rewrite to become too casual.
SuperHumanizer is harder to pin down than the others because its web presence is lighter and less product-detailed, but it is still used as an AI humanizer tool and shows up in current tool roundups. If you want a lighter, simpler option and do not need a giant writing platform around it, it can still be worth a look. I would treat this one more as a quick-use option than a deeply documented professional tool.
Why choose it: Choose SuperHumanizer if you want a simple tool to test quickly and you do not need a full writing suite.
Clever AI Humanizer pushes the “free and easy” angle hard. Its site says it is fully free, supports multiple languages, and lets users adjust style while rewriting AI-heavy text into more natural wording. That makes it attractive for casual use, fast rewrites, and users who do not want a paywall right away. Since the tool leans heavily on detection-related marketing, it still makes more sense to judge it by readability and output quality, not flashy claims.
Why choose it: Choose Clever AI Humanizer if you want a free option with a simple interface and quick results.
A lot of people use AI humanizers because they want to get past tools like GPTZero or Turnitin. From an SEO point of view, that is the wrong thing to focus on.
Google’s guidance is pretty clear: it does not automatically punish content just because AI helped write it. What matters is whether the page is helpful, reliable, and made for people instead of search engines. Content that feels stiff, repetitive, or empty is the real problem.
That is where an AI humanizer can actually help. When it works well, it does not just change a few words. It improves flow, breaks up repetitive sentence patterns, and makes the text easier to read. That can make the page more satisfying for real visitors, which is a much better goal than chasing a low AI-detection score.
The practical SEO benefit is simple:
Those things support people-first content. And that is much closer to what search systems want than text written mainly to game a detector. Google also warns that large-scale AI content without real value can violate its spam policies, so “humanized” text still has to be useful.
One important detail: marketers often talk about bounce rate or dwell time as if they are direct ranking levers. Google’s public guidance does not frame them that way. They can still be useful site metrics because they may show whether readers find your page compelling, but the bigger point is user satisfaction, not one magic number.
People who use AI humanizers complain about the same few problems again and again: weird wording, text that still gets flagged, and unstable backends when they try to scale. Reddit threads around AI writing tools also mention “symmetry” and overly polished structure as common giveaways.
| The issue | The fix |
| Word salad effect: the tool swaps normal words for weird synonyms, so the text gets harder to read. | Clean the draft first. Ask the base AI to use plain English, avoid clichés, and vary sentence length before you run a humanizer. |
| Uniformity flags: the text still feels AI-written because the paragraphs look too neat and predictable. | Break the pattern. Mix paragraph length, add a short sentence here and there, and cut stiff transitions. |
| API rate limits and downtime: bulk humanizer tools break when one LLM provider slows down or blocks requests. | Use routing and failover. A gateway like llmapi.ai can spread traffic, retry requests, and switch providers when one goes down. |
We are past the stage where fast output alone feels impressive. What matters now is whether AI-generated text actually sounds natural, clear, and human enough to connect with real people. That is why tools focused on rewriting tone, smoothing phrasing, and improving rhythm have become so useful.
But if you want to bring that same human-like quality into your own app or workflow, depending on one provider can limit you fast. Different models shine in different areas, whether that is tone, restructuring, speed, or cost.
That is where LLM API fits in naturally. It gives you one OpenAI-compatible API with multi-provider access, so you can work across models more flexibly instead of building around a single vendor. It also brings cost-aware routing, performance monitoring, secure key management, and provider-level breakdowns into one place, which makes it easier to manage AI writing workflows as they grow.
Why use LLM API?
If you want your product to speak in a more natural voice without making the backend harder to manage, LLM API is a smart layer to add. It gives you the freedom to use the right model for the tone and job while keeping the integration simple underneath.
It rewrites AI-sounding text to feel more natural. Usually that means: mixing sentence lengths, removing repetitive transitions, smoothing awkward phrasing, and shifting tone to sound less stiff.
It can, mainly because it’s easier to read and keeps people engaged. Better engagement (people actually reading, not bouncing instantly) often lines up with better SEO outcomes.
No. Detectors change constantly, so no tool can promise a permanent 100% pass rate. The most reliable way to make text feel real is adding your own edits—specific details, examples, and your actual voice.
Humanizers tend to run lots of generations quickly. LLM API can help you scale by routing requests across multiple models and handling rate limits more smoothly through one endpoint.
Different models have different strengths. Some feel more natural for conversation and tone than others. With LLM API, you can switch models without rewriting your whole integration and route to the one that gives the best “human” output.
Passwords alone do not cover every use case anymore. If you build fintech onboarding, protect workspace access, or try to stop ticket fraud, you may need a fast way to check whether one face really matches another.
That is where AI face compare APIs come in. These tools compare two face images and return a similarity score that helps your app decide if both images show the same person.
Below, we break down the top 5 tools on the market, how to choose the right one, common developer problems, and how to scale without extra mess.
Based on current feature sets, pricing pages, and developer-facing docs, these five APIs stand out for face comparison in 2026. The right pick depends on what you need most: cloud scale, compliance, mobile speed, simpler setup, or privacy controls.
Amazon Rekognition is one of the biggest names in cloud vision. Its CompareFaces API handles 1:1 matching, and the wider Rekognition stack also covers face search, face analysis, streaming video, and liveness checks. It is a strong fit if you already run a lot of your stack on AWS and want a service that can scale without much custom ML work.
Key features:
Pricing: Pay-as-you-go. AWS lists Rekognition Image Group 1 APIs, which include CompareFaces, at $0.001 per image for the first 1 million images per month, with lower rates at higher volume.
Best for: Large-scale apps, identity flows on AWS, and teams that want strong liveness support plus deep cloud integration.
| Pros | Cons |
| Strong face compare and liveness stack | Easy to get pulled deep into AWS |
| Good fit for high-volume workloads | Costs can add up at scale |
| Supports video workflows too | IAM and setup can feel heavy |
| Mature docs and SDK coverage | No simple always-free tier for long-term prototyping |
Azure Face API is built more for enterprise identity and regulated use cases. It supports verification, identification, grouping, liveness sessions, and face lists, while Azure also separates face attributes into its broader detection flow. That makes it appealing for teams that need both verification and stricter operational controls.
Key features:
Pricing: Azure uses transaction-based pricing. Microsoft’s pricing page shows Face API as a paid service with usage-based billing, and Azure’s free-account offer can be used to test services, though exact free access depends on your account and offer type.
Best for: Healthcare, finance, enterprise identity flows, and teams that need a more compliance-oriented Microsoft environment.
| Pros | Cons |
| Strong identity-verification toolkit | Azure setup can feel bulky |
| Good fit for regulated environments | Pricing is less “instant clarity” than simpler tools |
| Supports large datasets and face lists | Learning curve is real for first-time users |
| Liveness is part of the platform | Some attribute features sit in separate flows |
Face++ is still a serious option if you want rich face analysis on top of face matching. Its platform covers face compare, search, liveness, dense landmarks, face attributes, skin analysis, and beauty scoring. That wider toolkit makes it especially useful for mobile, consumer, and image-heavy products that want more than a plain match score.
Key features:
Pricing: Face++ says its APIs can be used for free to start, with paid options through pay-as-you-go or QPS-based plans. Its pricing page also confirms a free plan with no credit card required.
Best for: Mobile apps, beauty or AR-style products, and teams that want detailed facial mapping along with face verification.
| Pros | Cons |
| Very feature-rich beyond face compare | Can be more than you need for basic KYC |
| Strong landmark and attribute coverage | Pricing gets less simple at higher scale |
| Good for consumer-facing image apps | Regional and compliance review may matter more for some teams |
| Easy to test with a free start | Docs and product sprawl can feel busy |
Kairos leans hard into identity verification, face matching, liveness, and a developer-friendly API story. The company also still positions itself around accessible pricing and ethical, unbiased face recognition. If you want a simpler face verification product without stepping into a giant cloud stack, Kairos is worth a look.
Key features:
Pricing: Kairos lists free trial access, 1,000 free API calls for biometric face recognition, and paid identity-verification plans starting at $49/month, with usage-based pricing that drops at higher volume.
Best for: Teams that want a more direct face-verification product with lighter setup and clear identity-check workflows.
| Pros | Cons |
| Straightforward identity-verification focus | Smaller ecosystem than AWS or Azure |
| Free trial path is easy to test | Fewer surrounding platform features |
| Has cloud and on-prem options | Less ideal for giant video-heavy workloads |
| Privacy and control story is clearer than many bigger clouds |
Luxand is the easy-entry option in this group. Its cloud API covers face recognition, verification, similarity, landmarks, age and gender detection, cropping, and liveness. It is not trying to be a giant cloud platform. That is part of the appeal. If you want something you can wire up fast, Luxand stays one of the more approachable choices.
Key features:
Pricing: Luxand offers a free tier with 500 API requests per month and paid plans starting at low monthly rates; its pricing page currently shows entry plans beginning at $9/month.
Best for: Indie developers, startups, and smaller teams that want face matching live fast without deep cloud setup.
| Pros | Cons |
| Very easy to try and integrate | UI feels simpler than enterprise tools |
| Covers the main face-compare basics well | Not the first pick for massive enterprise rollouts |
| Free tier is friendly for testing | Advanced usage can hit plan limits fast |
| Good SDK and feature breadth for the price |
The face recognition space is much bigger than the top five cloud APIs. If those tools do not match your setup, there are solid alternatives in a few more specific categories.
If privacy is the top priority, sending face images to a third-party API may not work for you. In that case, self-hosted tools make more sense.
If your real goal is not generic face matching, but selfie-to-ID verification for compliance, you are usually better off with a full identity platform.
Picking a face compare API is mostly about four things: law, spoof resistance, real-world accuracy, and cost at scale. If one of these breaks, the whole setup gets risky fast.
If you collect or process face geometry, do not treat this like ordinary image data. Illinois BIPA explicitly covers scans of face geometry, and GDPR treats biometric data as a special category with tighter rules and higher risk.
Check these points before you test vendors:
Practical shortcut:
Azure is useful here because Microsoft supports on-prem and near-data container deployments for some AI services, which can help when compliance or internal policy says data should stay close to your own environment.
A lot of teams skip this and regret it later. Face comparison alone only answers “do these two faces look like the same person?” It does not answer “is this a real live person right now?”
Use plain face compare when the job is low risk, for example:
Use liveness when the action has security or money attached to it, for example:
AWS describes Face Liveness as a way to detect spoof attempts such as printed photos, digital replays, 3D masks, and even some camera-bypass attacks. That is the level of protection you want for higher-risk flows.
A simple rule:
Vendor benchmarks help, but they do not tell you how the model will behave on your users, your camera quality, and your lighting. Face systems can still perform unevenly across demographics, image quality, and pose. European guidance also warns that facial recognition brings elevated rights risks and needs careful review.
When you test vendors, do not stop at “it worked in staging.” Test:
What to measure:
This gives you something far more useful than a generic “high accuracy” claim.
Face APIs often look cheap at first glance. The problem starts when usage grows, retries pile up, or you add liveness on top of matching.
Your cost model should include:
For example, AWS pricing shows Rekognition image analysis is usage-based, and AWS also charges separately for some related storage components. That means your bill may have more than one moving part.
A good pricing check:
That last step matters more than people think. A product that looks affordable in a pilot can get expensive once you add liveness, duplicate checks, and multi-step verification.
This is the fastest way to cut through the noise:
In short, the best tool is not the one with the longest feature list. It is the one that matches your legal risk, security level, user population, and expected volume without turning your costs or compliance work into a mess.
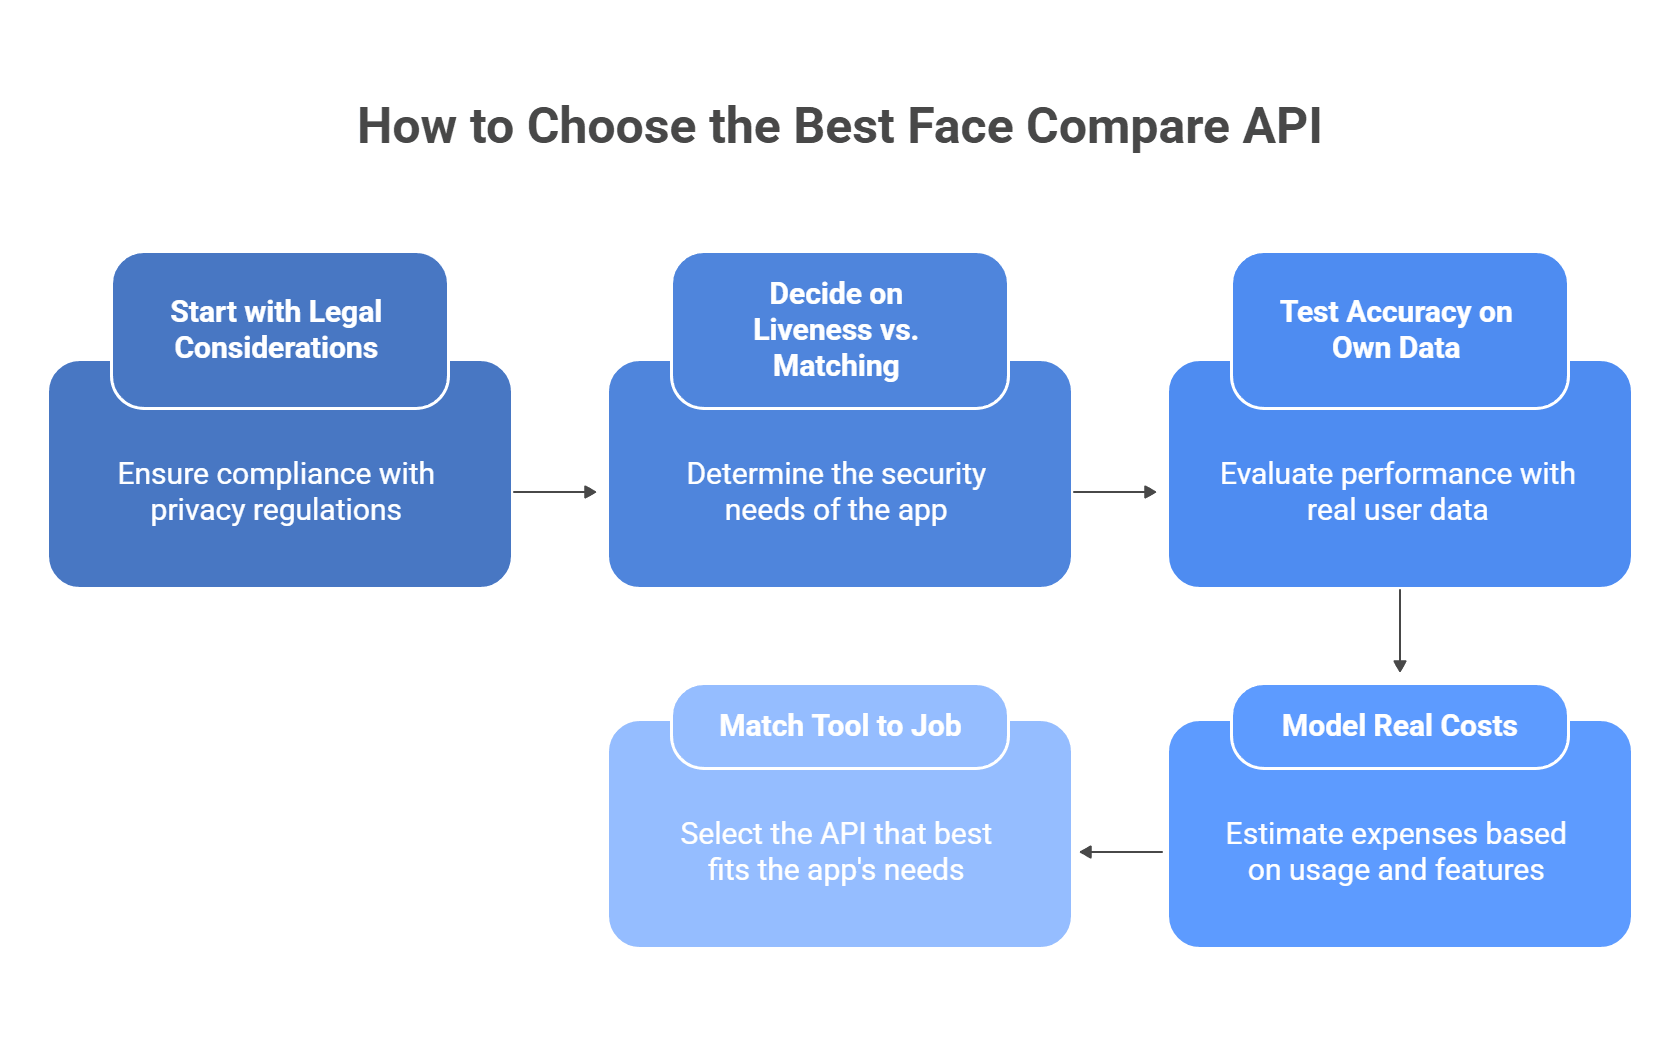
A lot of face-compare problems show up only after launch. The common pattern is simple: weak capture quality, no spoof protection, too many API calls, or threshold settings that are too loose for the risk level.
The issue: False rejections from bad lighting and off-angle photos.
The fix: Standardize capture as much as possible. AWS recommends face liveness checks in lighting that is not too dark or too bright and as even as possible, and Microsoft also points to more conservative session settings and stronger capture controls for better results.
Use a capture flow like this:
If you can, run light preprocessing before upload, such as exposure correction or blur checks, so you only send usable frames.
The issue: A printed photo or replay attack passes basic face matching.
The fix: Plain 1:1 face comparison is not enough for secure flows. AWS states that face liveness is designed to catch printed photos, digital photos, digital videos, 3D masks, and some camera-bypass attacks. Azure also separates liveness into its own workflow rather than treating it as normal face matching.
For anything high-risk:
That is the baseline for banking, KYC, password reset, and access control.
The issue: Costs explode because the app sends too many frames to the API.
The fix: Do not send every video frame to a paid cloud service. Filter locally first. OpenCV supports face detection from live camera input, and sharpness scoring methods can help you pick the best frame from a sequence instead of uploading dozens of weak ones.
A better flow looks like this:
This cuts waste fast and usually improves match quality too.
The issue: Bias, false positives, or uneven results across different groups.
The fix: Do not trust default thresholds blindly. NIST still tracks demographic effects in face recognition and notes that false positives can vary across populations, while Microsoft also warns that real-world performance depends on image quality, environment, and user diversity.
To reduce risk:
For low-risk apps, a looser threshold may be fine. For high-risk identity checks, stricter thresholds and liveness usually make more sense.
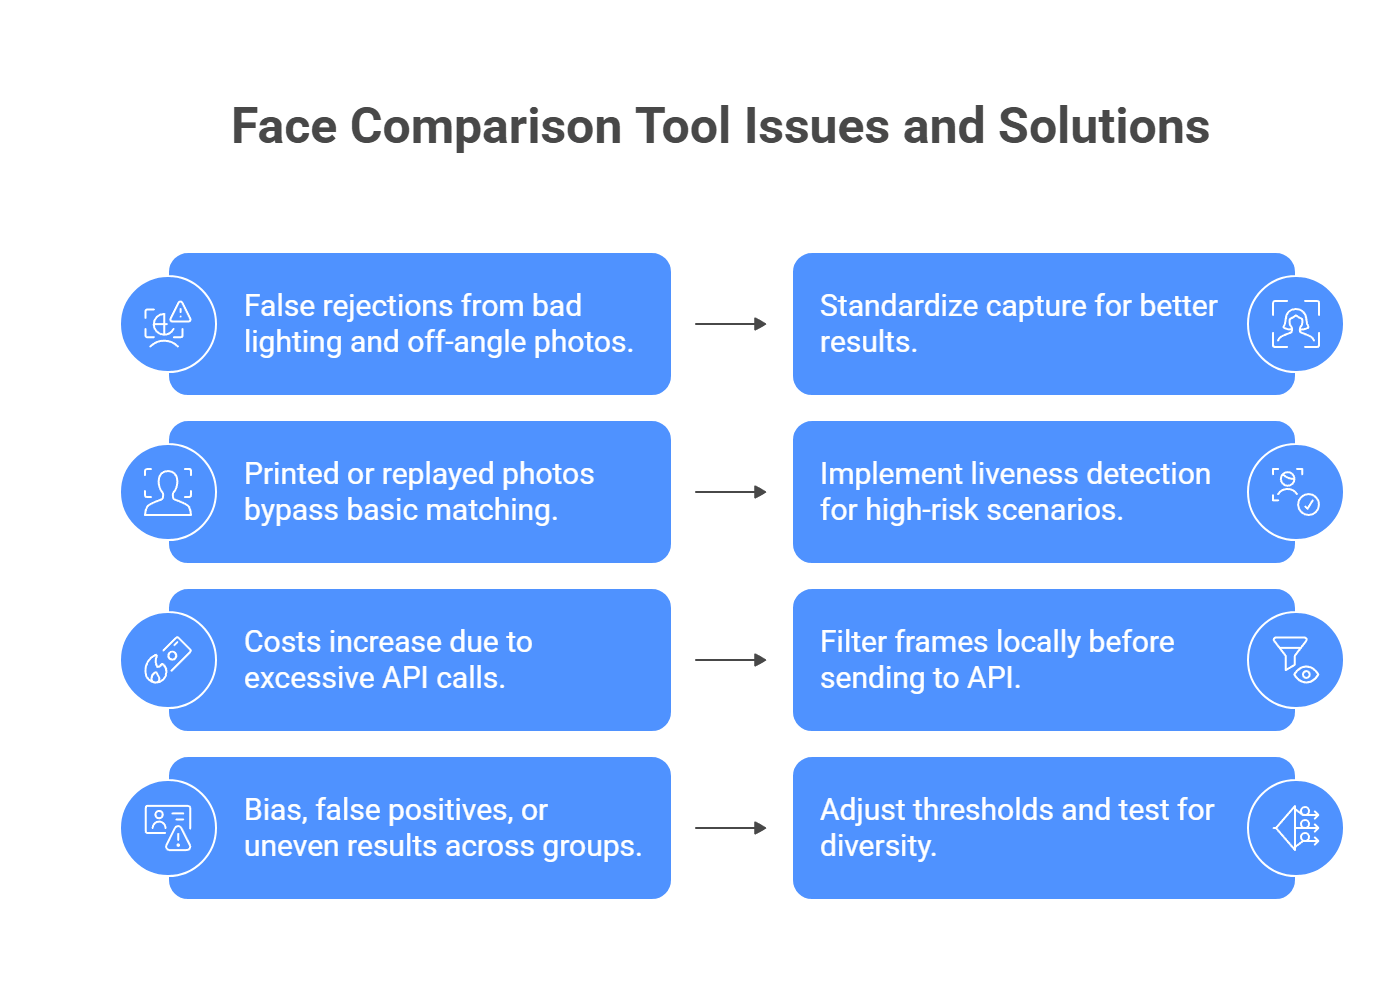
A face compare API and a secure authentication system do two different jobs.
Face matching asks one question: do these two faces look alike enough to count as the same person?
Liveness detection asks a different question: is there a real person physically present right now, or is someone trying to fool the camera?
That gap matters a lot. AWS says face liveness is built to detect spoof attacks such as printed photos, photos or videos shown on another screen, 3D masks, and even some pre-recorded or deepfake video attacks that try to bypass the camera. Azure describes liveness the same way: an anti-spoofing layer that checks whether a real person is actually in front of the camera, with both passive and passive-active modes now supported.
Basic 1:1 matching is useful for:
What it cannot prove on its own:
So if your flow protects money, access, accounts, or legal identity, plain face matching is not enough.
Modern liveness systems usually look for several signals at once, not one magic clue.
They may check:
AWS explicitly says its liveness flow analyzes a short selfie video to catch printed photos, digital photos, digital videos, 3D masks, and camera-bypass attacks such as pre-recorded or deepfake videos. Azure’s current liveness docs also split the feature into passive and passive-active modes, which is useful because some apps want less user friction, while others want stronger challenge-based proof.
This distinction helps a lot when you choose a vendor.
Passive liveness:
Active or passive-active liveness:
Azure’s current documentation specifically calls out both Passive and Passive-Active detection modes. That is a useful sign of where the market is going: less friction for simple cases, stronger challenge flows for higher-risk ones.
A few years ago, many teams mainly worried about printed photos or video replays. That is no longer enough. Vendors now openly talk about deepfakes and injection attacks as real threats to remote identity checks.
AWS says its liveness service is designed to detect spoofs that bypass the camera, including pre-recorded or deepfake videos. iProov also frames modern biometric defense around both presentation attacks, like photos and masks shown to a camera, and injected attacks, such as forged or deepfake media inserted into the stream.
That means your security bar should rise if your app handles:
A simple rule helps here.
You may not need liveness if the use case is low risk, such as:
You should treat liveness as required if the use case involves:
In those cases, a face compare API without liveness is only half a solution.
Before you choose a face API for secure flows, check:
AWS, for example, notes that its liveness flow can return a strong selfie frame for downstream face matching. That is useful because it reduces the need for separate capture logic.
So the bottom line is simple: if your app uses face verification for security, do not stop at “the faces match.” You also need proof that the second face belongs to a live, present human at the moment of capture. Without that layer, the system is much easier to fool.
An AI Face Compare API can help you build faster and more secure user flows. But in many products, facial recognition is only one part of the stack. Teams often also need text generation, document analysis, translation, or other multimodal features, and managing all of those through separate providers can get messy fast.
That is where a unified layer starts to matter. Instead of juggling extra API keys, billing setups, and provider limits for every generative feature, llmapi.ai gives you one OpenAI-compatible API with access to 200+ models, plus routing, fallback protection, unified billing, and team key management.
Why use LLM API alongside your face compare stack?
If you want to keep your specialized face recognition tool while making the rest of your AI infrastructure easier to manage, LLM API is a natural fit. It helps you consolidate the generative side of your stack without boxing your app into a single provider.
Usually yes, but the rules are strict and vary by location. Facial data is often treated as sensitive biometric data, so you typically need clear, informed consent, a retention/deletion policy, and limits on how you store and share templates. Laws like GDPR (EU) and Illinois BIPA are common “high bar” examples.
Keep it clean: use your Face Compare API only for identity checks, and route everything else (chat, summaries, analysis) through LLM API so you don’t juggle a bunch of different LLM SDKs and keys.
That’s a false positive, often caused by a low match threshold. A common fix is raising the required confidence score (many teams use something like 95%+, depending on the provider and risk level) and adding a second check for high-stakes flows.
Face compare fallbacks are usually on you to design, but for LLM features, LLM API can route to backup models via load balancing/failover so your app doesn’t lose chat or text features during outages.
AI video looks a lot more usable in 2026. Leading models now focus on better motion, stronger scene consistency, and more control. Runway’s recent materials for Gen-4 and Gen-4.5 highlight improvements in motion quality, prompt adherence, visual fidelity, and consistency across scenes.
That matters because AI video is now useful for ad creatives, product demos, media workflows, and app features. The harder part is that the market moves fast and the model landscape is fragmented. That is why a unified layer like LLMAPI can be useful: one API setup is easier to maintain than rebuilding around each new video model.
The market is crowded, but a few names clearly lead it. The easiest way to compare them is by asking four questions: What does it do well? Who is it for? How do you use it? What are the trade-offs?
Kling is one of the strongest all-around options right now, especially when you care about motion realism, longer clips, and story-style output. Its own developer materials highlight up to 15-second generation, scene cuts, storyboard-style control, and ultra-high-definition output. Third-party testing and reviews also keep pointing to its strong handling of gravity, balance, fabric, and action-heavy motion.
Main features:
Best for:
Start with a short storyboard, not one giant prompt. Define the subject, action, camera feel, and mood first. Then add reference images or scene notes if you want stronger continuity across shots. Kling tends to reward clearer direction when the scene is busy.
| Pros | Cons |
| Strong motion realism | More moving parts in setup |
| Longer clip length | Can be overkill for simple clips |
| Good multi-shot storytelling | API workflows can get messy if you want polished automation |
| Native audio support | |
| High-resolution output options |
Veo is one of the strongest choices for polished, premium-looking output. Google positions Veo 3 around native audio, strong prompt adherence, realism, and physics. Vertex AI also lists multiple Veo variants, including Veo 3, Veo 3 Fast, and Veo 3.1 Lite, which makes it easier to choose between quality and speed.
Main features:
Best for:
Use Veo when the shot needs to feel premium and controlled. Write prompts like a director: subject, environment, lighting, movement, and sound. If consistency matters, use reference images and keep each shot focused instead of trying to force too many scene changes into one request.
| Pros | Cons |
| Native audio generation | Can be slower on premium generations |
| Strong cinematic quality | Best experience often ties into Google’s ecosystem |
| Excellent prompt adherence | Not always the cheapest option for high volume |
| Good image-to-video tools | |
| Multiple model tiers for cost/speed |
Runway stays very strong when you want more control. Its current materials focus on visual fidelity, prompt adherence, creative control, and consistent characters, objects, and locations across scenes. Motion Brush and camera-direction workflows remain part of why creative teams like it so much.
Main features:
Best for:
Runway works best when you already know the look you want. Start with a reference image or very visual prompt, then use motion and camera cues to shape the shot. This is a strong pick when the creative team wants hands-on control instead of “type prompt and hope.”
| Pros | Cons |
| Strong creative control | More manual direction needed |
| Good consistency tools | Can take longer to master |
| Motion Brush is useful | Better for crafted output than fast bulk generation |
| Great for image-to-video work | |
| Popular with professional creative teams |
Sora still matters because of its world-building, motion quality, and longer-form ambition. OpenAI says Sora can generate videos up to a minute long while keeping visual quality and prompt adherence. The API pricing page lists per-second video pricing, which makes cost planning easier than vague credit systems. One important current detail: OpenAI’s docs now say the Sora 2 video generation API is deprecated and will shut down on September 24, 2026.
Main features:
Best for:
Use Sora for bigger, more cinematic scenes that need room to unfold. Keep the prompt structured: environment, action, camera, timing, and visual style. But go in with your eyes open: if you are building a long-term workflow, the announced deprecation means you should avoid locking your whole strategy to Sora alone.
| Pros | Cons |
| Longer video potential | Expensive at higher settings |
| Strong scene/world understanding | API is already marked for deprecation |
| Good cinematic camera feel | Risky as a long-term single-model bet |
| Clear pricing per second | |
| Strong brand recognition |
These are worth grouping together because they are both strong when you need speed, cost control, and practical output, not just headline demos. Wan 2.7 is getting attention for editing, first-and-last-frame control, subject referencing, and natural-language video changes. Vidu Q3 stands out for 16-second clips, native audio-video generation, and precise camera control.
Main features:
Best for:
Use Wan when you need to revise or reshape existing shots more flexibly. Use Vidu when you want finished clips with audio already baked in. These models make the most sense when speed and repeatable throughput matter a lot.
| Pros | Cons |
| Better for faster turnaround | Less prestige than the biggest flagship names |
| More budget-friendly positioning | Quality can vary more by use case |
| Useful editing/control features | Fewer teams already have established workflows around them |
| Vidu supports native audio-video output | |
| Good fit for scaled content production |
| Model | Best at | Best for | Biggest caution |
| Kling AI 3.0 | Motion realism and story-style clips | cinematic social, action, branded stories | setup can get more complex |
| Google Veo | Premium visual polish + native audio | commercials, premium marketing, product visuals | slower and often pricier |
| Runway | Fine creative control | agencies, editors, brand teams | takes more hands-on direction |
| Sora 2 | Longer cinematic generation | concept videos, premium storytelling | API is deprecated for Sep. 24, 2026 |
| Wan 2.7 / Vidu Q3 | Speed and scalable output | high-volume content, faster teams, budget-conscious users | not always the strongest for premium cinematic polish |
The models are impressive. The integration work usually is not. Video APIs behave very differently from text models. In many cases, you do not send a prompt and get a result back right away. You submit a job, get a task ID, then wait while the provider renders the video. That means extra work around polling, retries, status checks, and failed jobs.
Here are the biggest pain points:
So yes, the model quality is exciting. But the real challenge sits in the workflow around it: job orchestration, provider differences, wait-time handling, and cost control.
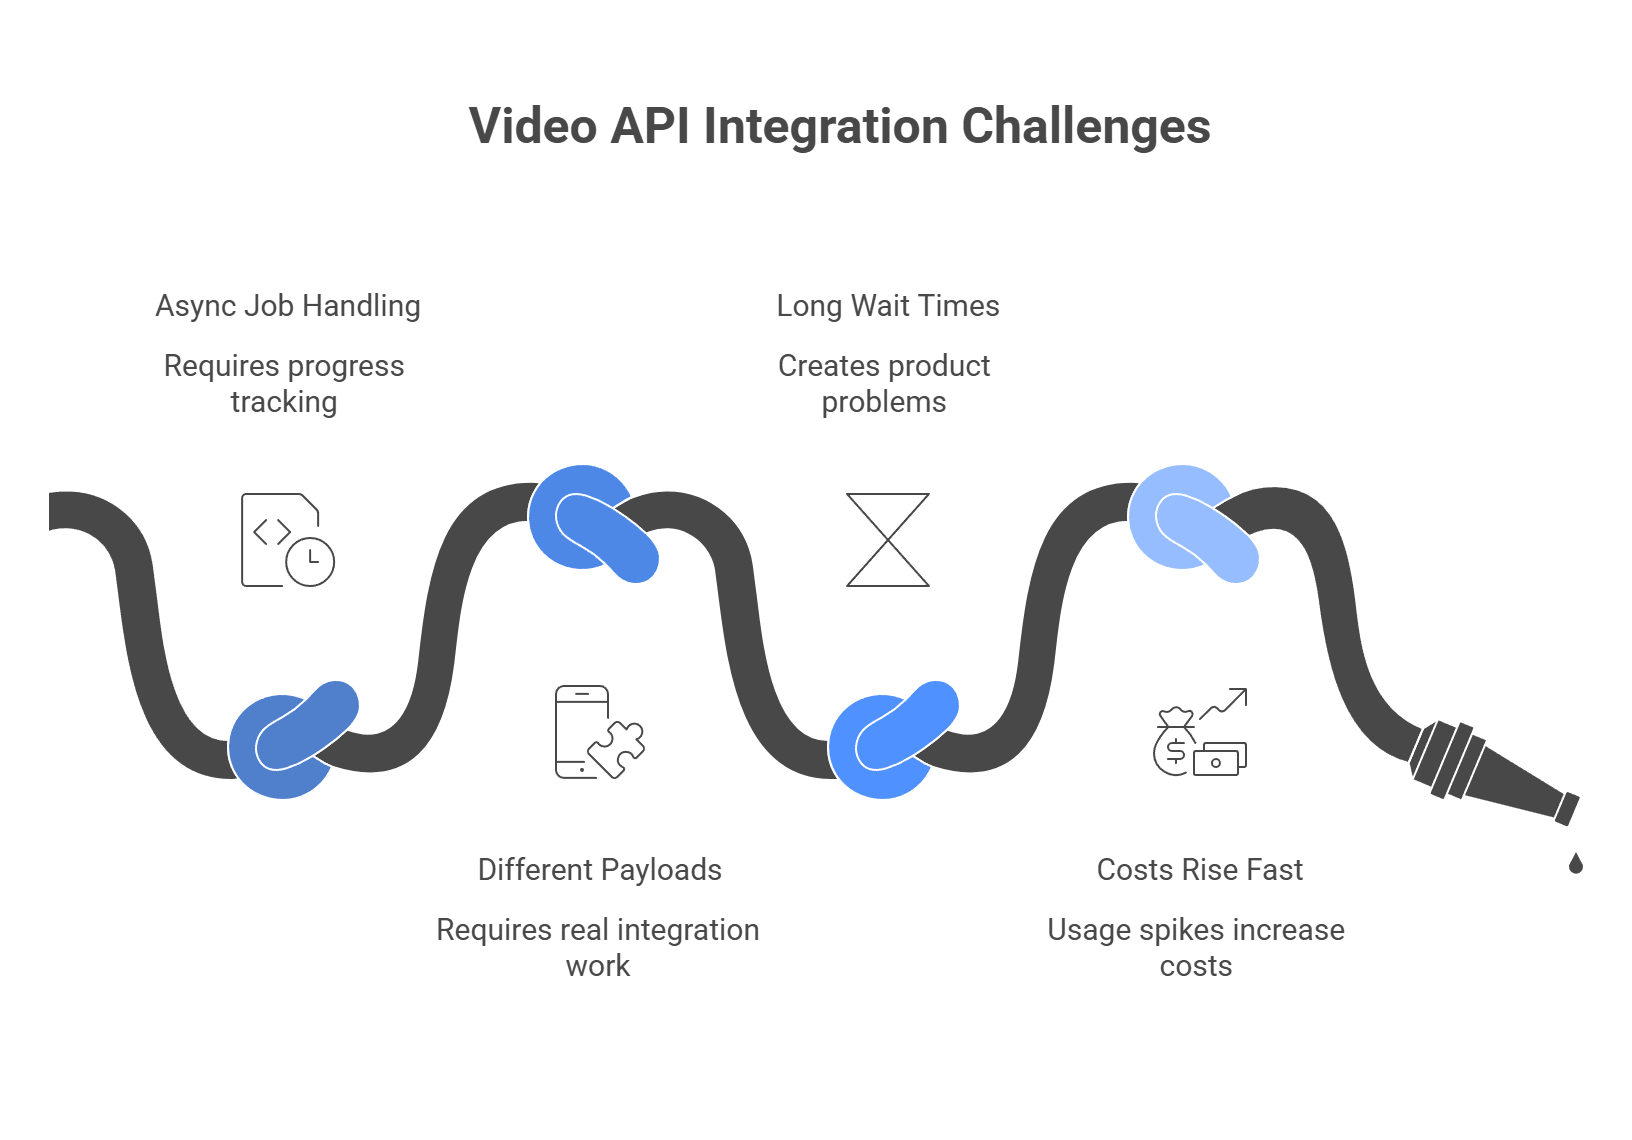
If you want to build an AI video app that can scale in 2026, one provider is usually not enough. Different models have different strengths, prices, wait times, and uptime. A unified API layer helps you avoid that mess and gives you more control over how your product works.
Here is why many teams use LLMAPI for video features:
Instead of building separate integrations for Kling, Runway, and Veo, you connect to one API endpoint through LLMAPI. You prepare the prompt and image input once, then switch models by changing the “model” value in your JSON payload. LLMAPI handles the provider-specific work on its side.
Video generation often takes time, and each provider tends to handle callbacks or status checks a bit differently. LLMAPI gives you one webhook format or one polling flow to check request status and fetch the final .mp4 output, no matter which model created the video.
When one provider slows down or starts to return errors, your app should still work. With LLMAPI, you can route requests to another model automatically. For example, if Kling runs into 503 errors, the request can move to Veo 3.2 or Runway Gen-4.5 instead. That helps keep your video button usable and cuts down on failed requests.
Not every request needs the most expensive model. LLMAPI lets you route traffic based on your product logic. Free users can use a faster, lower-cost model like Wan 2.7, while paid users can get higher-quality output from models such as Veo 3.2 or Sora Pro. This gives you a cleaner way to match cost with customer value.
Once you put an aggregator in the middle, the request flow gets much simpler. Instead of dealing with different payload formats, async patterns, and callback setups for each video provider, your app follows one consistent path from request to final file.
Unified video APIs commonly use this kind of async job flow: submit the request, get a job ID back right away, then poll for status or wait for a webhook when the render is done.
Your frontend sends a prompt, such as “A cinematic pan of a cyberpunk city in the rain,” plus an optional reference image, to LLMAPI’s video generation endpoint. From your side, it is one clean request format instead of a different integration for every model vendor.
LLMAPI receives the request, checks which provider is available, routes the call to the selected model or fallback model, and maps your payload to that provider’s required schema. This is one of the main reasons teams use unified AI gateways in the first place: the app talks to one API, while the gateway handles provider-specific differences behind the scenes.
Because video generation is a long-running task, the request does not stay open until the file is ready. Instead, LLMAPI returns a standardized job_id right away, usually with an initial status such as pending or queued.
Your frontend can then show a loading state while the job moves through the system. This async pattern is standard for video and other heavy AI workloads because it keeps the app responsive and makes status tracking much easier.
When the provider finishes the render, LLMAPI captures the result and sends the final output back through a consistent delivery path, such as a hosted file URL and a webhook to your server. Webhooks are widely used for this because they let the platform notify your backend as soon as the job is complete, instead of forcing your app to keep checking over and over.
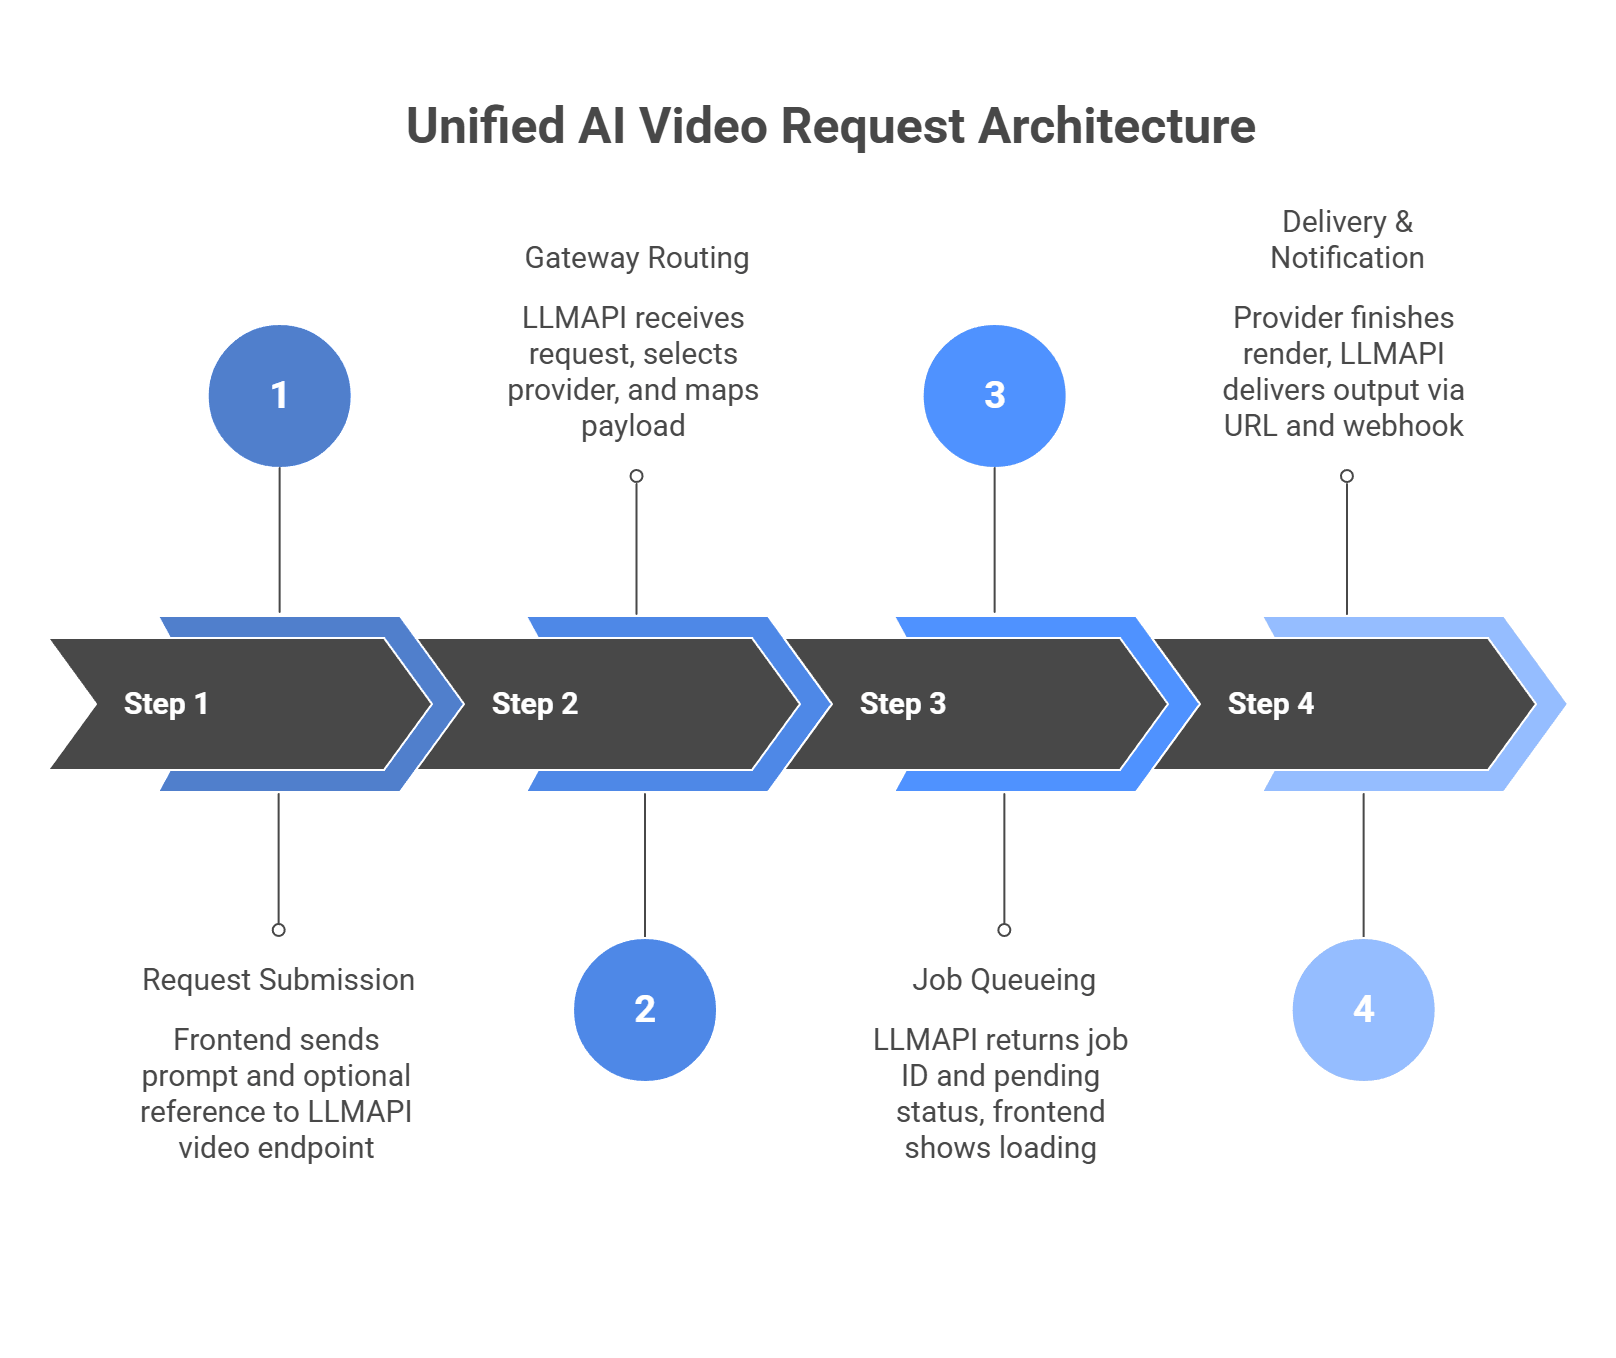
This structure is a big part of the appeal. Your team gets one request flow, one job format, and one delivery pattern, even when the actual video comes from different providers under the hood.
AI video is moving fast, and the top model today may not stay on top for long. Locking your product into one provider is a risky move when capabilities, pricing, and reliability can shift so quickly. If you want to stay competitive, your app needs room to adapt as the video ecosystem changes.
That is why flexibility matters just as much as raw model quality. A strong setup should let you explore different video tools, test what works best, and switch directions without turning every change into a full rebuild.
LLMAPI gives you a simpler way to do that. With one OpenAI-compatible API and access to 200+ models, it helps you keep your infrastructure more flexible underneath while avoiding the mess of fragmented integrations and billing. It also adds routing, fallback options, and usage visibility, which can make fast-moving AI video workflows easier to manage.
Why use LLMAPI for AI video workflows?
If you want to build AI video features without getting stuck rebuilding your stack every few months, LLMAPI is a natural layer to add. It helps you stay flexible, move faster, and spend more time building the product instead of managing provider chaos.
It depends on the model and quality. Fast “turbo” models can produce a ~5-second clip in under 15 seconds. High-fidelity cinematic models at 1080p/4K can take 3–8 minutes per clip.
Yes, many can. Some models support “character/element reference” modes where you pass a reference image (or a saved character ID) and the model keeps the face, outfit, and proportions consistent across scenes.
Costs vary a lot. Some hosted open-source setups can be around $0.10 per second of video. Premium proprietary models can be $0.50–$1.50+ per generation, depending on duration and resolution.
Direct integrations often have different auth methods and payload formats. With LLMAPI, you integrate once to a unified endpoint, then switch providers by changing the model name in your request.
Instead of keeping one long HTTP request open, it can return a job_id right away. Then it handles the long-running generation in the background and notifies your app (or lets you poll) when the final video is ready.
Want to connect AI to your daily apps, smart home tools, or simple web workflows without building a full backend? IFTTT is one of the easiest ways to do it.
It works especially well when you want to connect events from consumer apps or devices to web requests, then send the result somewhere useful. IFTTT supports Webhooks, queries, and filter code, which means you can trigger a workflow, call an external API, and shape the result before the final action runs.
Below, let’s walk through how to build an IFTTT setup that listens for an event, sends data to an AI API, handles the response, and pushes that output back into your workflow.
A lot of people skip IFTTT when they think about AI workflows. That is a mistake. If your project touches smart devices, mobile actions, or lightweight personal automations, IFTTT can be a surprisingly good fit.
Why does it work so well here?
So no, IFTTT is not the tool for every serious enterprise workflow. But if you want a fast, low-friction way to connect AI to phones, devices, simple app events, or personal automations, it is a lot more capable than people give it credit for.
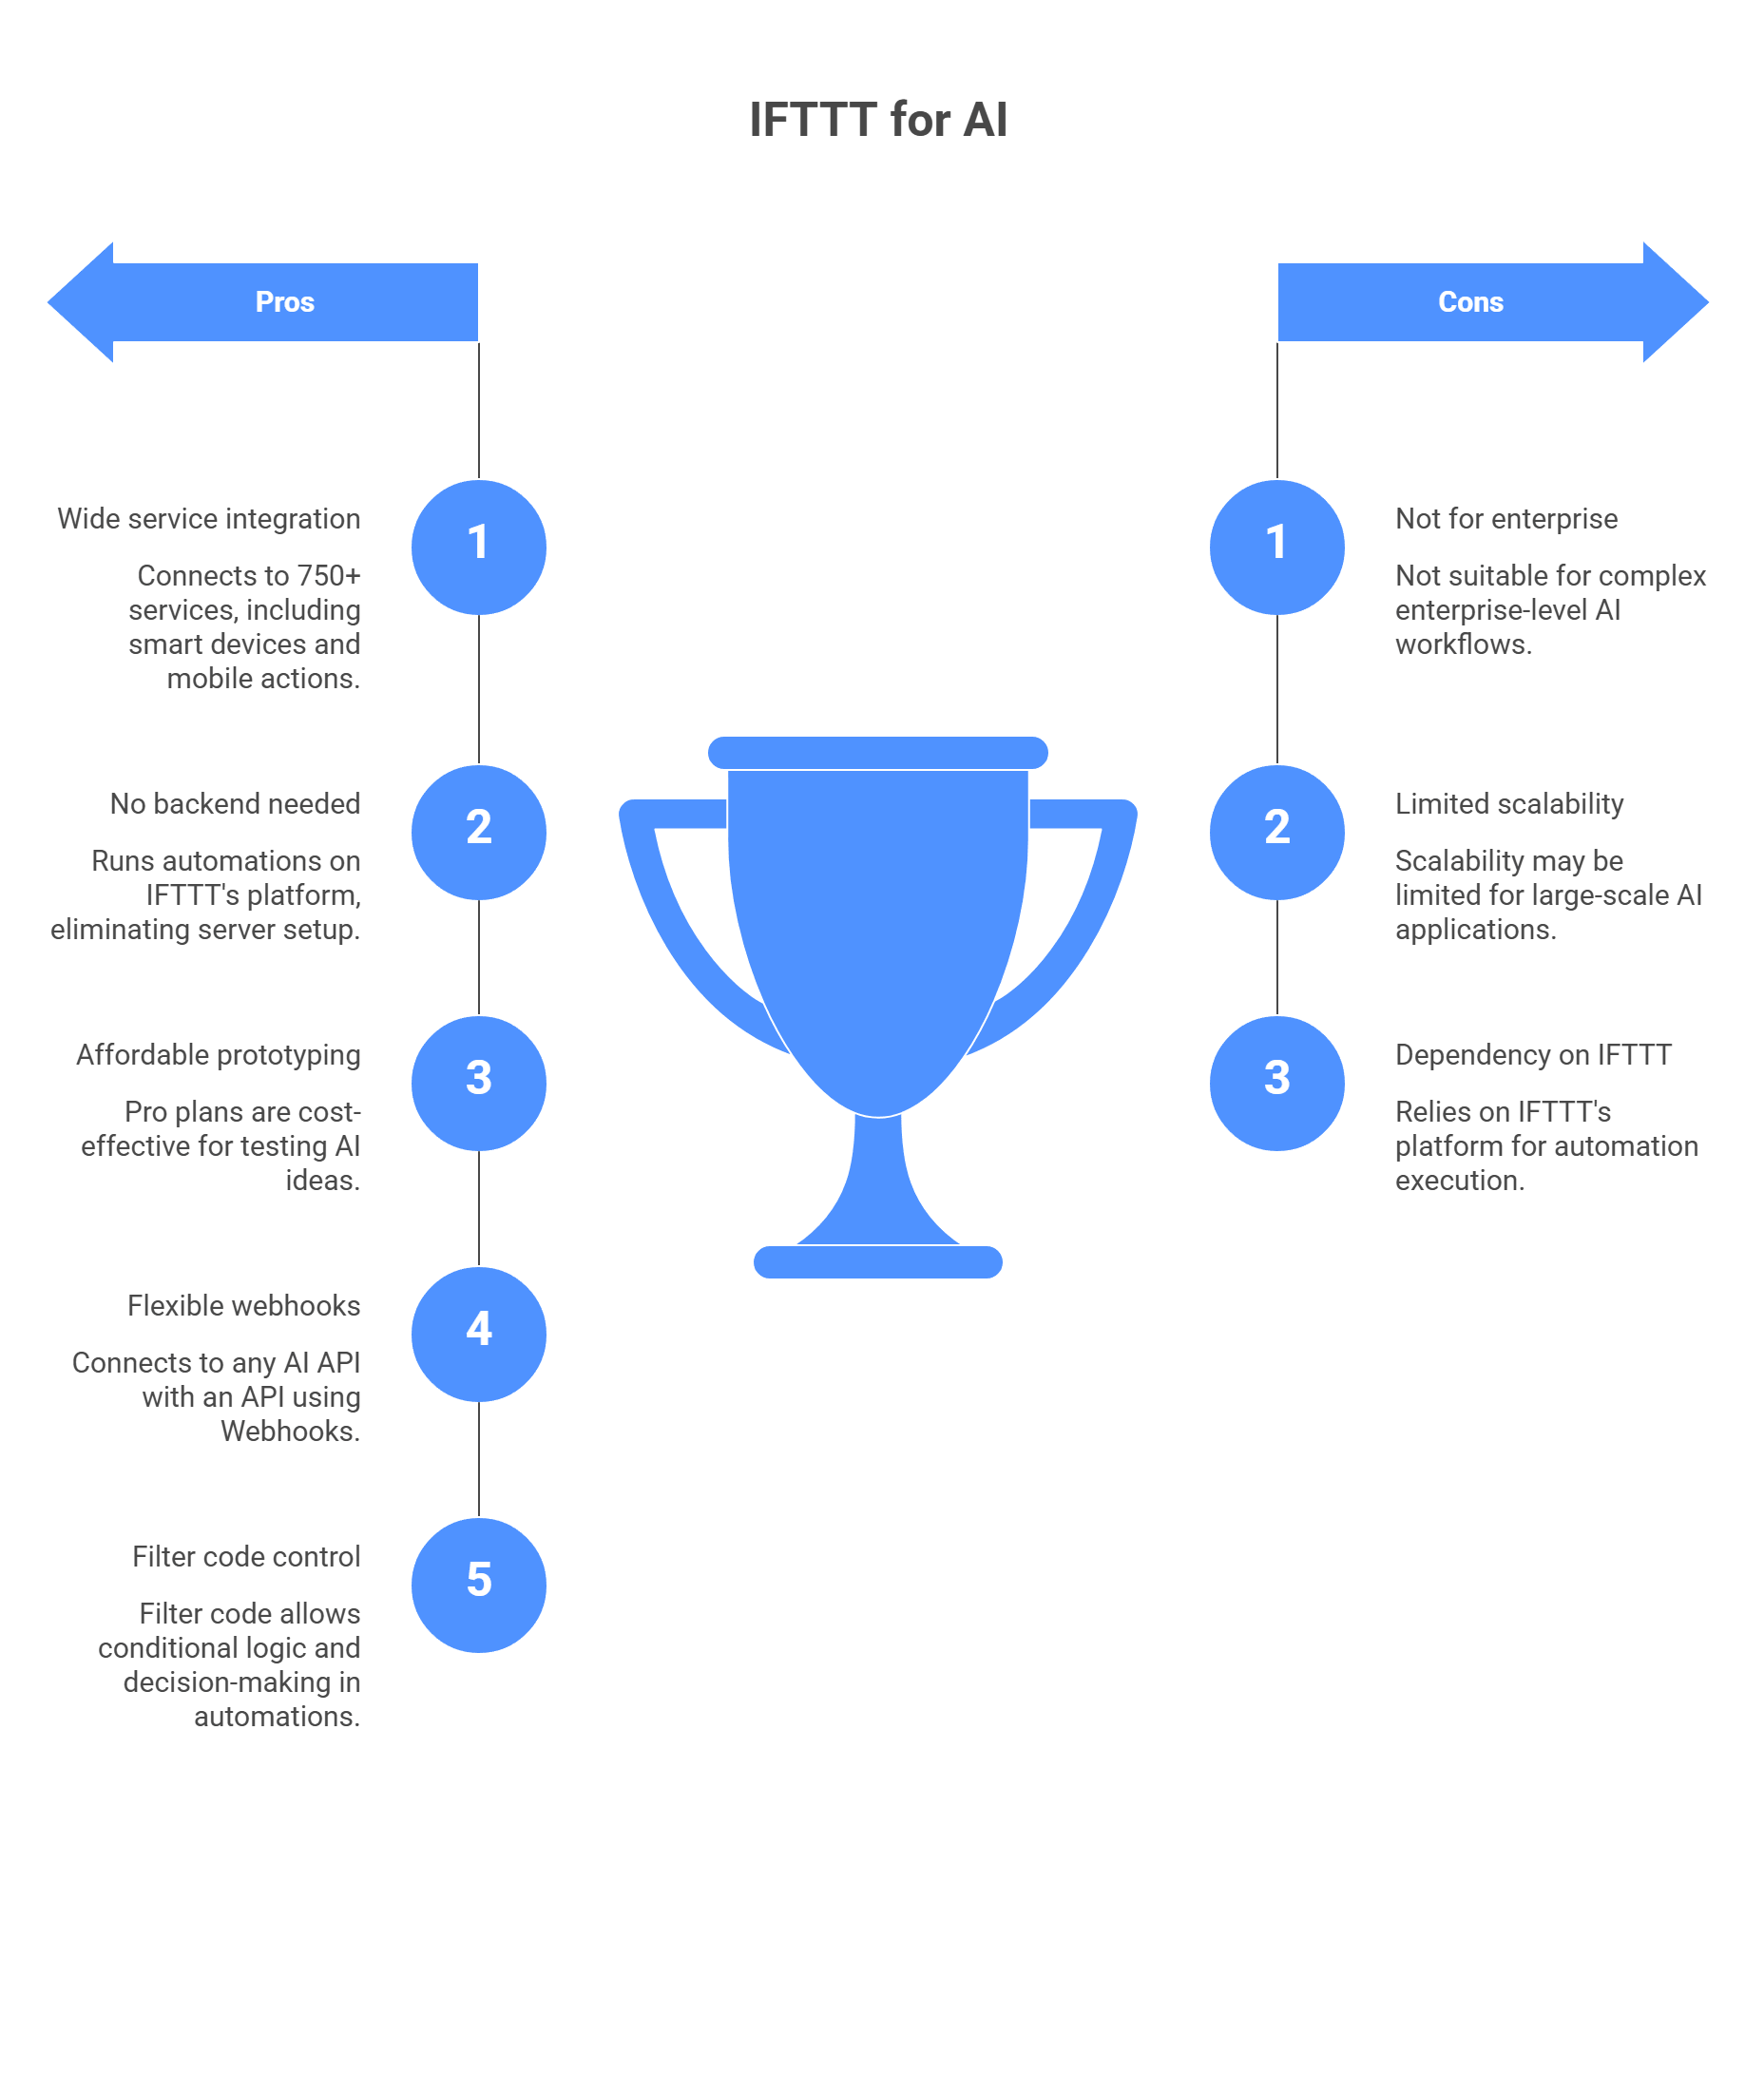
If you want IFTTT to do more than a basic two-step automation, you need a slightly smarter setup. The usual pattern is not just If This, Then That. It is more like: something happens, IFTTT asks the AI for help, filter code cleans up the response, then the final action runs. IFTTT’s own docs describe Applets as flows built from triggers, queries, and actions, and its Webhooks query with JSON response is designed to return the JSON body so you can parse it with filter code.
This is what starts the Applet. It could be a phone button, a new Gmail event, a smart-home sensor, or some other supported app event. In IFTTT’s structure, the trigger is the part that tells the Applet to begin.
This is the part that makes the AI call possible. Instead of jumping straight from trigger to action, you use a query, usually Make a web request with JSON response. That query sends the request to your AI API and returns the JSON response body back into the Applet. IFTTT explicitly says this query returns the JSON response body and that you can use filter code to parse it.
This is the bridge between the raw response and the useful output. AI APIs usually send back nested JSON, and IFTTT will not magically know which field you care about. Filter code lets you add JavaScript inside the Applet so you can parse the response, extract the text you want, and shape the data before the action runs. IFTTT’s help docs also note that JSON bodies can be parsed with filter code.
This is the final step, the part where the AI result actually gets used. That could mean sending yourself a Telegram message, writing a row into Google Sheets, or triggering some smart-home response based on the AI output. In IFTTT’s model, actions are the result of the Applet run.
So the full flow looks like this:
Trigger → Query → Filter Code → Action
That extra middle layer is what makes the setup feel much more useful. Without it, you just have a basic automation. With it, you get something that can actually react to data in a smarter way.
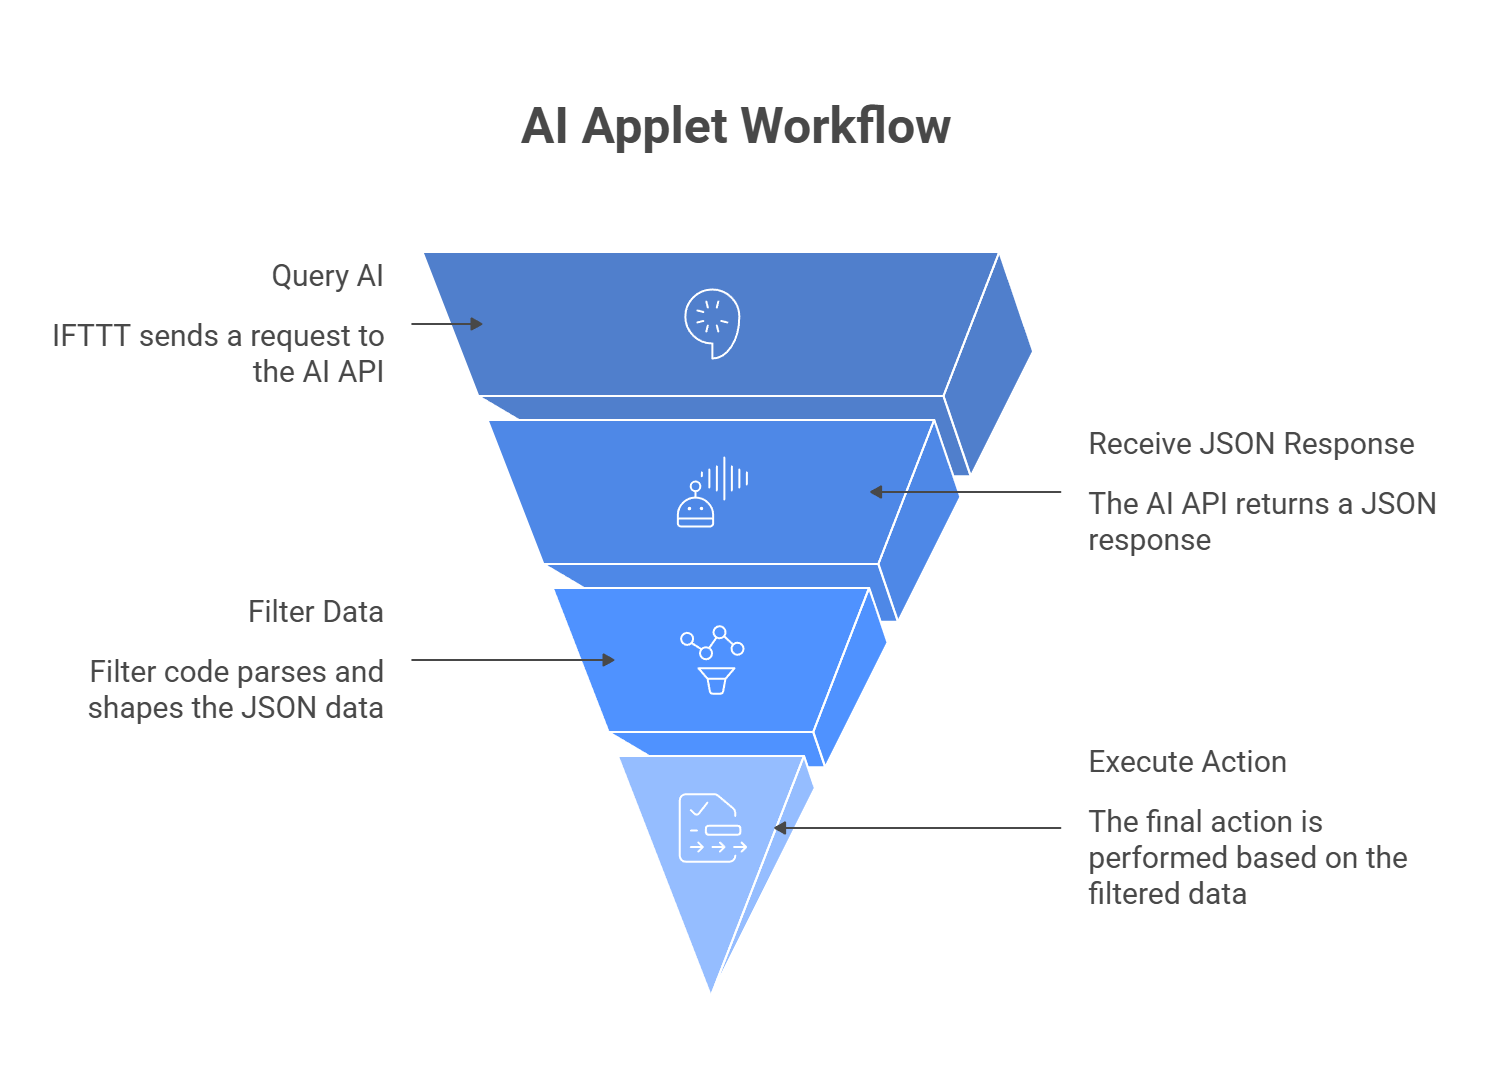
To build this kind of AI Applet, you will need IFTTT Pro+. IFTTT’s current plans and help pages say queries and filter code are Pro+ features, so the free plan and regular Pro plan are not enough for this setup.
Start in IFTTT and click Create.
Then click If This and choose the event that should start the workflow. For a simple test, the Button widget is a good option because it gives you a button you can tap on your phone to run the Applet manually.
This is the easiest way to test the whole AI flow before you connect it to something messier like email, location, or a smart-home event.
Before you build the web request, you need an API endpoint and a key.
You can use a single provider, but if you want more flexibility, you can also use a unified gateway such as llmapi.ai. That gives you one key and one endpoint while keeping the option to change models later without rebuilding the Applet.
That part matters more than it sounds. If the model choice changes later, it is much easier to swap the backend than rebuild the whole automation.
Now add the AI step.
Click the + button between the trigger and action, search for Webhooks, and choose Make a web request with JSON response. IFTTT’s Webhooks docs say this query returns the JSON response body, and that you can parse it with filter code.
Then fill it in like this:
In the Body field, send valid JSON. A simple starter example looks like this:
{

  "model": "gpt-4o",

  "messages": [

    {

      "role": "system",

      "content": "You are a witty assistant. Tell me a short, 2-sentence joke about automation."

    }

  ]

}
If your trigger includes text, you can insert an Ingredient into the prompt instead of hardcoding everything.
Next, click Then That and pick where the AI output should go.
For a simple test, Notifications works well. Choose Send a rich notification and put in placeholder text for now. You will replace it in the next step with the real AI output.
Now for the part that makes the response usable.
Go back to the Applet overview and click the Filter icon between the query and the action. IFTTT says filter code runs after the trigger fires and can change action field values before the action runs.\
Inside the JavaScript editor, parse the JSON response and pass the text to the notification.
A typical structure looks like this:
// Get the raw response body from the Webhooks query

let rawResponse = MakerWebhooks.makeWebRequestQueryJson.ResponseBody;

// Parse the JSON

let jsonObject = JSON.parse(rawResponse);

// Extract the model's reply

let aiText = jsonObject.choices[0].message.content;

// Replace the notification text

IfNotifications.sendRichNotification.setMessage(aiText);

IfNotifications.sendRichNotification.setTitle("AI Assistant:");
One small note here: the exact object path can vary a bit depending on the API response. So if your provider returns a different JSON structure, this line may need a small tweak:
let aiText = jsonObject.choices[0].message.content;
Save the Applet and publish it.
Then trigger it from your phone or test source. If everything is set up right, IFTTT will:
And yes, that means one button tap can turn into a joke, summary, alert, or any other AI response you want.
One useful bonus: IFTTT now also offers filter code generators in the web Applet composer for Pro+ users, which can speed up the setup if you do not want to write every line manually.
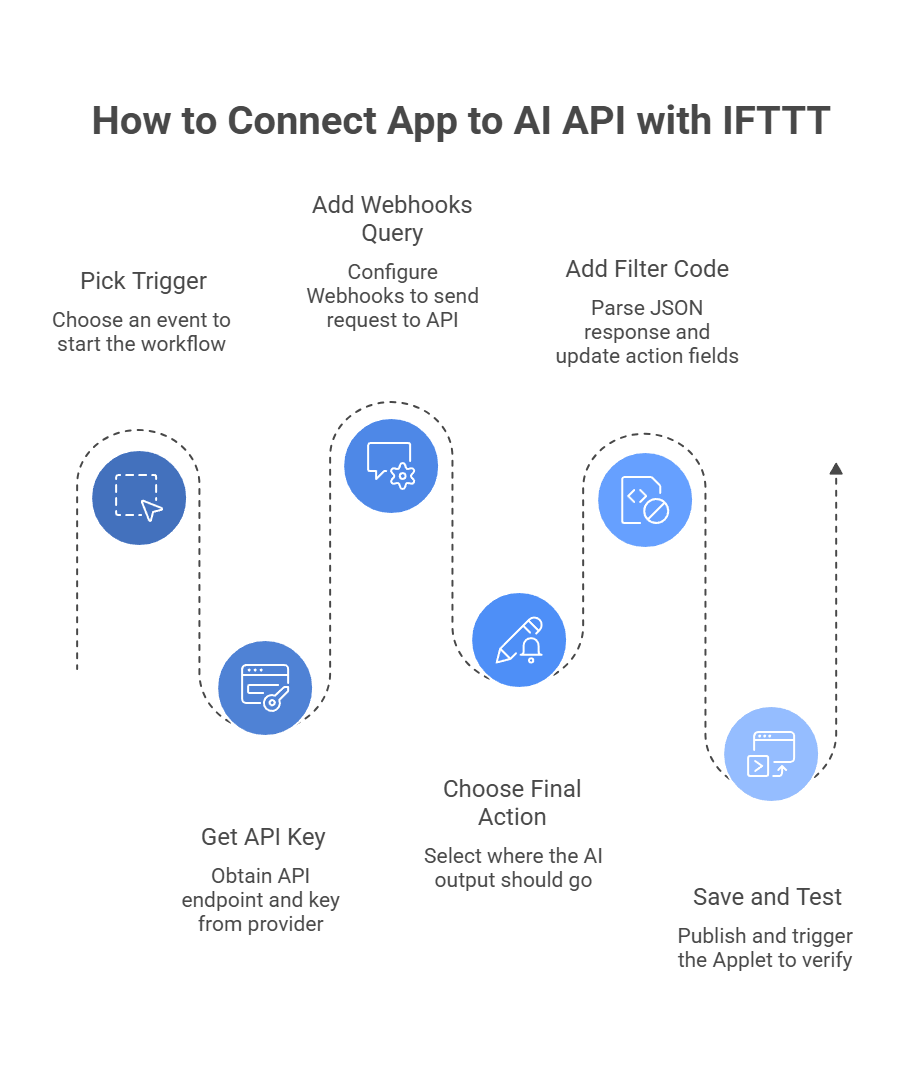
IFTTT is handy for lightweight AI automations, but it can break fast if the JSON is messy, the response is too slow, or the trigger fires too often. Here is the cleaner version:
| Pitfall | What goes wrong | How to avoid it |
| Broken JSON payloads | Quotes, line breaks, or messy text can break the request and trigger a 400 error. | Clean the text with Filter Code before sending it. |
| Slow AI responses | If the model takes too long, the request fails. | Use shorter prompts and faster models. |
| Wrong plan level | Lower tiers do not support the full query + parsing setup. | Check that you are on Pro+ before building. |
| Too many triggers at once | A noisy trigger can send too many requests and hit limits. | Use quieter triggers or add guardrails in filter code. |
| Parsing the wrong field | The AI reply may sit deep inside the JSON, so the action sends blank output. | Test the response and extract the exact field you need. |
| Using IFTTT like a full backend | Heavy logic or long workflows can hit platform limits. | Keep IFTTT for fast, simple AI tasks. |
So the safe rule is pretty simple: keep the request fast, keep the JSON clean, make sure you are on Pro+, and do not let a noisy trigger spam your AI endpoint.
IFTTT is one of the easiest ways to connect AI with everyday actions in the physical and digital world. Once you start using Webhook Queries and Filter Code, simple triggers can become much more useful. A smart home event, a saved song, or a form submission can all trigger AI-driven logic that feels far more customized and intelligent.
The catch is that IFTTT workflows depend on speed and consistency. When requests take too long or a provider hits a limit, the automation can fail quietly in the background. That makes your setup less dependable, especially when it runs without someone watching it.
A cleaner way to handle that is to send your IFTTT webhooks through LLMAPI. That gives you one unified AI gateway instead of tying everything to a single provider. It also gives your automations more room to stay stable when one model is slow, unavailable, or no longer the right fit.
Why use LLMAPI with IFTTT?
If you want your IFTTT AI workflows to feel smarter without becoming harder to maintain, LLMAPI is a strong layer to add. It helps keep the automation simple on the surface while making the AI side more flexible and reliable underneath.
Usually, yes. To send API requests and then transform the response inside IFTTT, you typically need Queries and Filter Code, which are tied to IFTTT Pro+.
IFTTT Webhooks have short timeout limits. If a model is slow, the Applet can fail. Routing through LLMAPI lets you use fallbacks to faster equivalent models, which helps keep responses within IFTTT’s limits.
Yes. That’s one of IFTTT’s strengths. You can trigger from motion sensors/cameras or voice assistants, send the event to an AI for analysis, then use the result to run another smart home action.
LLMAPI standardizes requests and responses to a consistent schema, so you usually don’t need to rewrite your payload or Filter Code. To switch models, you typically just update the model value (for example, “gpt-4o” → “claude-3-5-sonnet”).
Most of the time it’s malformed JSON. Ingredients like email bodies can include quotes and line breaks that break JSON formatting. Check that your payload is valid JSON and that your Content-Type is set to application/json.
AI has moved past the hype stage. It is now part of how companies save time, cut repetitive work, and handle tasks that used to take hours. Customer support, report writing, research, data analysis, internal search, all of this can now move faster with the right setup.
But here is the hard part: how do you go from “we tried a few AI tools” to a workflow your team can actually use every day?
Below, we look at the real value of AI adoption, a practical 7-step path to make it work, and how tools like LLM API can make the whole process much easier.
So, why do companies bother with AI workflows in the first place? Because the payoff is not abstract. The value usually shows up in support queues, reporting time, routine back-office tasks, and how fast teams can react.
Here is where the gains tend to show up first:
AI is good at repetitive work with clear rules, such as ticket sorting, first-pass replies, document summaries, and data entry checks. In customer support, that can mean AI handles simple requests first, while human agents focus on edge cases, angry customers, or high-value accounts.
Once part of a workflow moves from manual work to automated steps, the cost per task often drops. A practical example: instead of paying people to manually tag every support ticket or build the same weekly report by hand, AI can do the first pass and cut down rework.
In IBM’s 2025 research on intelligent automation, organizations attributed a 31% reduction in IT costs to automation. McKinsey’s 2025 AI survey also found that respondents most often reported cost benefits from AI in software engineering, manufacturing, and IT.
AI workflows do not clock out at 5 p.m. A support bot can answer common questions overnight. A document pipeline can process incoming files while your team sleeps. A global company can cover more time zones without hiring a full team for each one. Intercom’s 2026 customer service research describes support teams reshaping around AI agents as part of everyday operations.
AI can also speed up the path from raw data to action. Instead of waiting days for someone to clean data, build slides, and write a summary, leaders can get faster drafts and real-time signals.
Microsoft shared one 2025 example where a bank reduced report errors by 40%, cut analytics time, and sped up decision-making by 50% after rolling out Microsoft Fabric and Power BI. McKinsey also points to AI and data-driven systems as tools that improve decision-making and automate recurring decisions.
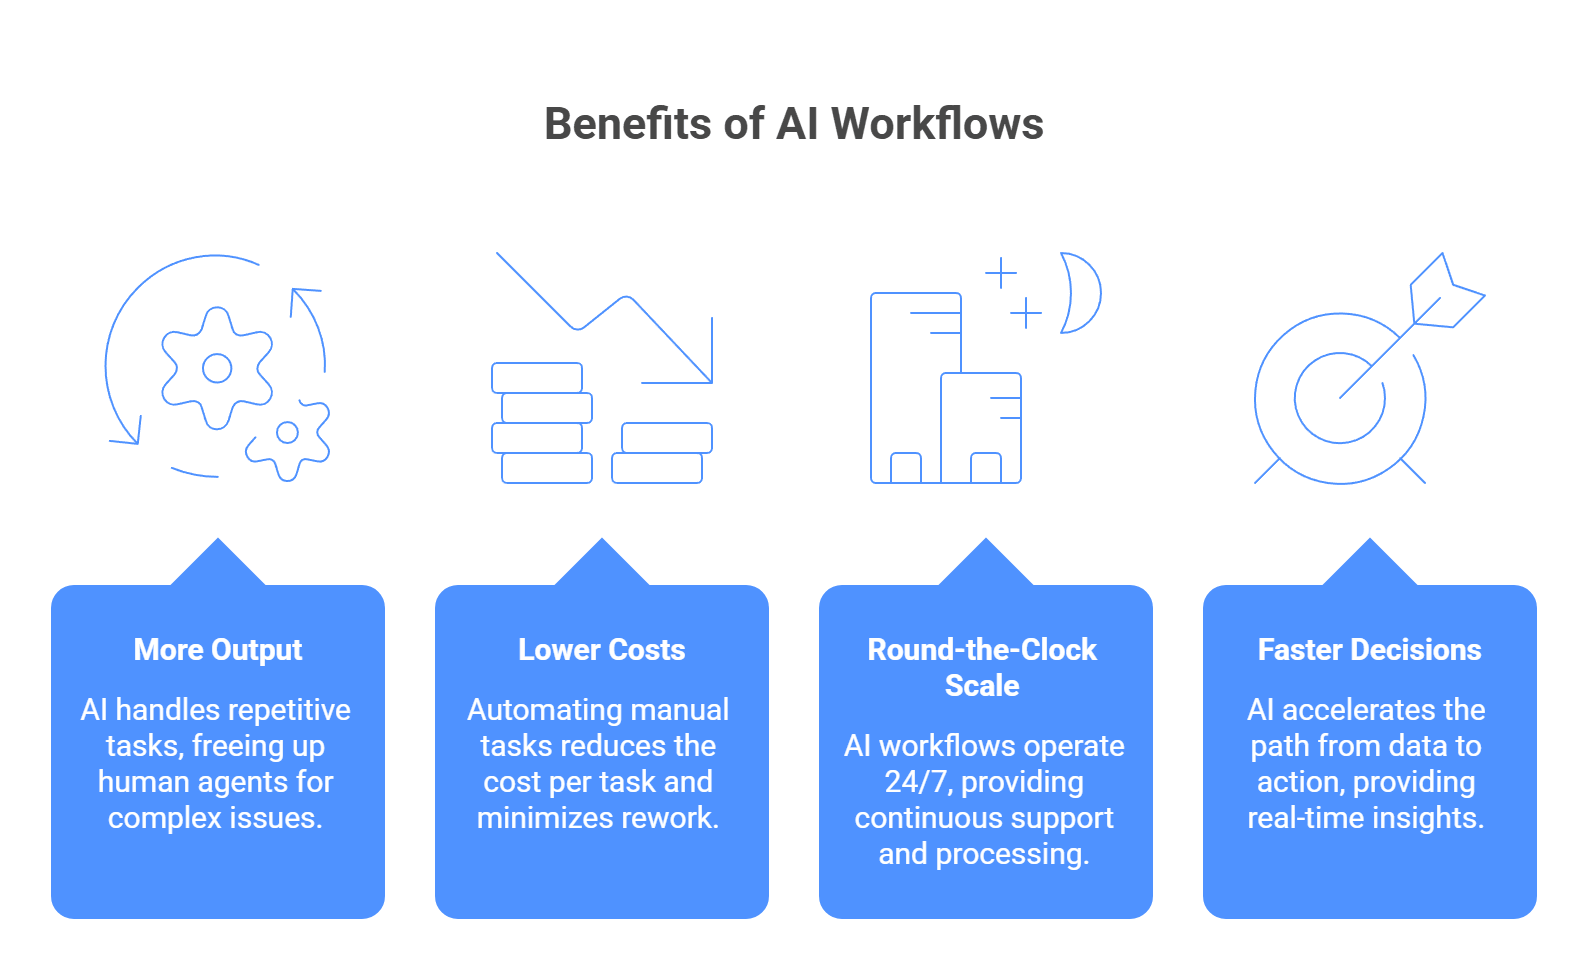
So the real question is less “Why adopt AI?” and more “Which part of your work still eats hours every week for no good reason?” That is usually where the first useful AI workflow starts.
AI adoption works best when it follows a clear path. Not a giant company-wide jump. Not ten tools at once. Just a smart rollout with a real use case, clean data, the right setup, and room to learn.
Here is a simpler way to approach it, with real examples that fit each step.
Do not try to automate half the company on day one. Start where the work is repetitive, easy to spot, and annoying enough that people will gladly hand it over.
A good example is meeting follow-up. Microsoft Teams Recap already helps teams review transcripts, files, and shared content after meetings, and Microsoft Copilot for Sales now lets sellers save AI-generated meeting summaries straight into CRM from Teams. That is a very practical first workflow: less manual note logging, less context switching, and faster follow-up.
Want AI to answer questions from your company docs? Then those docs need some order first. If the source is messy, outdated, or full of contradictions, the output will be messy too.
AWS makes this point very clearly in its RAG guidance. Better parsing, chunking, and query reformulation help improve answer quality, which tells you the same basic truth: document prep matters. This step is less flashy, but it saves a lot of pain later.
Most businesses do not need to build a model from scratch. They need a reliable way to access the right models for the job, whether that means text, search, summaries, or structured output.
That is why many teams prefer flexible model access instead of tying everything to one provider. OpenRouter, for example, offers one API across many model providers and normalizes requests and responses, which shows why aggregator-style setups appeal to teams that want fewer rewrites later.
Before you roll anything out to the whole company, try it with one team, one workflow, and one goal. Ask a simple question: did this save time, cut manual work, or improve response speed?
Even a strong tool can flop if the team does not know what to do with it. People need examples, guardrails, and time to build confidence.
Microsoft has written openly about this part too. Its AI skilling and adoption materials focus on training teams, growing internal AI skills, and helping employees work with Copilot in a more practical way. One example: Bupa upskilled teams with Microsoft 365 Copilot and GitHub Copilot, then scaled many AI use cases across the company. That is a good reminder that adoption is not just about software. It is also about habits.
The real value shows up once AI becomes part of the tools your team already opens every day. CRM, support platform, internal search, dashboards, email, docs, that is where it starts to feel useful instead of experimental.
Microsoft’s Salesforce CRM connector for Microsoft 365 Copilot is a simple example. It lets organizations index Salesforce contacts, leads, cases, and accounts so users can search that content from Microsoft Search and Copilot. Salesforce also highlights AI call summaries and predictive features inside CRM workflows. That is what integration should look like: fewer app jumps, more useful context inside the system people already use.
Once a workflow is live, the job is not over. You still need to watch quality, cost, latency, and bad outputs. Otherwise, small issues grow quietly. In plain terms: check what the model says, how much it costs, where it fails, and whether it still helps enough to justify expansion into other teams.
A simple way to think about the whole process: pick one annoying task, clean the data, choose flexible infrastructure, test on a small team, train people, plug it into your stack, then keep a close eye on quality and cost. That is usually how AI stops being a side experiment and starts becoming part of real work.
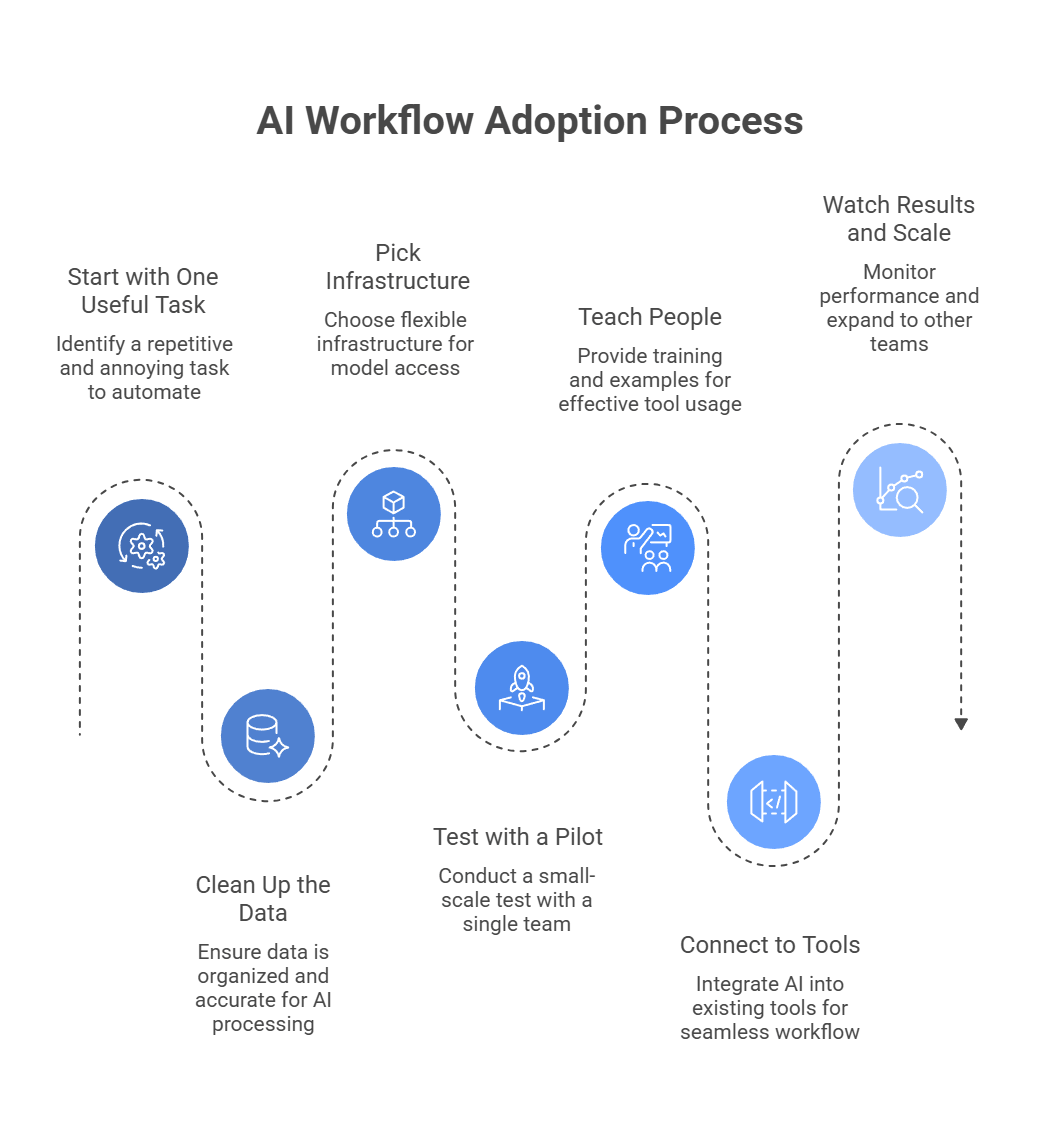
Even with a good plan, problems can still show up. A workflow may fail during peak hours, someone may paste sensitive data into the wrong tool, or the model may return an answer that sounds right but is not. These are some of the most common issues teams run into early on.
| Common issue | What this can look like | How to fix it |
| API rate limits and downtime | Your support bot works in the morning, then fails once traffic spikes. Some users get answers, others get errors. | Add routing and failover, so requests can move to another model if the first one fails. A unified router such as LLM API makes this much easier. |
| Data privacy concerns | An employee pastes a customer message with names, emails, or account details into a public AI tool. | Use enterprise-grade API access, limit who can send data, and redact sensitive details before requests go out. |
| Model hallucinations | AI answers a policy question and adds a rule that does not exist. The text sounds polished, so nobody notices right away. | Add human review for important tasks. Use strict prompts and RAG, so the model works from approved sources instead of guessing. |
| Prompt injection and bad inputs | A document contains hidden instructions that try to override your system rules. | Treat outside content as untrusted. Filter inputs and keep system instructions separate from retrieved content. |
| Messy or contradictory source data | The assistant pulls from two old docs that say different things, so the answer comes out mixed or wrong. | Clean the source data first. Remove outdated files and keep one clear source of truth for each topic. |
Once the strategy is clear, the next question is simple: what tools do you actually need to make it work?
Most teams do not need a huge stack. They need a few solid tools that cover three jobs: model access, workflow automation, and custom AI logic. That is the core setup for most real AI workflows.
This part matters once you use more than one model. Without a shared layer, teams end up with too many API keys, messy billing, custom failover logic, and extra work every time they want to test a new provider.
This is the layer that connects AI to the tools your team already uses. Think Slack, Gmail, CRMs, docs, forms, support tools, and internal alerts.
This category comes in when a simple prompt is no longer enough. If you want AI to work with your own documents, databases, tools, or multi-step tasks, this is where frameworks start to matter.
A simple way to choose: If you need one place to manage models, look at LLMAPI, Portkey, or LiteLLM. If you need AI to connect with business apps, look at Make, Zapier, or n8n. If you need custom RAG or agent behavior, look at LangChain, LlamaIndex, or Flowise.
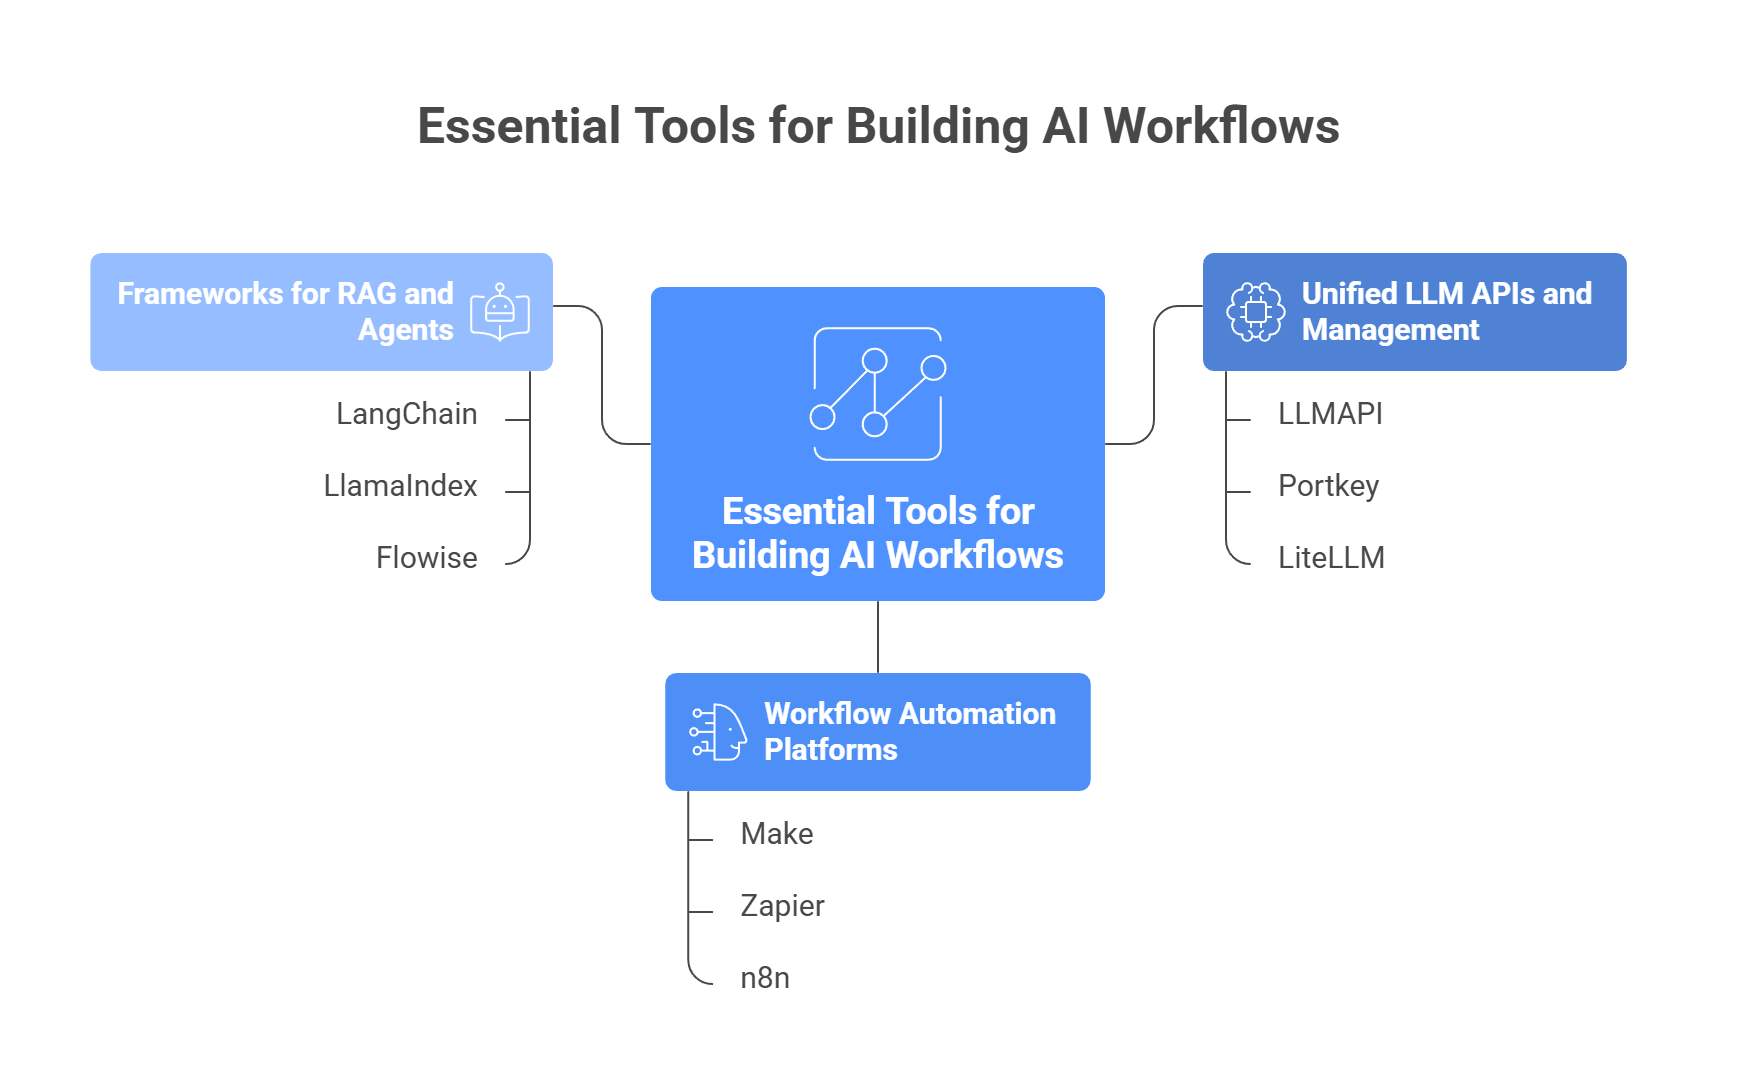
Before you scale an AI workflow, you need a simple way to prove that it is worth the cost. The easiest way is to track three things: time saved, cost per task, and error reduction. Those are the numbers that show whether the workflow helps the business or just looks impressive.
A practical formula many teams use is:
(Time saved per task × number of tasks × hourly labor cost) − AI cost
That gives you a basic efficiency ROI view. A 2025 ROI guide from Writer uses this same approach for generative AI programs.
Start with one task. Measure how long it takes a person to do it without AI, then compare that with the AI-assisted version.
For example:
Now multiply that by volume.
Then attach labor cost.
This kind of measurement is not just theoretical. Zapier’s 2025 case study on Remote says its AI-powered help desk saved 616 hours per month on IT support tickets and auto-resolved 27.5% of IT help desk tickets.
Once you know the labor cost of the old process, compare it to the AI cost.
A simple check:
This is where many teams get tripped up. They measure output, but forget usage costs, retries, failed calls, and tool subscriptions. ROI works best when you compare the full monthly AI cost against the full monthly labor cost avoided. That is also why cost tracking and budget controls matter in production AI setups. LiteLLM, for example, highlights budget tracking as part of its platform, and Writer’s ROI framework also treats solution cost as part of the core ROI formula.
This metric is easy to miss, but it matters a lot. If AI cuts typos, wrong tags, missing fields, or formatting mistakes, your team spends less time fixing work later.
A simple way to measure it:
Example:
That kind of drop matters because bad output costs time twice: once to create it, and again to fix it. Workflow optimization guides now regularly treat error reduction as a core AI performance metric alongside time saved and cost.
Use this before you call the workflow a success:
A good AI workflow should answer three questions clearly:
If the answer is yes to all three, you have something worth scaling. If not, the workflow probably needs a better use case, cleaner inputs, or tighter controls.
Adopting AI workflows can shift a business from reacting to problems to handling them earlier and more efficiently. The best way to start is usually simple: focus on a few high-value use cases, help your team get comfortable with the tools, and build on infrastructure that can adapt as AI keeps changing.
But even strong AI plans can get slowed down by technical complexity. Managing providers, APIs, and infrastructure across different tools can create extra work that pulls attention away from actual business goals.
That is where centralized API solutions can help. Instead of spending time on integration headaches, businesses can simplify access to models, reduce operational friction, and stay more flexible as their AI needs grow.
Why choose a centralized API like the LLM API solution?
If your goal is to build AI workflows that are practical, scalable, and easier to manage, a centralized API layer can make that process much smoother. It lets your team spend less time fixing infrastructure and more time creating better experiences for customers and employees.
With modern low-code tools and unified APIs, simple workflows (like email categorization or document summarization) can go live in days. Bigger, company-wide rollouts usually take a few months.
No. Data scientists help when you build custom models, but many useful workflows run on pre-trained models via APIs, which regular engineers can integrate. Ops teams can also build a lot with no-code tools.
LLM API works like a single gateway to multiple LLM providers. Instead of maintaining separate integrations, contracts, and billing for OpenAI, Google, and Anthropic, your team uses one standardized API.
If you rely on one provider, workflows can stop. With LLM API, you can set up automatic fallbacks so requests reroute to another model and your workflow keeps running.
Enterprise API endpoints typically have stronger privacy terms than consumer chat apps, and providers often say they don’t train on your data for those services. Still, it’s smart to mask PII before sending anything sensitive to an external API.