AI video looks a lot more usable in 2026. Leading models now focus on better motion, stronger scene consistency, and more control. Runway’s recent materials for Gen-4 and Gen-4.5 highlight improvements in motion quality, prompt adherence, visual fidelity, and consistency across scenes.
That matters because AI video is now useful for ad creatives, product demos, media workflows, and app features. The harder part is that the market moves fast and the model landscape is fragmented. That is why a unified layer like LLMAPI can be useful: one API setup is easier to maintain than rebuilding around each new video model.
The market is crowded, but a few names clearly lead it. The easiest way to compare them is by asking four questions: What does it do well? Who is it for? How do you use it? What are the trade-offs?
Kling is one of the strongest all-around options right now, especially when you care about motion realism, longer clips, and story-style output. Its own developer materials highlight up to 15-second generation, scene cuts, storyboard-style control, and ultra-high-definition output. Third-party testing and reviews also keep pointing to its strong handling of gravity, balance, fabric, and action-heavy motion.
Main features:
Best for:
Start with a short storyboard, not one giant prompt. Define the subject, action, camera feel, and mood first. Then add reference images or scene notes if you want stronger continuity across shots. Kling tends to reward clearer direction when the scene is busy.
| Pros | Cons |
| Strong motion realism | More moving parts in setup |
| Longer clip length | Can be overkill for simple clips |
| Good multi-shot storytelling | API workflows can get messy if you want polished automation |
| Native audio support | |
| High-resolution output options |
Veo is one of the strongest choices for polished, premium-looking output. Google positions Veo 3 around native audio, strong prompt adherence, realism, and physics. Vertex AI also lists multiple Veo variants, including Veo 3, Veo 3 Fast, and Veo 3.1 Lite, which makes it easier to choose between quality and speed.
Main features:
Best for:
Use Veo when the shot needs to feel premium and controlled. Write prompts like a director: subject, environment, lighting, movement, and sound. If consistency matters, use reference images and keep each shot focused instead of trying to force too many scene changes into one request.
| Pros | Cons |
| Native audio generation | Can be slower on premium generations |
| Strong cinematic quality | Best experience often ties into Google’s ecosystem |
| Excellent prompt adherence | Not always the cheapest option for high volume |
| Good image-to-video tools | |
| Multiple model tiers for cost/speed |
Runway stays very strong when you want more control. Its current materials focus on visual fidelity, prompt adherence, creative control, and consistent characters, objects, and locations across scenes. Motion Brush and camera-direction workflows remain part of why creative teams like it so much.
Main features:
Best for:
Runway works best when you already know the look you want. Start with a reference image or very visual prompt, then use motion and camera cues to shape the shot. This is a strong pick when the creative team wants hands-on control instead of “type prompt and hope.”
| Pros | Cons |
| Strong creative control | More manual direction needed |
| Good consistency tools | Can take longer to master |
| Motion Brush is useful | Better for crafted output than fast bulk generation |
| Great for image-to-video work | |
| Popular with professional creative teams |
Sora still matters because of its world-building, motion quality, and longer-form ambition. OpenAI says Sora can generate videos up to a minute long while keeping visual quality and prompt adherence. The API pricing page lists per-second video pricing, which makes cost planning easier than vague credit systems. One important current detail: OpenAI’s docs now say the Sora 2 video generation API is deprecated and will shut down on September 24, 2026.
Main features:
Best for:
Use Sora for bigger, more cinematic scenes that need room to unfold. Keep the prompt structured: environment, action, camera, timing, and visual style. But go in with your eyes open: if you are building a long-term workflow, the announced deprecation means you should avoid locking your whole strategy to Sora alone.
| Pros | Cons |
| Longer video potential | Expensive at higher settings |
| Strong scene/world understanding | API is already marked for deprecation |
| Good cinematic camera feel | Risky as a long-term single-model bet |
| Clear pricing per second | |
| Strong brand recognition |
These are worth grouping together because they are both strong when you need speed, cost control, and practical output, not just headline demos. Wan 2.7 is getting attention for editing, first-and-last-frame control, subject referencing, and natural-language video changes. Vidu Q3 stands out for 16-second clips, native audio-video generation, and precise camera control.
Main features:
Best for:
Use Wan when you need to revise or reshape existing shots more flexibly. Use Vidu when you want finished clips with audio already baked in. These models make the most sense when speed and repeatable throughput matter a lot.
| Pros | Cons |
| Better for faster turnaround | Less prestige than the biggest flagship names |
| More budget-friendly positioning | Quality can vary more by use case |
| Useful editing/control features | Fewer teams already have established workflows around them |
| Vidu supports native audio-video output | |
| Good fit for scaled content production |
| Model | Best at | Best for | Biggest caution |
| Kling AI 3.0 | Motion realism and story-style clips | cinematic social, action, branded stories | setup can get more complex |
| Google Veo | Premium visual polish + native audio | commercials, premium marketing, product visuals | slower and often pricier |
| Runway | Fine creative control | agencies, editors, brand teams | takes more hands-on direction |
| Sora 2 | Longer cinematic generation | concept videos, premium storytelling | API is deprecated for Sep. 24, 2026 |
| Wan 2.7 / Vidu Q3 | Speed and scalable output | high-volume content, faster teams, budget-conscious users | not always the strongest for premium cinematic polish |
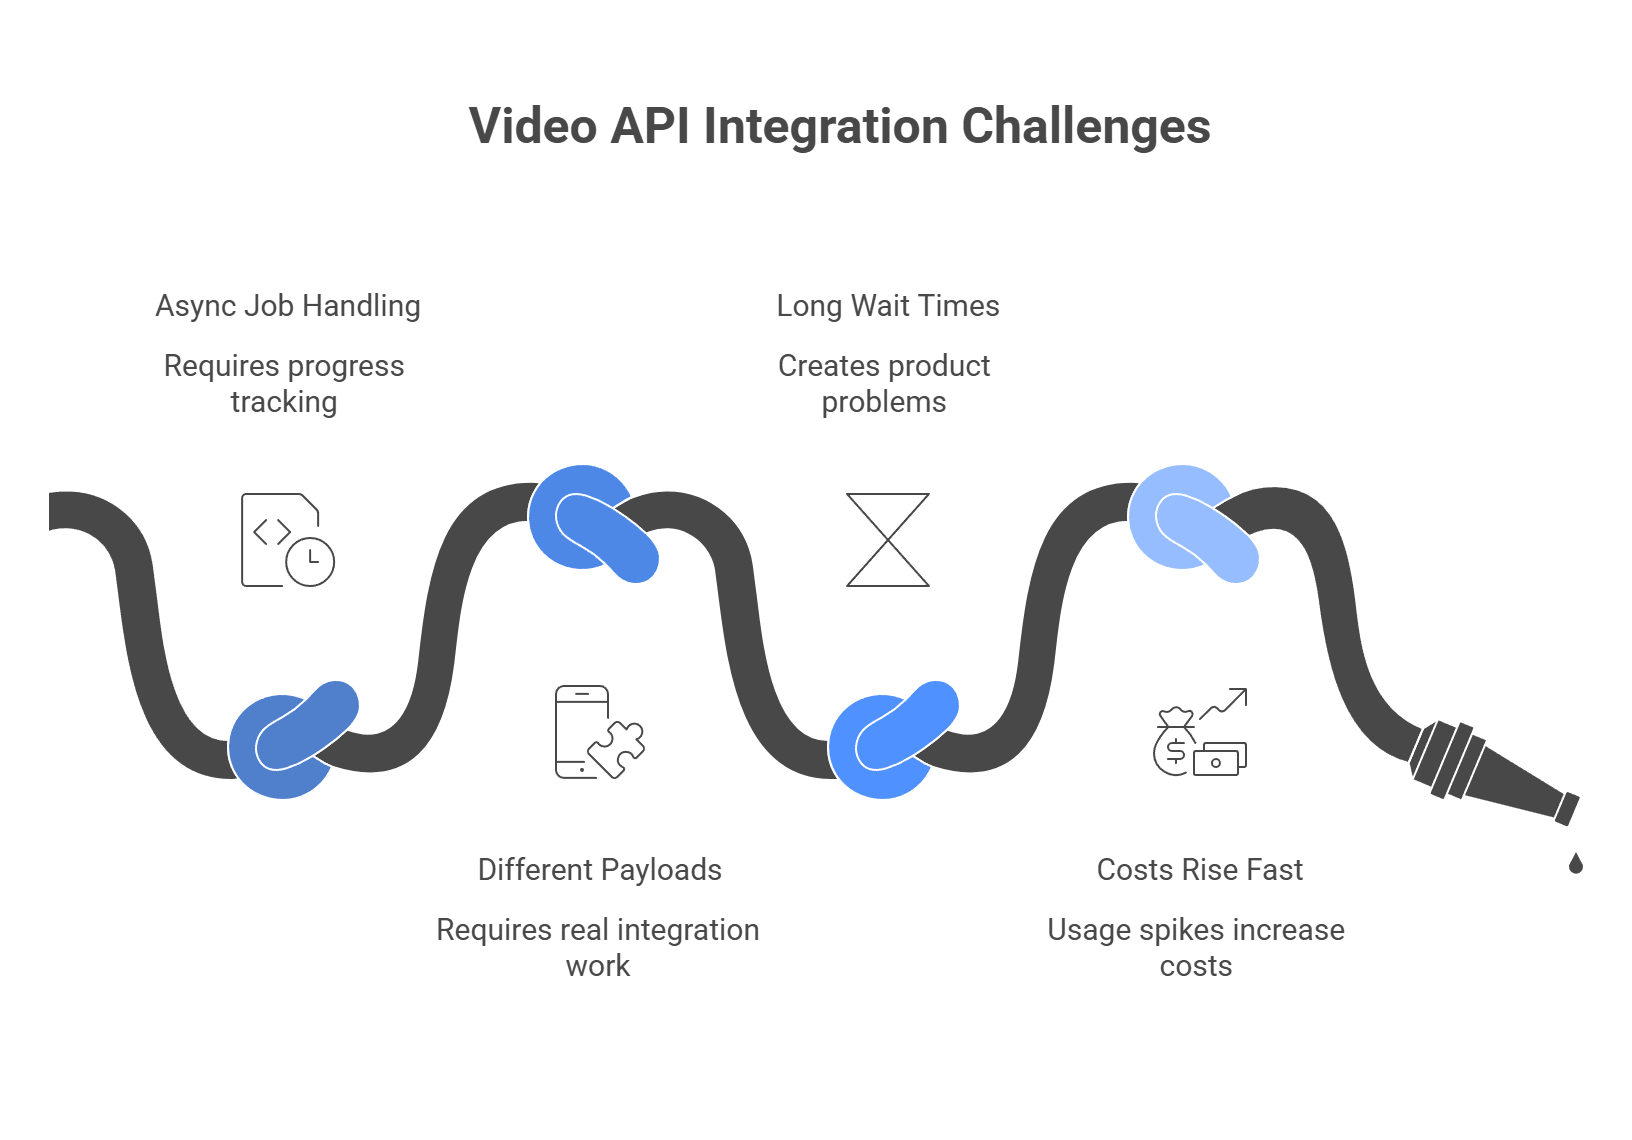
The models are impressive. The integration work usually is not. Video APIs behave very differently from text models. In many cases, you do not send a prompt and get a result back right away. You submit a job, get a task ID, then wait while the provider renders the video. That means extra work around polling, retries, status checks, and failed jobs.
Here are the biggest pain points:
So yes, the model quality is exciting. But the real challenge sits in the workflow around it: job orchestration, provider differences, wait-time handling, and cost control.
If you want to build an AI video app that can scale in 2026, one provider is usually not enough. Different models have different strengths, prices, wait times, and uptime. A unified API layer helps you avoid that mess and gives you more control over how your product works.
Here is why many teams use LLMAPI for video features:
Instead of building separate integrations for Kling, Runway, and Veo, you connect to one API endpoint through LLMAPI. You prepare the prompt and image input once, then switch models by changing the “model” value in your JSON payload. LLMAPI handles the provider-specific work on its side.
Video generation often takes time, and each provider tends to handle callbacks or status checks a bit differently. LLMAPI gives you one webhook format or one polling flow to check request status and fetch the final .mp4 output, no matter which model created the video.
When one provider slows down or starts to return errors, your app should still work. With LLMAPI, you can route requests to another model automatically. For example, if Kling runs into 503 errors, the request can move to Veo 3.2 or Runway Gen-4.5 instead. That helps keep your video button usable and cuts down on failed requests.
Not every request needs the most expensive model. LLMAPI lets you route traffic based on your product logic. Free users can use a faster, lower-cost model like Wan 2.7, while paid users can get higher-quality output from models such as Veo 3.2 or Sora Pro. This gives you a cleaner way to match cost with customer value.
Once you put an aggregator in the middle, the request flow gets much simpler. Instead of dealing with different payload formats, async patterns, and callback setups for each video provider, your app follows one consistent path from request to final file.
Unified video APIs commonly use this kind of async job flow: submit the request, get a job ID back right away, then poll for status or wait for a webhook when the render is done.
Your frontend sends a prompt, such as “A cinematic pan of a cyberpunk city in the rain,” plus an optional reference image, to LLMAPI’s video generation endpoint. From your side, it is one clean request format instead of a different integration for every model vendor.
LLMAPI receives the request, checks which provider is available, routes the call to the selected model or fallback model, and maps your payload to that provider’s required schema. This is one of the main reasons teams use unified AI gateways in the first place: the app talks to one API, while the gateway handles provider-specific differences behind the scenes.
Because video generation is a long-running task, the request does not stay open until the file is ready. Instead, LLMAPI returns a standardized job_id right away, usually with an initial status such as pending or queued.
Your frontend can then show a loading state while the job moves through the system. This async pattern is standard for video and other heavy AI workloads because it keeps the app responsive and makes status tracking much easier.
When the provider finishes the render, LLMAPI captures the result and sends the final output back through a consistent delivery path, such as a hosted file URL and a webhook to your server. Webhooks are widely used for this because they let the platform notify your backend as soon as the job is complete, instead of forcing your app to keep checking over and over.
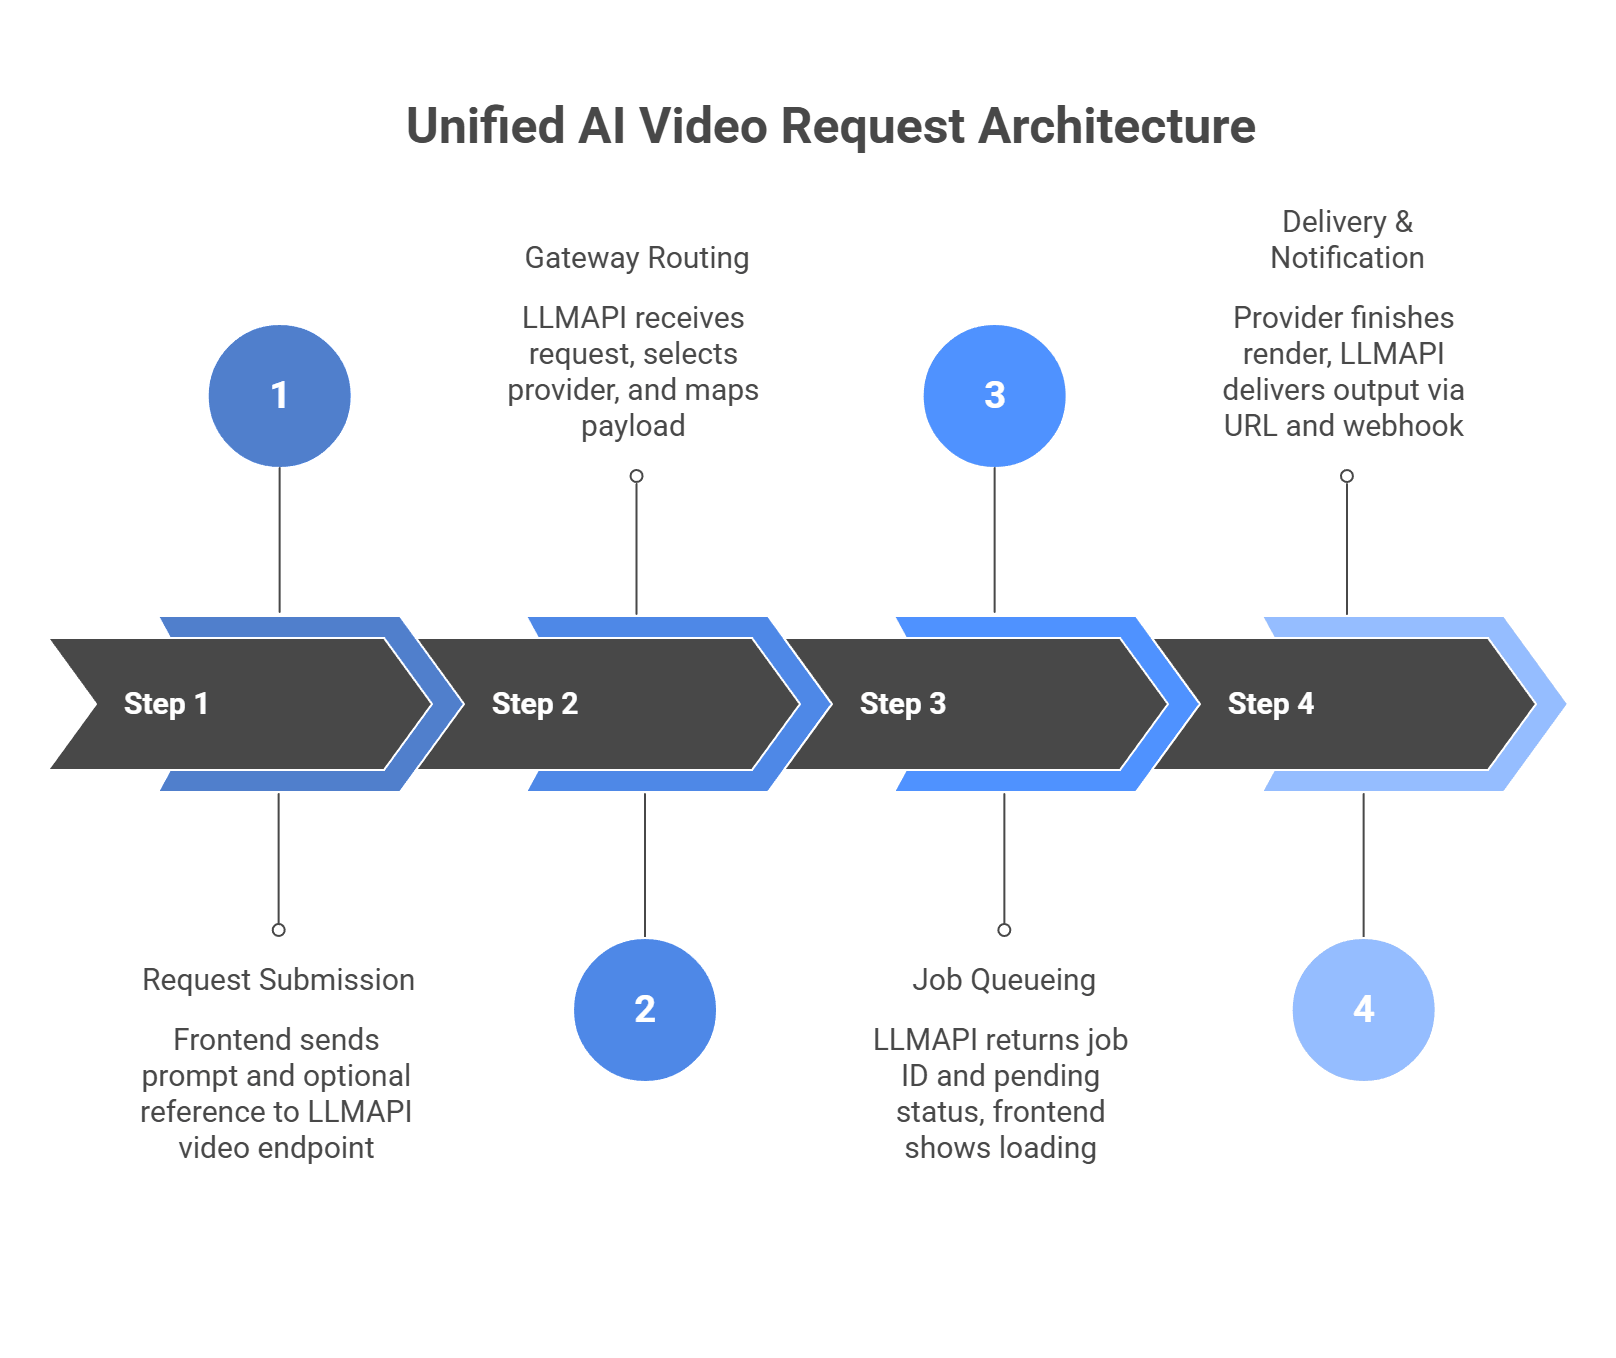
This structure is a big part of the appeal. Your team gets one request flow, one job format, and one delivery pattern, even when the actual video comes from different providers under the hood.
AI video is moving fast, and the top model today may not stay on top for long. Locking your product into one provider is a risky move when capabilities, pricing, and reliability can shift so quickly. If you want to stay competitive, your app needs room to adapt as the video ecosystem changes.
That is why flexibility matters just as much as raw model quality. A strong setup should let you explore different video tools, test what works best, and switch directions without turning every change into a full rebuild.
LLMAPI gives you a simpler way to do that. With one OpenAI-compatible API and access to 200+ models, it helps you keep your infrastructure more flexible underneath while avoiding the mess of fragmented integrations and billing. It also adds routing, fallback options, and usage visibility, which can make fast-moving AI video workflows easier to manage.
Why use LLMAPI for AI video workflows?
If you want to build AI video features without getting stuck rebuilding your stack every few months, LLMAPI is a natural layer to add. It helps you stay flexible, move faster, and spend more time building the product instead of managing provider chaos.
It depends on the model and quality. Fast “turbo” models can produce a ~5-second clip in under 15 seconds. High-fidelity cinematic models at 1080p/4K can take 3–8 minutes per clip.
Yes, many can. Some models support “character/element reference” modes where you pass a reference image (or a saved character ID) and the model keeps the face, outfit, and proportions consistent across scenes.
Costs vary a lot. Some hosted open-source setups can be around $0.10 per second of video. Premium proprietary models can be $0.50–$1.50+ per generation, depending on duration and resolution.
Direct integrations often have different auth methods and payload formats. With LLMAPI, you integrate once to a unified endpoint, then switch providers by changing the model name in your request.
Instead of keeping one long HTTP request open, it can return a job_id right away. Then it handles the long-running generation in the background and notifies your app (or lets you poll) when the final video is ready.
Machine translation used to get the point across, but the writing often felt awkward. Tone slipped, idioms sounded strange, and technical text needed cleanup.
LLMs changed that. Translation tools now focus much more on context and meaning, not just word swaps. Smartling and DeepL both now frame translation around stronger context handling in longer text and more adaptive workflows.
So what does that mean for you? If you build a multilingual app, manage localization, or need translated content that still sounds natural, the question is no longer just “Can AI translate this?” It is more like: Which model should handle it, when do you need human review, and how do you get output that actually sounds right for the audience? Below, we’ll break down the current AI translation landscape, the strongest model options, and how to get much better multilingual results with LLMs.
The big shift is simple: older translation systems mostly worked segment by segment. LLMs work with more context, more control, and more output flexibility. Traditional machine translation, including classic NMT setups, was built around paired sentence data and strong sentence-level translation. Google Cloud still separates NMT, custom models, glossaries, and newer Translation LLM workflows in its translation stack.
That difference matters because LLMs are better at problems translation teams deal with every day:
One important reality check: bigger context does not automatically mean perfect consistency. Google’s own developer forum has posts from users who say long-context performance can degrade in real use, so teams still need testing and QA instead of trusting the token limit on the label.
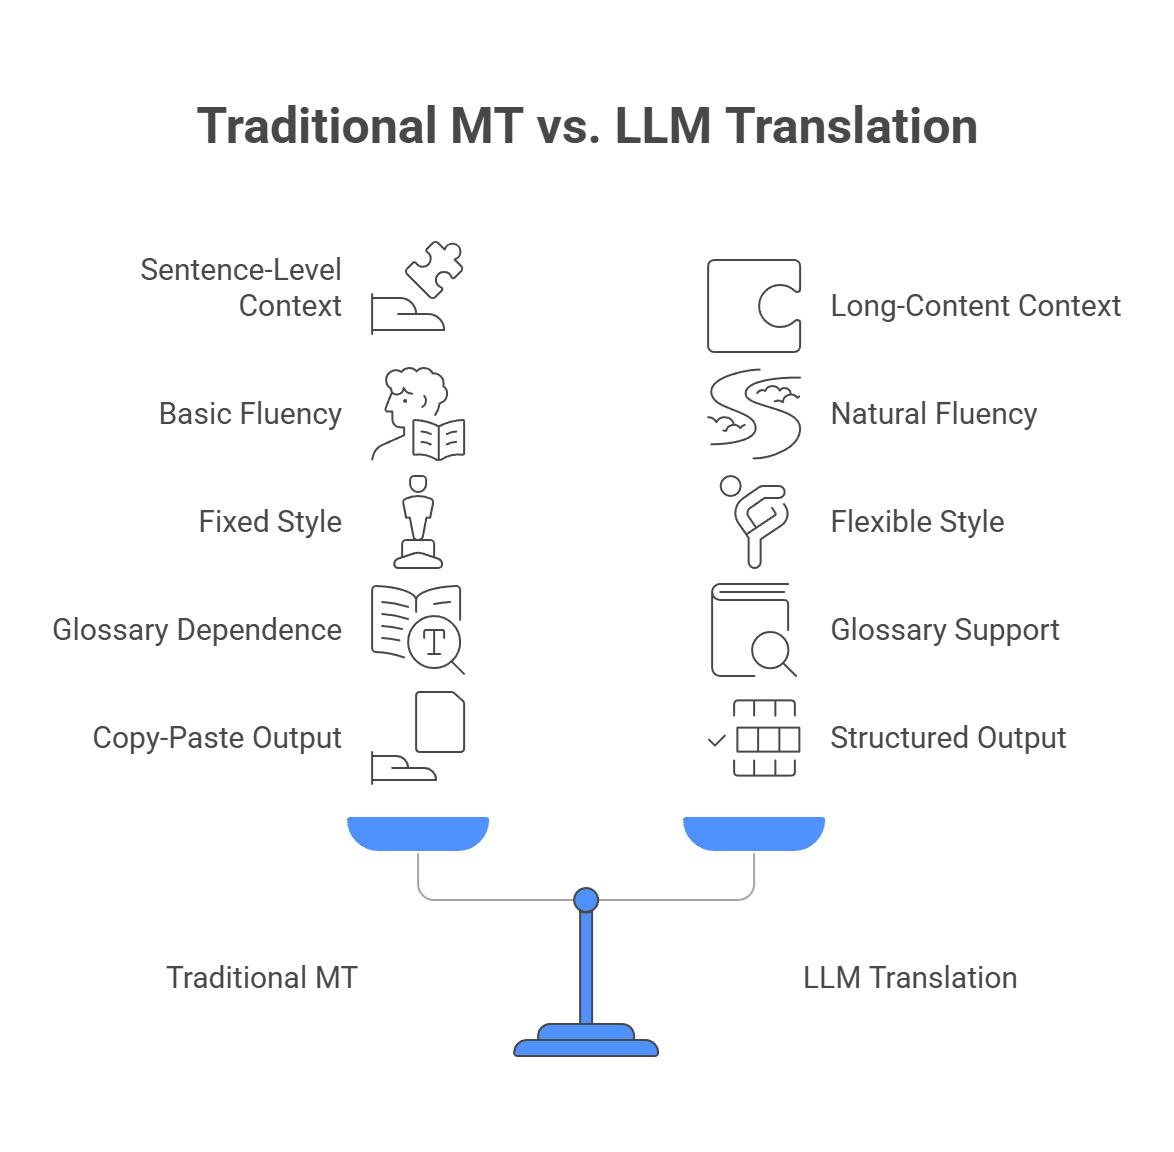
So no, LLMs did not “replace translation problems.” They changed the kind of control you have. That is the real upgrade: better fluency, better context handling, better style control, and better fit for real product workflows.
There is no single “best” model for every translation job. The right pick depends on what you translate: UI strings, legal docs, PDFs, product copy, low-resource languages, or bulk content at scale.
A cleaner way to choose is this:
Anthropic explicitly positions Claude as strong in multilingual tasks, including zero-shot work across languages. That makes it a good fit for teams that care about how the translation sounds, not just whether the meaning is technically correct.
For developers, Claude is especially useful when you need to load a long style guide, glossary, or product context before translation. Anthropic also supports prompt caching, which can help when you reuse the same large instructions across many translation requests.
For localization teams and content owners, Claude is a strong option for:
In practice, Claude makes the most sense when your biggest question is: Will this still sound human after translation?
OpenAI is a very practical choice when translated text has to fit into a product pipeline, not just a document. Its latest API models support multilingual input and structured outputs, and OpenAI’s Structured Outputs feature is specifically built to keep responses aligned to a JSON schema.
That matters a lot for developers. If you translate:
Then structure matters almost as much as language quality. OpenAI is a strong fit when the translation has to stay machine-readable and predictable. GPT-4.1 also offers a 1M-token context window and is positioned as strong at instruction following and tool calling.
For product and localization teams, OpenAI is usually the safer pick when you need one model that handles many languages and many content types without too much special tuning.
Gemini stands out when translation is not just plain text. Google’s docs say Gemini can process PDFs with native vision, handle up to 1000 PDF pages in document workflows, and work with long context at 1M+ tokens.
That makes it especially useful for:
For developers, Gemini is attractive when the translation task includes layout-aware or file-aware understanding, not just sentence conversion. If your source content includes charts, tables, screenshots, or visual references, Gemini has a real edge because it can interpret more than plain text.
For business users, Gemini is a strong option when the question is: Can the model understand the whole document, not just the text pulled out of it?
If cost matters a lot, or your product serves Chinese and nearby language markets heavily, Qwen and DeepSeek are worth serious attention.
Qwen’s official materials say the model family supports 119 languages in Qwen3 and expands to 201 languages and dialects in Qwen3.5. Qwen also released a translation-focused model, Qwen-MT, and positions it directly around translation quality and speed.
DeepSeek’s value is simpler: price. Its official API pricing page shows low per-token costs, which makes it attractive for high-volume translation pipelines where cost per million tokens matters.
For developers, these models make sense when you need:
For teams that ship lots of content every day, the question is often not “Which model is perfect?” but “Which model is good enough at a price we can scale?” That is where Qwen and DeepSeek become much more interesting.
DeepL is still not “just another LLM.” It remains a translation-focused platform, and its newer generation models are designed specifically for translation quality. DeepL says its next-gen model improved translation quality over its older classic model, and its developer docs now support custom instructions for tone, terminology, formatting, and domain-specific guidance.
For developers, that means DeepL is strong when you need:
For localization managers and non-technical teams, DeepL is often easier to justify when the task is straightforward professional translation and you want fewer moving parts. DeepL also supports document translation with layout preservation across major file formats.
Meta’s NLLB-200 project was built specifically to support 200 languages, including around 150 low-resource languages. That makes it important in cases where mainstream commercial APIs may not be the strongest fit.
For developers, NLLB is most relevant when:
For product teams, this is less about fancy output and more about reach. If your market includes languages many big tools handle weakly or inconsistently, NLLB deserves a look.
A plain prompt like “Translate this to French” can work for simple text. For anything customer-facing, technical, or brand-sensitive, that is usually not enough. Better translations come from better setup.
This is the fastest quality upgrade. Do not ask for a generic translation. Tell the model the role, audience, tone, and goal. For example:
This matters because modern LLM translation workflows are increasingly built around prompt control, not just raw language conversion. Smartling’s LLM translation docs, for example, explicitly position LLM translation around prompt-guided behavior and glossary-aware output.
A better prompt looks like this:
You are an expert bilingual copywriter for Gen-Z fashion brands. Translate this product description from English to Brazilian Portuguese. Keep it upbeat, trendy, and conversational.
That gives the model something much closer to a real translation brief.
This is where many teams mess up. If your brand always translates “Dashboard” one specific way, or your legal team uses fixed wording, pass that in. Do not hope the model guesses right every time.
Glossaries are still a core part of production translation. Smartling supports glossary term insertion for LLM translation, and DeepL’s API also supports glossaries directly in translation workflows. For developers, this usually means:
For localization teams, the point is simple: the more important the terminology, the less you should leave to chance. Smartling also describes glossaries as a way to preserve brand terminology across translations.
One-shot translation is fine for rough drafts. For production work, a review step helps a lot. A strong workflow looks like this:
You do not always need three separate models, but you should separate the tasks. One pass translates. Another checks whether anything was dropped, mistranslated, or made too literal.
This is especially useful for:
This is critical for developers. If you translate app files, JSON, XML, HTML, or placeholder-based strings, you need hard rules. For example:
This is where structured outputs help. OpenAI’s Structured Outputs feature is designed to keep responses aligned to a JSON schema, which is useful when translated content has to stay machine-readable.
A much safer prompt looks like this:
Translate the values in this JSON file to Spanish. Do not translate the keys. Do not translate placeholders such as {username}. Preserve the JSON structure exactly.
That one instruction can save a lot of cleanup later.
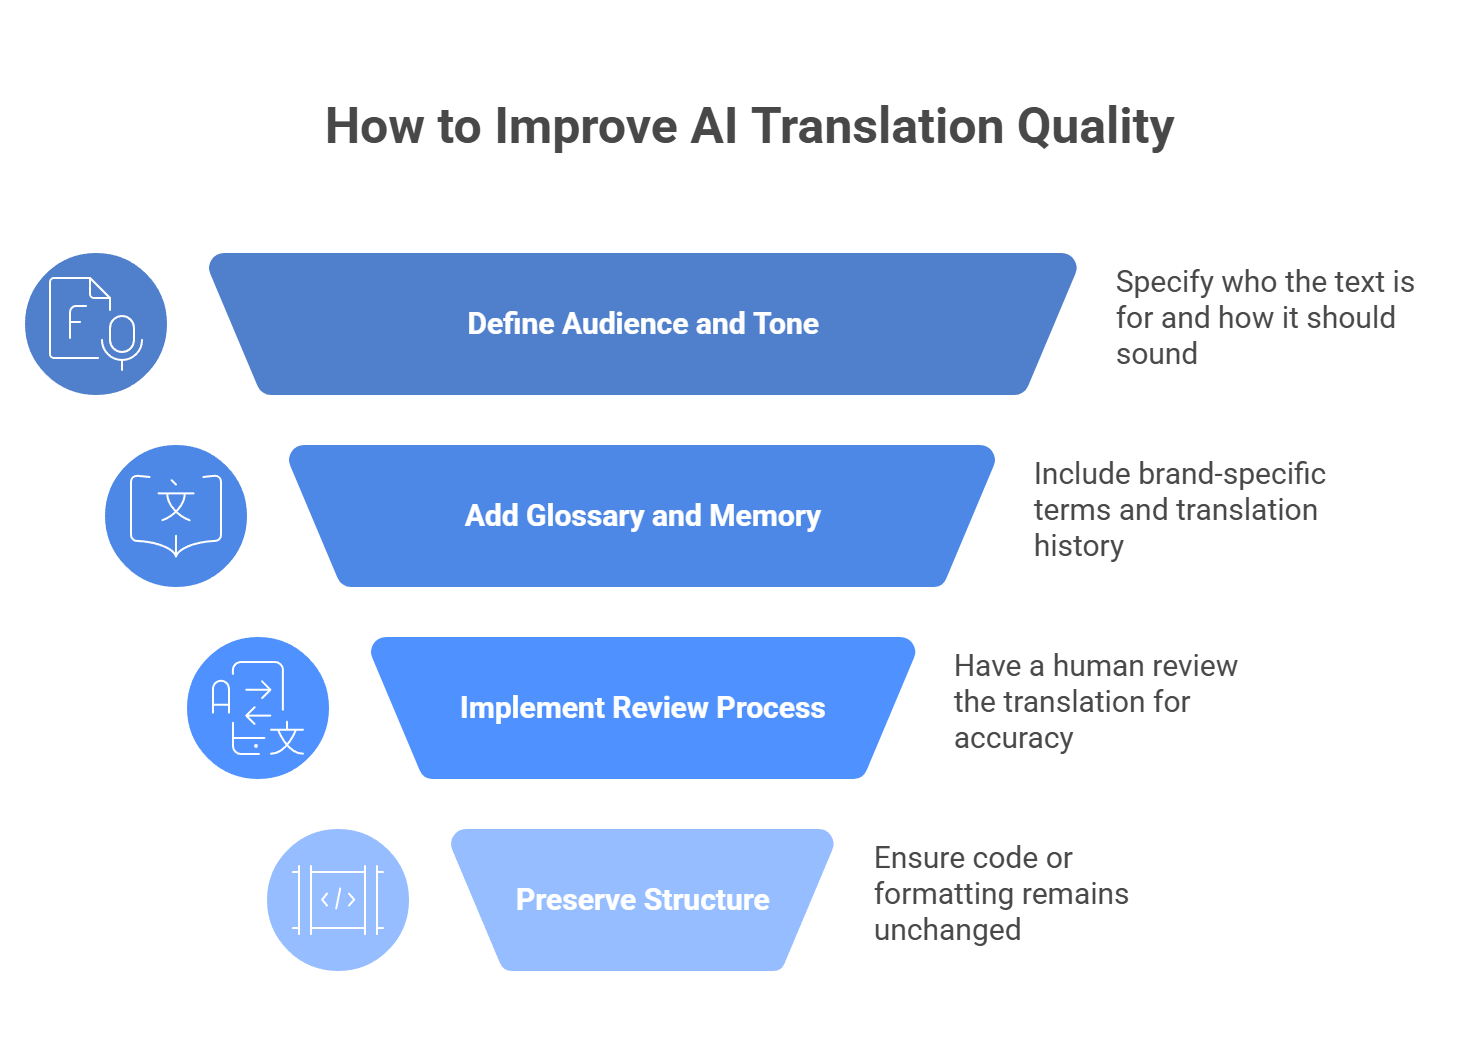
If you want better translation quality, do four things:
That is usually the difference between “good enough demo output” and something you can actually ship.
LLMs are good at making translations sound smooth. That is exactly why they still need human review in important cases. The problem is not always obvious broken output. The harder problem is plausible error, a sentence sounds natural, but one term, number, or legal nuance is wrong. Smartling’s docs explicitly warn that LLMs can produce hallucinations in translation and recommend keeping a human in the loop to validate and edit results.
That changes the human role. Instead of translating everything from scratch, people more often work as:
This matters most for:
And this is not just best-practice talk. Phrase notes that under the 2025 ACA language access rules, machine-translated healthcare content must be reviewed by a qualified human translator. So the smart model is not AI or human. It is AI plus human review where risk is high. A practical rule:
That is the setup that usually gives teams the best mix of speed, scale, and actual trust.
LLM-based translation has changed global communication. Instead of matching words one by one, modern models can preserve tone, context, and nuance more naturally. That gives teams a better way to localize marketing copy, product content, documentation, and user experiences without sounding robotic.
The challenge is that one model will not be the best fit for every task. A model that works well for brand messaging may not be ideal for technical content or multimodal files. That is why a flexible translation pipeline matters. It lets you choose the right model for each job instead of relying on one provider for everything.
This is where LLMAPI fits in naturally. It gives you one OpenAI-compatible API with access to 200+ models, so you can route translation workloads more flexibly, manage providers in one place, and switch models without rebuilding your integration.
Why use LLMAPI for translation workflows?
If you want to make your product, app, or content strategy more global without making your infrastructure more complicated, LLMAPI is a smart layer to add. It gives you the flexibility to choose the right model for each translation task while keeping the integration simple underneath.
For most professional work, yes. Traditional tools are great for fast, literal sentence-by-sentence translation. LLMs tend to do better with full documents because they keep context, maintain tone, and can follow style instructions (like “make it more formal”).
Yes. You can tell the model to translate only text values and keep keys, variables, and syntax unchanged. This keeps your structured files valid for your app.
Different models are strong in different languages and styles. LLMAPI lets you access multiple providers through one API, so you can route translations by target language or content type and get more consistent quality.
Outages happen. If you rely on one provider, your localization flow can break. With LLMAPI, you can use load balancing and failover to route requests to a backup model and keep translations running.
Use a simple glossary in your prompt. Add rules like “Never translate ‘CloudSync’” and “Translate ‘Dashboard’ as ‘Painel’.” This keeps brand terms and key jargon consistent.
Want to connect AI to your daily apps, smart home tools, or simple web workflows without building a full backend? IFTTT is one of the easiest ways to do it.
It works especially well when you want to connect events from consumer apps or devices to web requests, then send the result somewhere useful. IFTTT supports Webhooks, queries, and filter code, which means you can trigger a workflow, call an external API, and shape the result before the final action runs.
Below, let’s walk through how to build an IFTTT setup that listens for an event, sends data to an AI API, handles the response, and pushes that output back into your workflow.
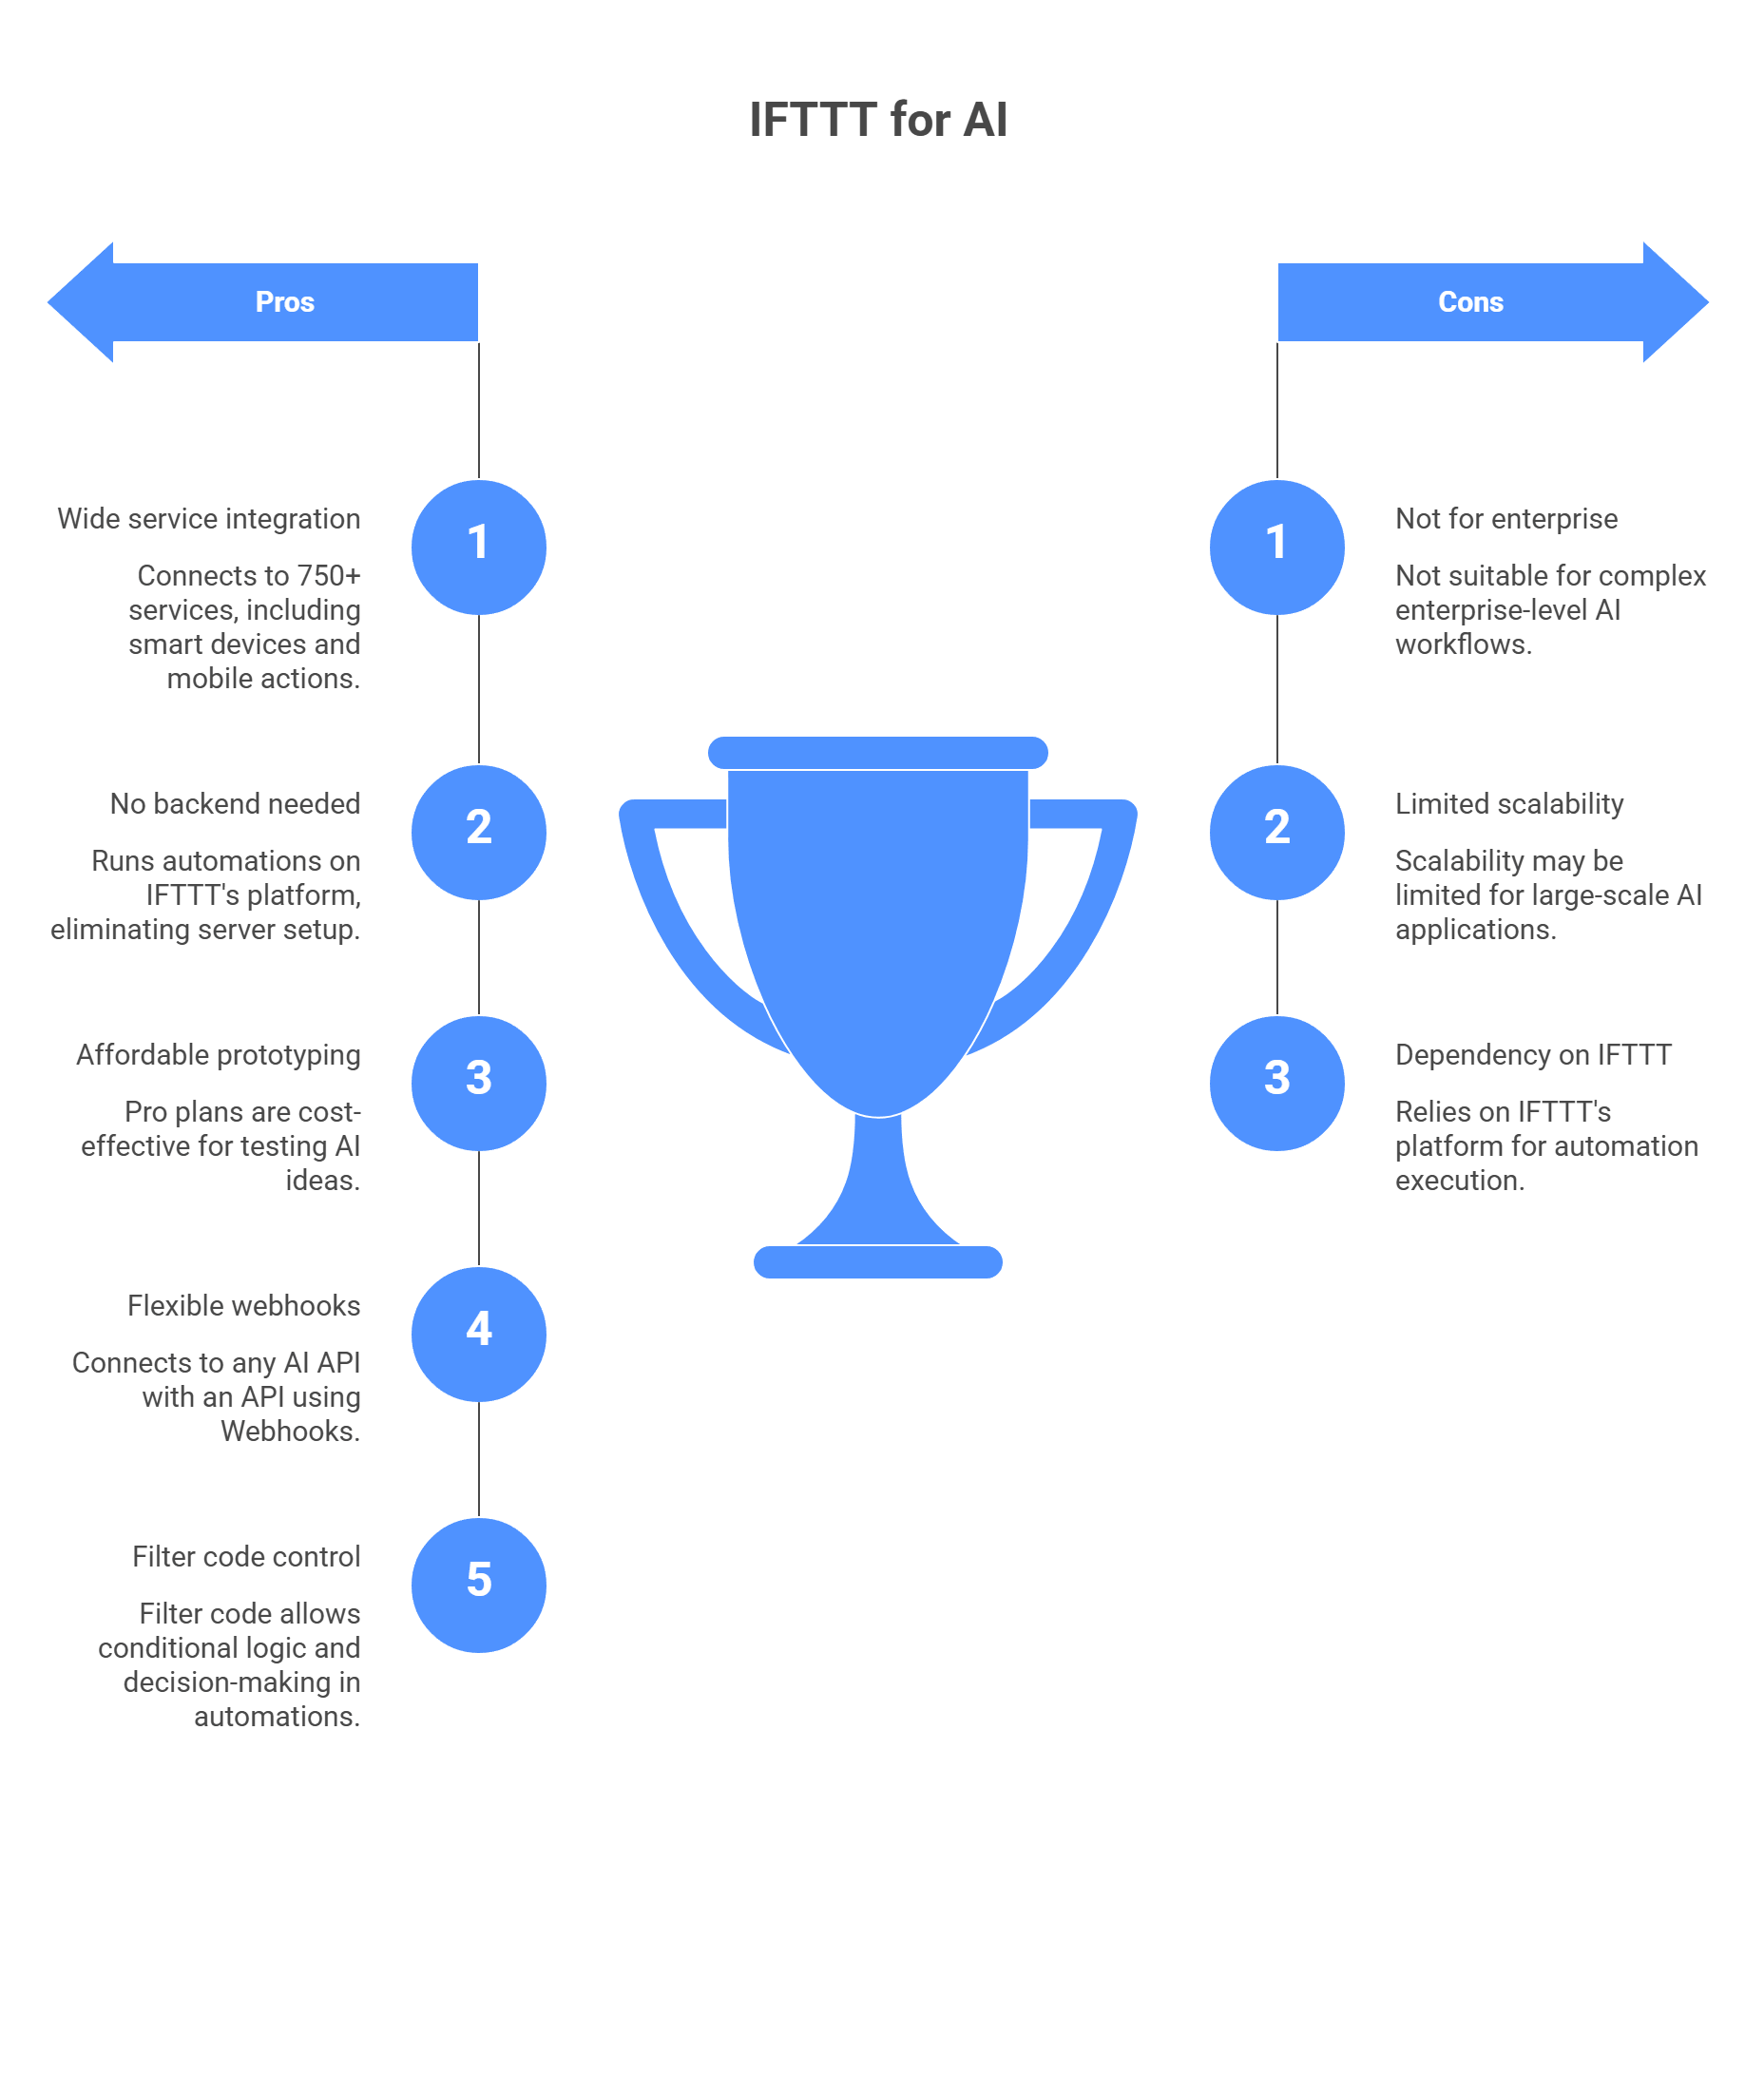
A lot of people skip IFTTT when they think about AI workflows. That is a mistake. If your project touches smart devices, mobile actions, or lightweight personal automations, IFTTT can be a surprisingly good fit.
Why does it work so well here?
So no, IFTTT is not the tool for every serious enterprise workflow. But if you want a fast, low-friction way to connect AI to phones, devices, simple app events, or personal automations, it is a lot more capable than people give it credit for.
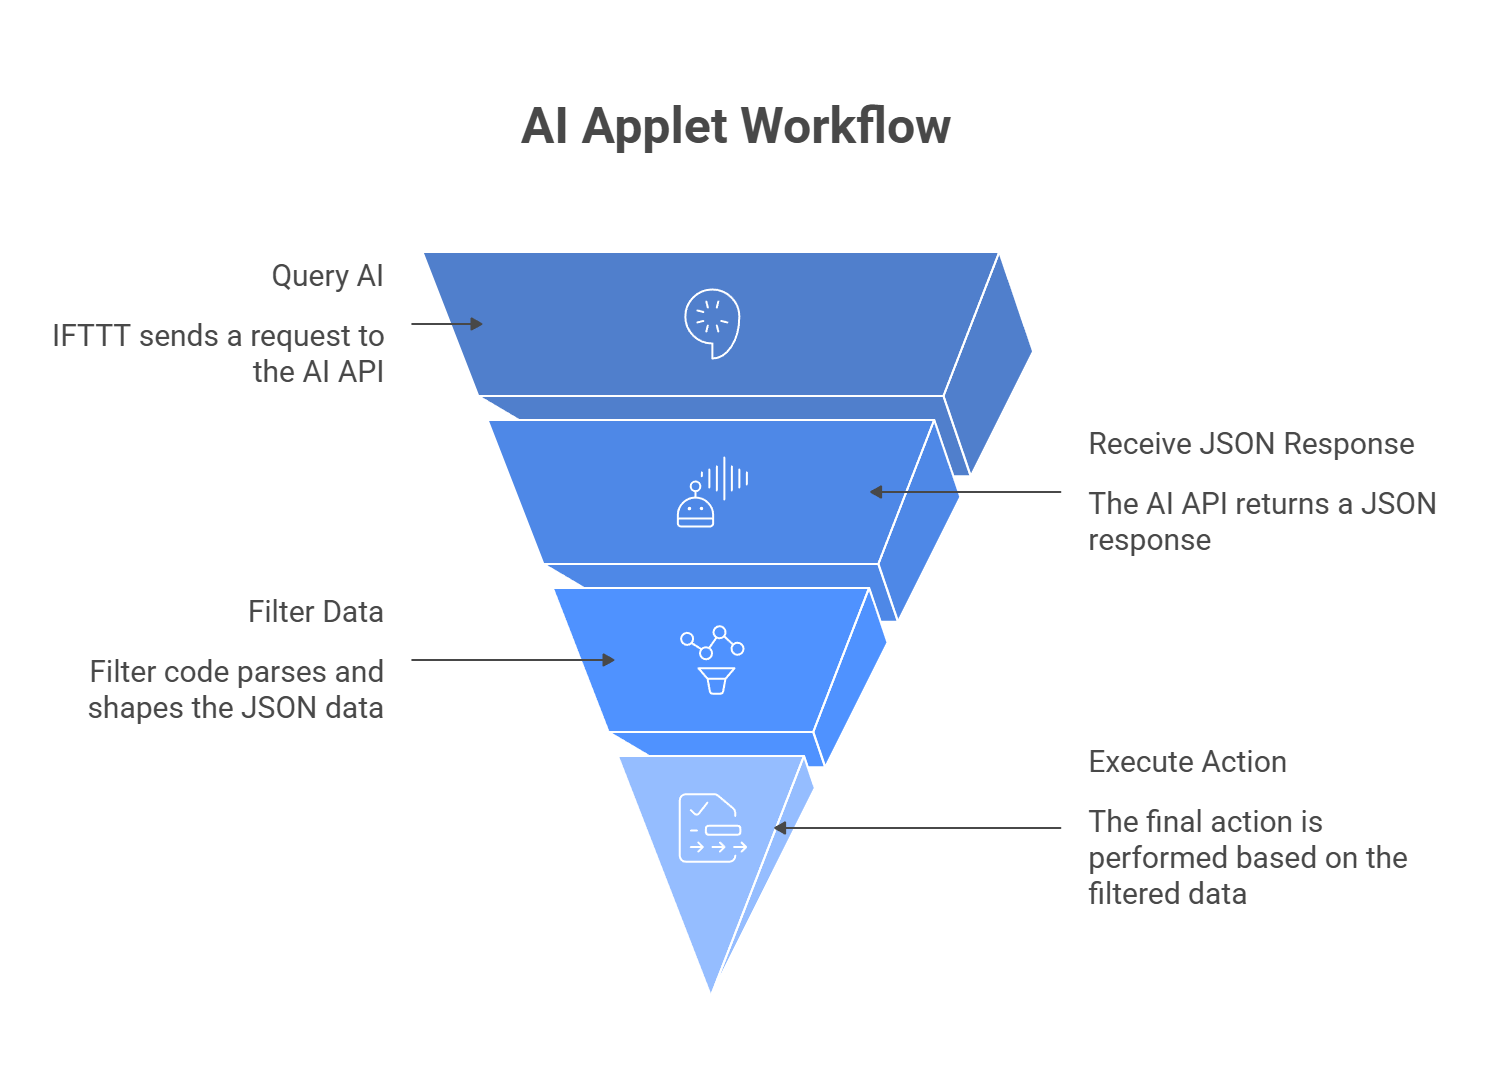
If you want IFTTT to do more than a basic two-step automation, you need a slightly smarter setup. The usual pattern is not just If This, Then That. It is more like: something happens, IFTTT asks the AI for help, filter code cleans up the response, then the final action runs. IFTTT’s own docs describe Applets as flows built from triggers, queries, and actions, and its Webhooks query with JSON response is designed to return the JSON body so you can parse it with filter code.
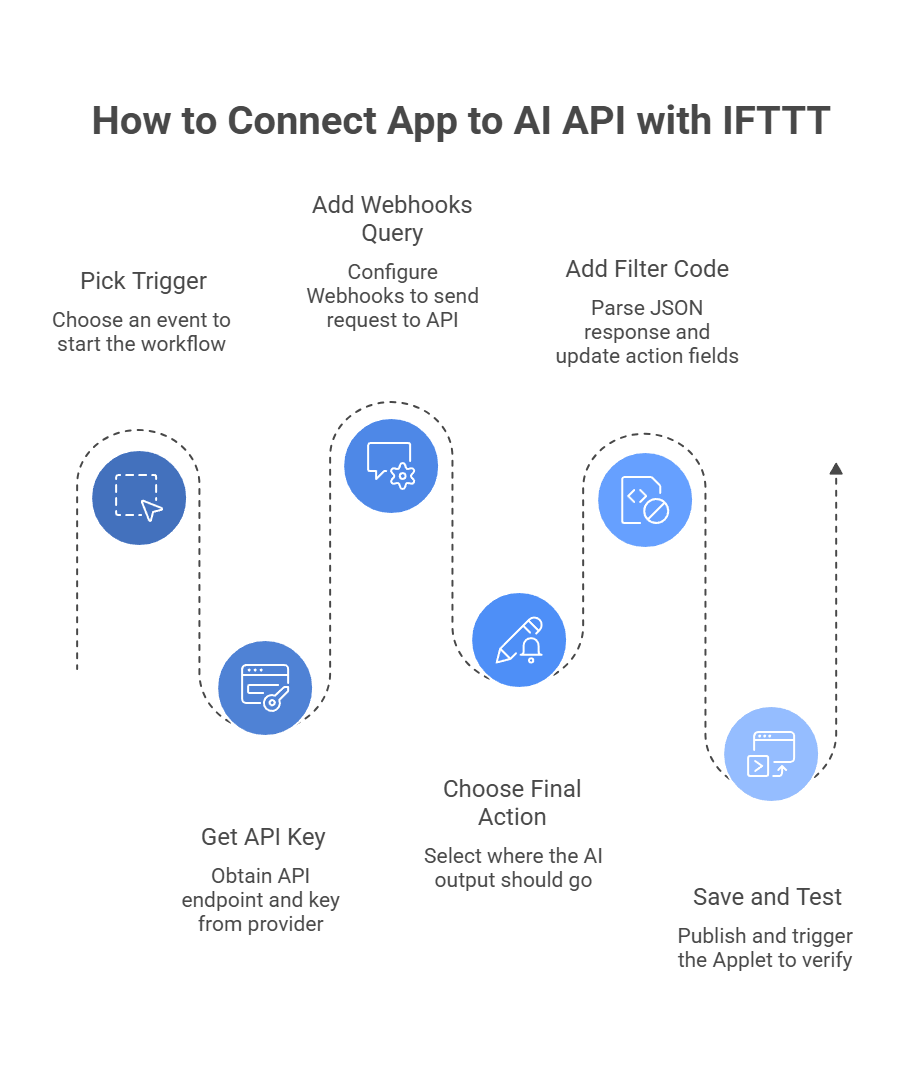
This is what starts the Applet. It could be a phone button, a new Gmail event, a smart-home sensor, or some other supported app event. In IFTTT’s structure, the trigger is the part that tells the Applet to begin.
This is the part that makes the AI call possible. Instead of jumping straight from trigger to action, you use a query, usually Make a web request with JSON response. That query sends the request to your AI API and returns the JSON response body back into the Applet. IFTTT explicitly says this query returns the JSON response body and that you can use filter code to parse it.
This is the bridge between the raw response and the useful output. AI APIs usually send back nested JSON, and IFTTT will not magically know which field you care about. Filter code lets you add JavaScript inside the Applet so you can parse the response, extract the text you want, and shape the data before the action runs. IFTTT’s help docs also note that JSON bodies can be parsed with filter code.
This is the final step, the part where the AI result actually gets used. That could mean sending yourself a Telegram message, writing a row into Google Sheets, or triggering some smart-home response based on the AI output. In IFTTT’s model, actions are the result of the Applet run.
So the full flow looks like this:
Trigger → Query → Filter Code → Action
That extra middle layer is what makes the setup feel much more useful. Without it, you just have a basic automation. With it, you get something that can actually react to data in a smarter way.
To build this kind of AI Applet, you will need IFTTT Pro+. IFTTT’s current plans and help pages say queries and filter code are Pro+ features, so the free plan and regular Pro plan are not enough for this setup.
Start in IFTTT and click Create.
Then click If This and choose the event that should start the workflow. For a simple test, the Button widget is a good option because it gives you a button you can tap on your phone to run the Applet manually.
This is the easiest way to test the whole AI flow before you connect it to something messier like email, location, or a smart-home event.
Before you build the web request, you need an API endpoint and a key.
You can use a single provider, but if you want more flexibility, you can also use a unified gateway such as llmapi.ai. That gives you one key and one endpoint while keeping the option to change models later without rebuilding the Applet.
That part matters more than it sounds. If the model choice changes later, it is much easier to swap the backend than rebuild the whole automation.
Now add the AI step.
Click the + button between the trigger and action, search for Webhooks, and choose Make a web request with JSON response. IFTTT’s Webhooks docs say this query returns the JSON response body, and that you can parse it with filter code.
Then fill it in like this:
In the Body field, send valid JSON. A simple starter example looks like this:
{

  "model": "gpt-4o",

  "messages": [

    {

      "role": "system",

      "content": "You are a witty assistant. Tell me a short, 2-sentence joke about automation."

    }

  ]

}
If your trigger includes text, you can insert an Ingredient into the prompt instead of hardcoding everything.
Next, click Then That and pick where the AI output should go.
For a simple test, Notifications works well. Choose Send a rich notification and put in placeholder text for now. You will replace it in the next step with the real AI output.
Now for the part that makes the response usable.
Go back to the Applet overview and click the Filter icon between the query and the action. IFTTT says filter code runs after the trigger fires and can change action field values before the action runs.\
Inside the JavaScript editor, parse the JSON response and pass the text to the notification.
A typical structure looks like this:
// Get the raw response body from the Webhooks query

let rawResponse = MakerWebhooks.makeWebRequestQueryJson.ResponseBody;

// Parse the JSON

let jsonObject = JSON.parse(rawResponse);

// Extract the model's reply

let aiText = jsonObject.choices[0].message.content;

// Replace the notification text

IfNotifications.sendRichNotification.setMessage(aiText);

IfNotifications.sendRichNotification.setTitle("AI Assistant:");
One small note here: the exact object path can vary a bit depending on the API response. So if your provider returns a different JSON structure, this line may need a small tweak:
let aiText = jsonObject.choices[0].message.content;
Save the Applet and publish it.
Then trigger it from your phone or test source. If everything is set up right, IFTTT will:
And yes, that means one button tap can turn into a joke, summary, alert, or any other AI response you want.
One useful bonus: IFTTT now also offers filter code generators in the web Applet composer for Pro+ users, which can speed up the setup if you do not want to write every line manually.
IFTTT is handy for lightweight AI automations, but it can break fast if the JSON is messy, the response is too slow, or the trigger fires too often. Here is the cleaner version:
| Pitfall | What goes wrong | How to avoid it |
| Broken JSON payloads | Quotes, line breaks, or messy text can break the request and trigger a 400 error. | Clean the text with Filter Code before sending it. |
| Slow AI responses | If the model takes too long, the request fails. | Use shorter prompts and faster models. |
| Wrong plan level | Lower tiers do not support the full query + parsing setup. | Check that you are on Pro+ before building. |
| Too many triggers at once | A noisy trigger can send too many requests and hit limits. | Use quieter triggers or add guardrails in filter code. |
| Parsing the wrong field | The AI reply may sit deep inside the JSON, so the action sends blank output. | Test the response and extract the exact field you need. |
| Using IFTTT like a full backend | Heavy logic or long workflows can hit platform limits. | Keep IFTTT for fast, simple AI tasks. |
So the safe rule is pretty simple: keep the request fast, keep the JSON clean, make sure you are on Pro+, and do not let a noisy trigger spam your AI endpoint.
IFTTT is one of the easiest ways to connect AI with everyday actions in the physical and digital world. Once you start using Webhook Queries and Filter Code, simple triggers can become much more useful. A smart home event, a saved song, or a form submission can all trigger AI-driven logic that feels far more customized and intelligent.
The catch is that IFTTT workflows depend on speed and consistency. When requests take too long or a provider hits a limit, the automation can fail quietly in the background. That makes your setup less dependable, especially when it runs without someone watching it.
A cleaner way to handle that is to send your IFTTT webhooks through LLMAPI. That gives you one unified AI gateway instead of tying everything to a single provider. It also gives your automations more room to stay stable when one model is slow, unavailable, or no longer the right fit.
Why use LLMAPI with IFTTT?
If you want your IFTTT AI workflows to feel smarter without becoming harder to maintain, LLMAPI is a strong layer to add. It helps keep the automation simple on the surface while making the AI side more flexible and reliable underneath.
Usually, yes. To send API requests and then transform the response inside IFTTT, you typically need Queries and Filter Code, which are tied to IFTTT Pro+.
IFTTT Webhooks have short timeout limits. If a model is slow, the Applet can fail. Routing through LLMAPI lets you use fallbacks to faster equivalent models, which helps keep responses within IFTTT’s limits.
Yes. That’s one of IFTTT’s strengths. You can trigger from motion sensors/cameras or voice assistants, send the event to an AI for analysis, then use the result to run another smart home action.
LLMAPI standardizes requests and responses to a consistent schema, so you usually don’t need to rewrite your payload or Filter Code. To switch models, you typically just update the model value (for example, “gpt-4o” → “claude-3-5-sonnet”).
Most of the time it’s malformed JSON. Ingredients like email bodies can include quotes and line breaks that break JSON formatting. Check that your payload is valid JSON and that your Content-Type is set to application/json.
Want to give your app an AI layer without building backend logic from scratch? Zapier makes that much easier.
You can use it to summarize support tickets, draft emails, sort feedback, and connect AI to the tools your team already uses. So instead of building everything yourself, you turn Zapier into the bridge between your app, your workflow, and the AI.
Below, let’s go step by step through how to make that work.
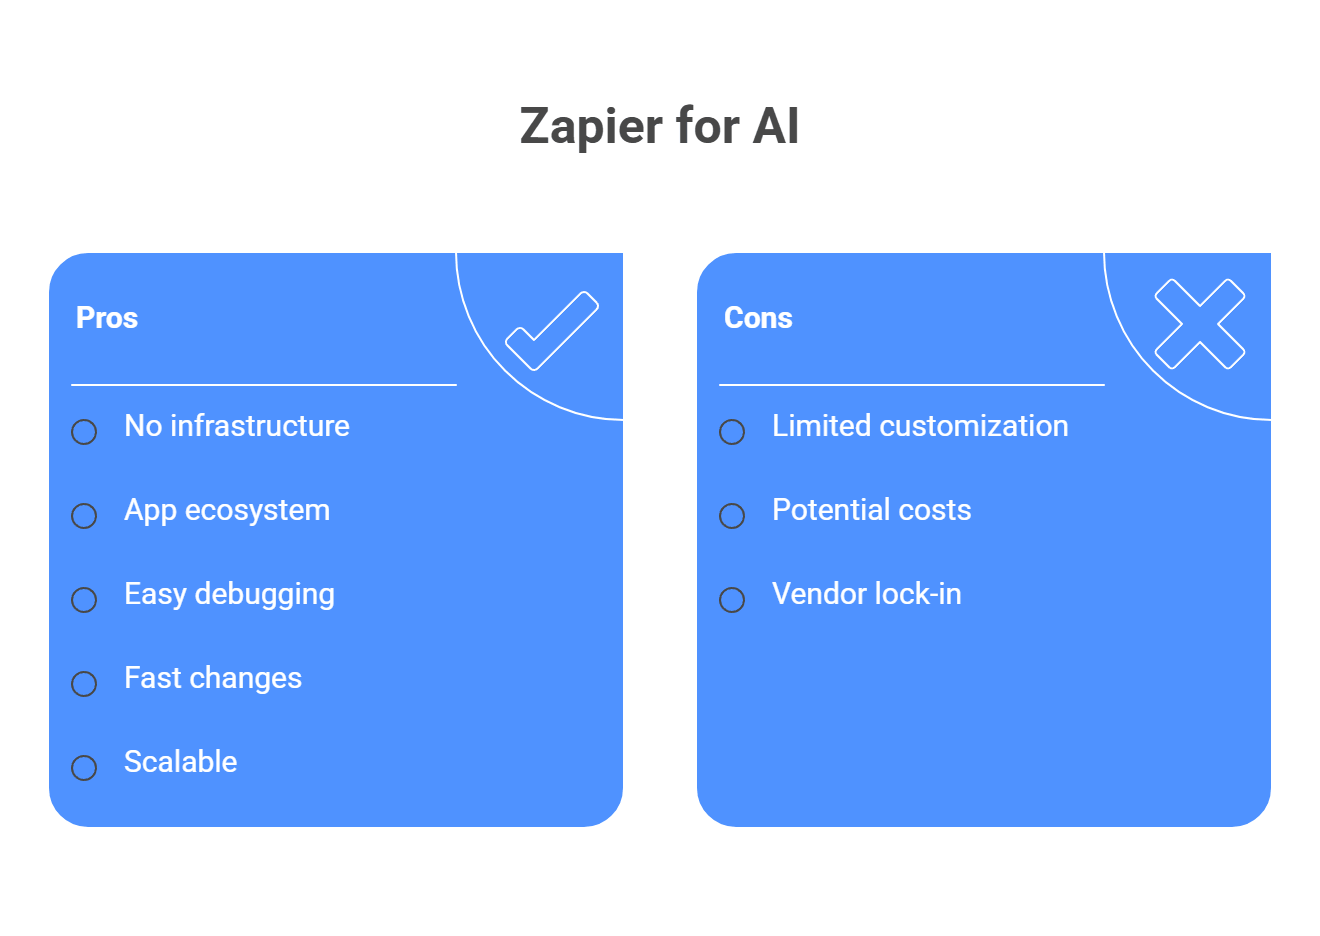
If the goal is to get AI working fast, Zapier has a pretty obvious advantage: you can wire things together without building backend infrastructure first. No server to maintain, no queue system to set up, no separate admin panel just to see what happened.
A few reasons teams like it:
So why use Zapier instead of hardcoding every API call yourself? Usually because it gets you from idea to working automation much faster, makes debugging less painful, and gives you a cleaner way to connect AI to the rest of your stack.
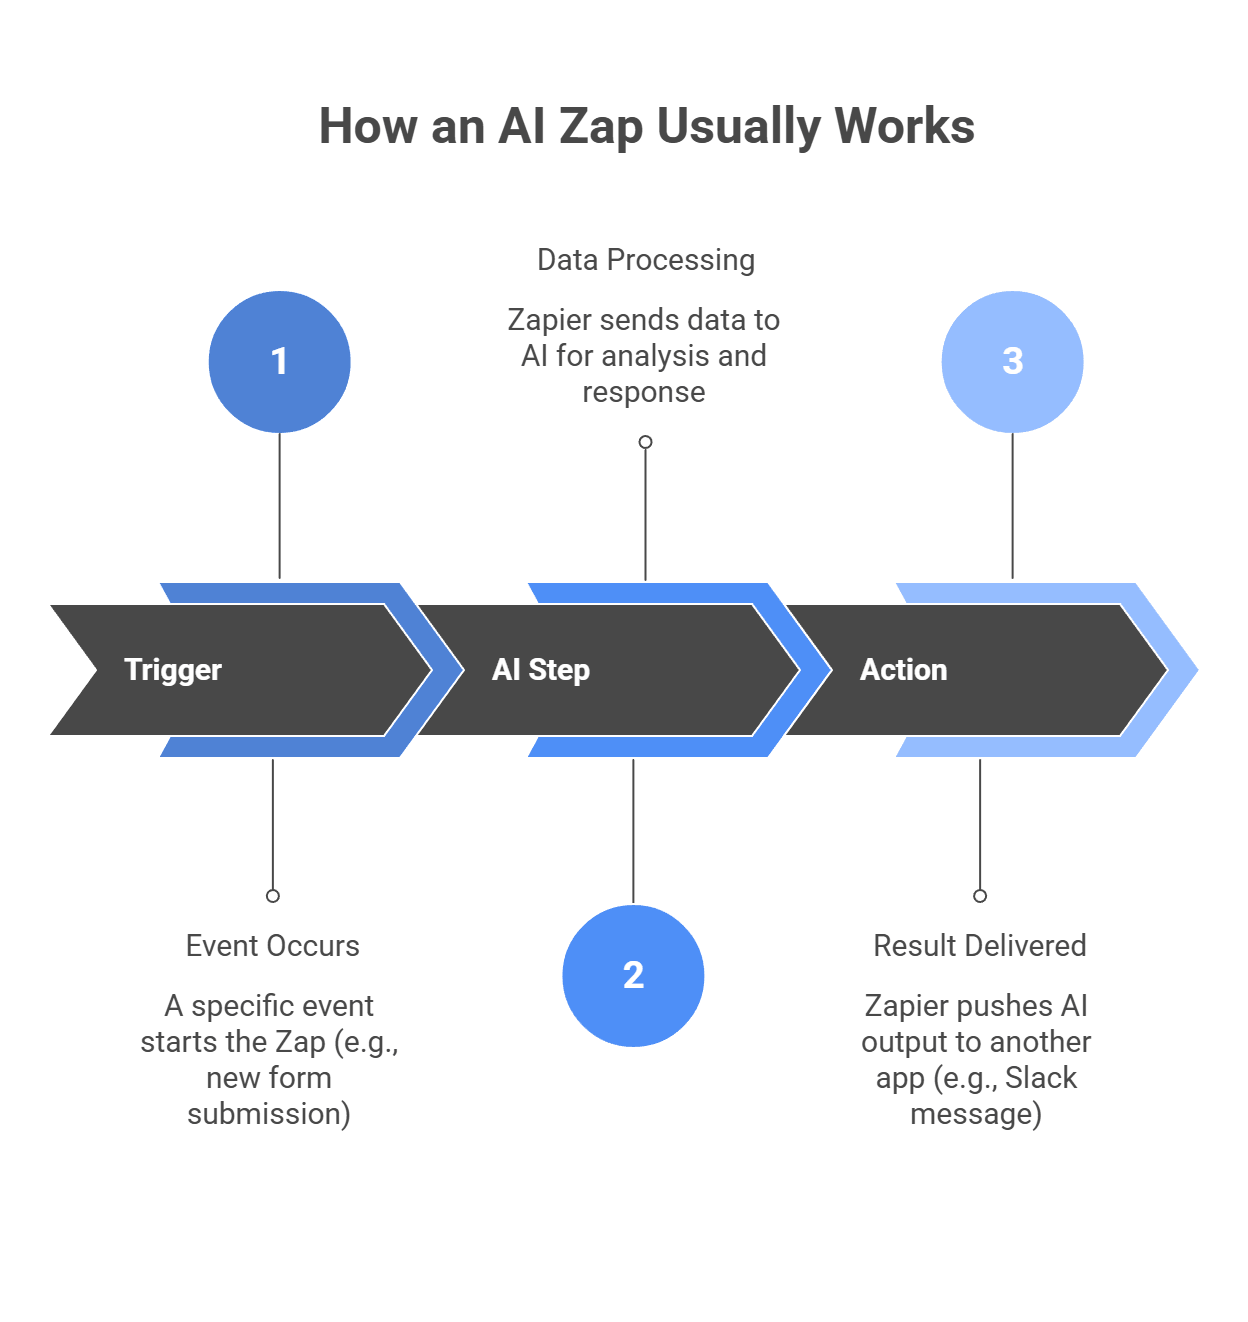
Before you build anything, picture the flow first. Most AI Zaps follow a simple pattern: something happens, AI does the thinking, then Zapier sends the result somewhere useful. That is basically the whole setup.
This is the “when.” A new form gets submitted. A new row appears in Google Sheets. A support ticket comes in. Zapier defines a Zap as an automated workflow built from a trigger plus one or more actions.
This is the “brain” part. Zapier takes the data from the trigger, turns it into input for an AI step, and sends it off for processing. That can mean summarizing text, classifying feedback, drafting a reply, or pulling out key details. Zapier’s AI tooling is built around exactly these kinds of no-code AI automation steps, and it connects with thousands of apps plus hundreds of AI tools.
This is the “then.” Once the AI response comes back, Zapier pushes it somewhere: Slack, Gmail, HubSpot, a spreadsheet, a CRM, wherever the workflow needs it. That is what makes the whole thing useful. The AI does not just generate text for fun, it moves the next step forward. Zapier’s help docs describe actions as the events a Zap performs after the trigger fires.
So the real architecture is pretty simple:
Trigger → AI step → Action
And honestly, that is why Zapier works so well for AI workflows. You do not need to build a whole backend just to move data from one tool, through an AI model, into another tool.
For this guide, the most flexible setup is Webhooks by Zapier. Zapier does have native AI integrations, but the webhook route gives you more freedom. You can connect to almost any AI API or unified gateway without waiting for Zapier to add or update a built-in app. That is also why Zapier community answers often point people to Custom Request when the normal app step is too limiting.
Before you click around in Zapier, define the flow in one sentence.
For example:
When a customer sends a support ticket, summarize it with AI and post a suggested reply in Slack.
That gives you three clear pieces:
This sounds simple, but it matters. A lot of messy Zaps happen because people start building before they know what the input and output should look like.
In Zapier:
When you test a trigger, Zapier tries to pull recent records from the connected app so you can use real sample data while building the rest of the Zap. That is the official behavior, and it helps a lot because you are not guessing at field names.
Now add the AI step.
This option is useful because it gives you full control over the request body and headers, which is exactly what you want for AI APIs. Community posts also call out Custom Request as the better option when you need to control the JSON structure yourself.
Then set it up like this:
In the Data or request body area, send valid JSON. A simple structure looks like this:
{
  "model": "gpt-4o",
  "messages": [
    {
      "role": "system",
      "content": "You are a helpful customer support assistant. Summarize the following ticket and suggest a polite response."
    },
    {
      "role": "user",
      "content": "Ticket from Customer: {Insert Trigger Data Here}"
    }
  ]
}
Instead of typing the ticket text manually, use Zapier’s variable picker to insert the real field from the trigger step.
Then add headers such as:
One practical heads-up from Zapier community threads: header behavior and JSON formatting are common places where webhook tests go wrong, especially when the receiving API expects a very specific body format.
Click Continue, then Test step.
Zapier will send the mapped request to your AI API. If it works, you should see the raw response in the test result.
What are you looking for? Usually the actual answer will live inside a nested field such as:
This part matters because the next step will need the exact field that contains the generated text.
Now add the final action.
For example:
In the message body, insert the AI output field from the webhook step. This is where the earlier test pays off, because now you know which field actually holds the result.
Then run Test step again and make sure the message shows up the way you want.
Once the test looks good, publish the Zap.
After that, watch Zap History for the first few days. Zapier’s help docs describe Zap History as the place where you can review Zap runs and task usage, and community troubleshooting posts also treat it as the first place to check when a workflow starts acting weird.
That part is worth taking seriously. A workflow can pass one clean test, then fail later because:
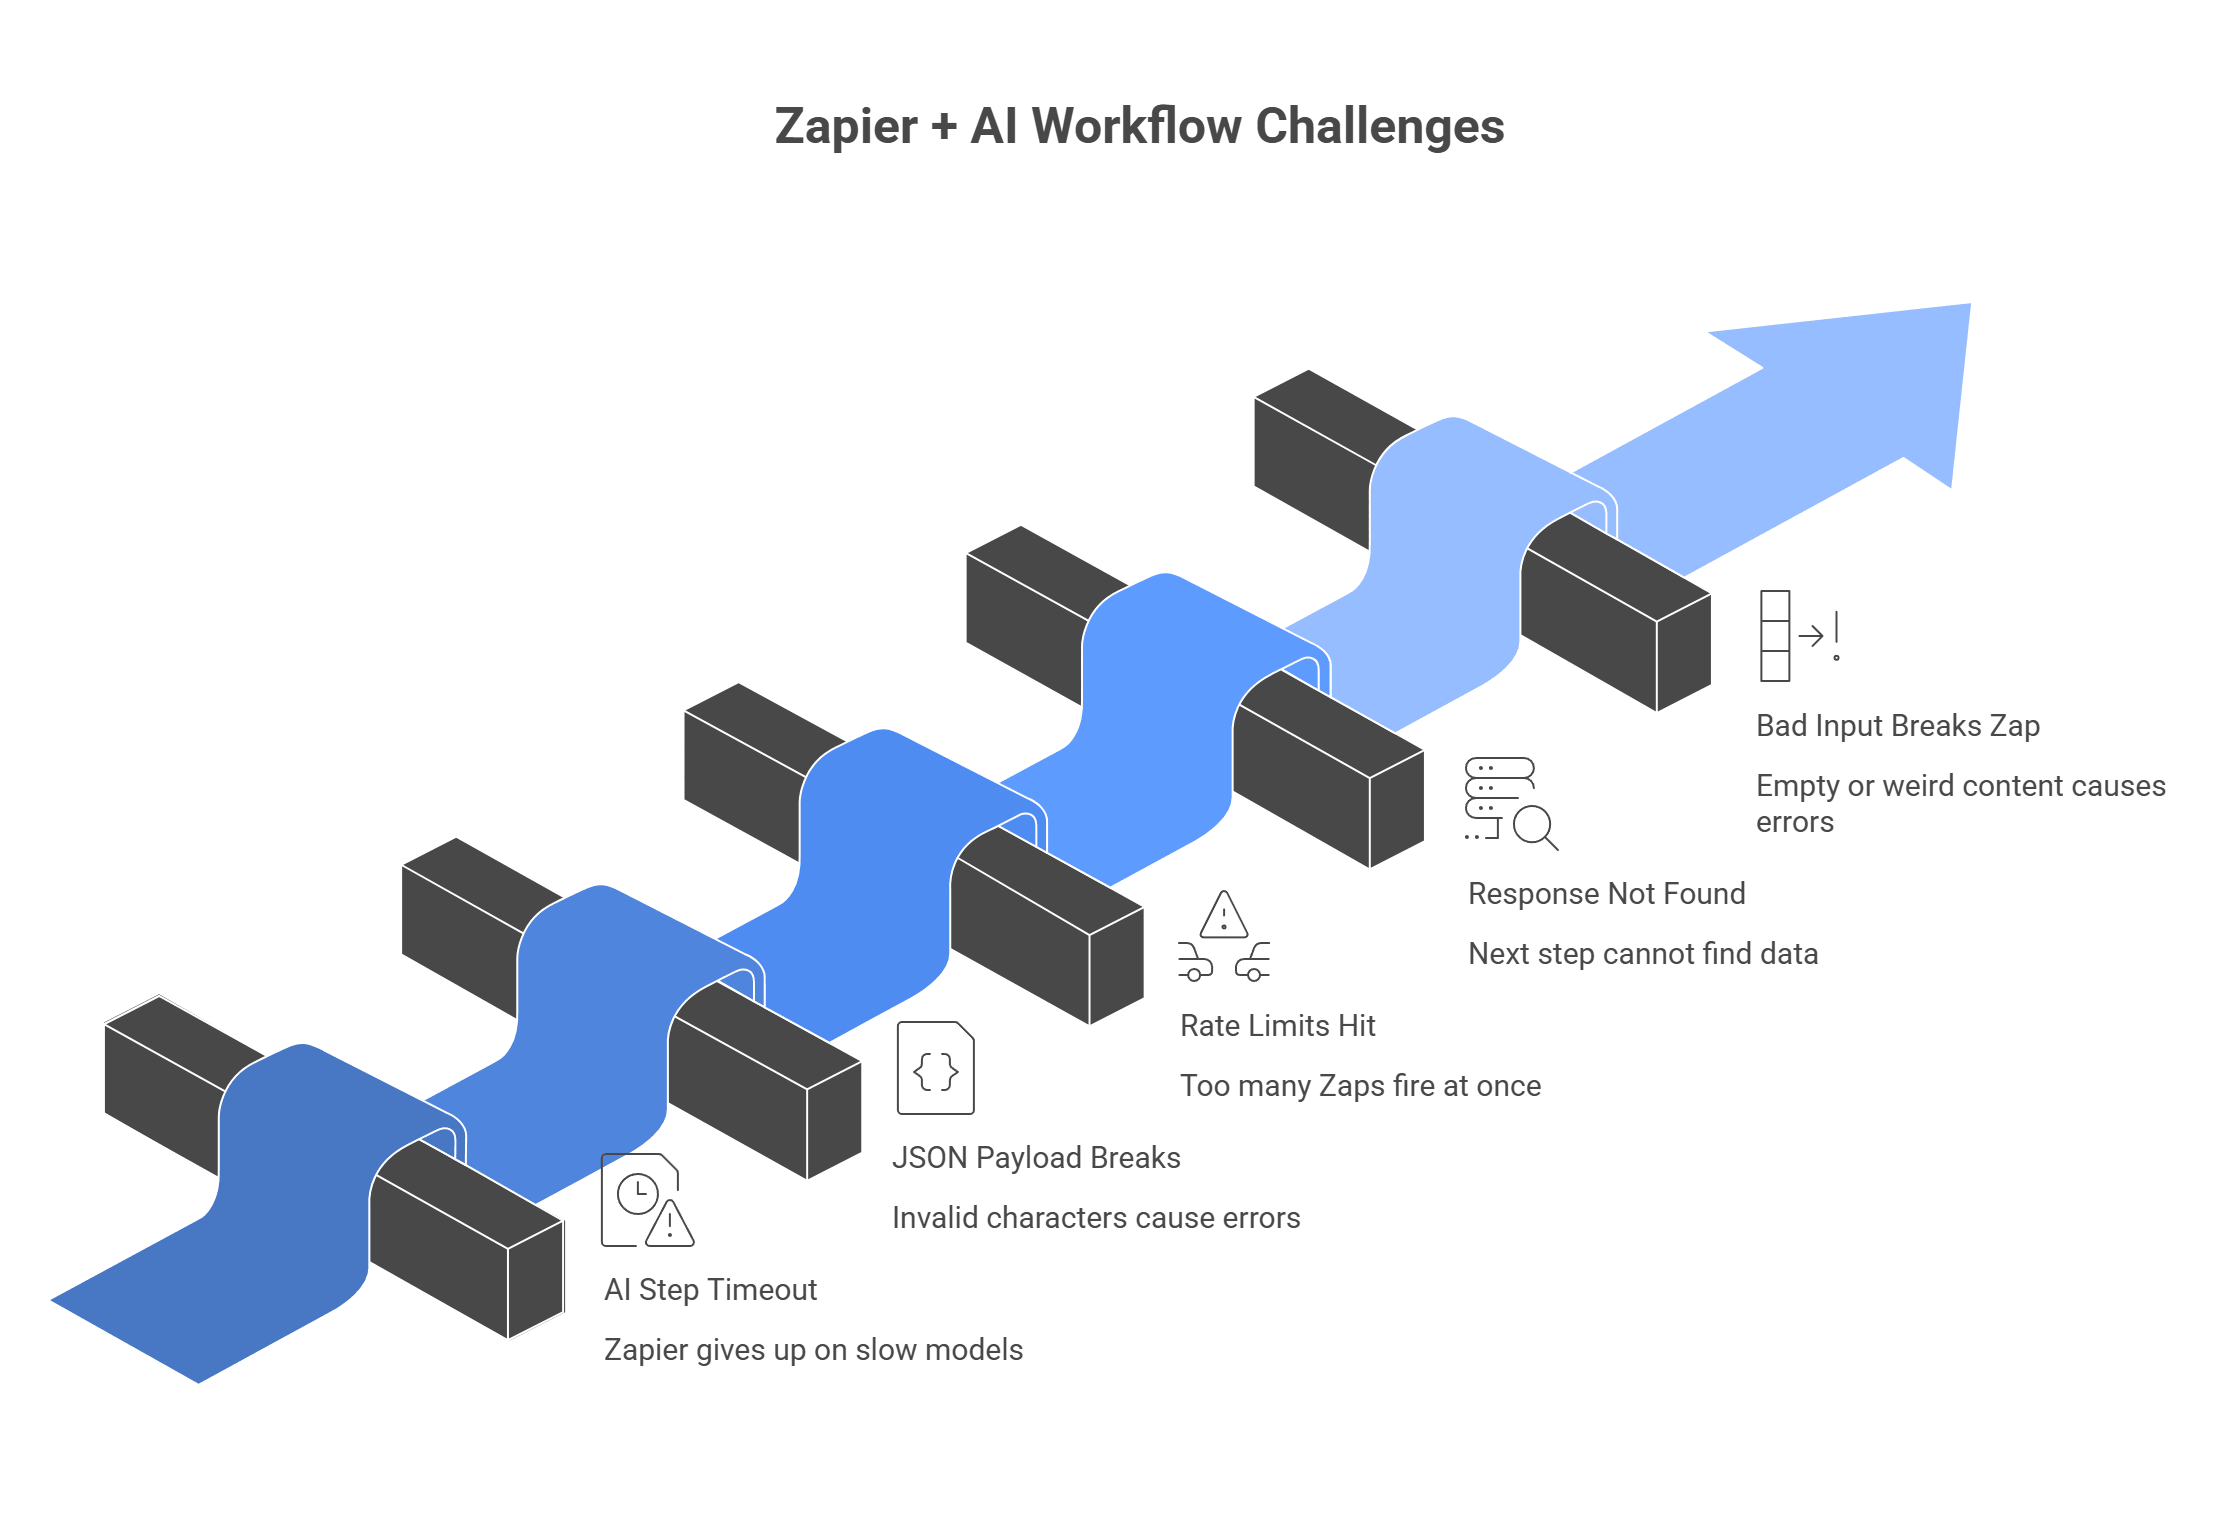
Zapier makes AI workflows much easier, but the same issues come up again and again in forum threads: the request takes too long, the JSON breaks, the model gets rate-limited, or one messy field ruins the whole run. Zapier community posts also confirm that 30 seconds is a hard timeout for a single request, and it cannot be extended.
Here are the ones to watch most:
A good rule here is simple: if the request is too slow, shorten it or make it async. If the payload is too messy, clean it before it leaves Zapier. And if volume starts to grow, treat rate limits as a real part of the design, not a surprise later.
Zapier makes AI automation much more accessible. With triggers, webhooks, and actions, non-technical teams can build useful workflows without needing fully custom software. That opens the door for founders, marketers, and operations teams to create practical AI tools faster and with less friction.
The problem is that building the automation is only one part of it. Keeping it reliable is the harder part. If your workflow depends on just one provider, rate limits, outages, or slow responses can break important automations at the worst time.
That is where llmapi.ai fits naturally. It gives you one OpenAI-compatible endpoint with access to top models across providers, so your Zapier webhook setup stays simpler underneath. It also helps teams stay more flexible with routing, fallback options, and easier model switching when performance or availability changes.
Why use LLMAPI?
If you want your Zapier AI automations to feel easier to manage and less fragile over time, llmapi.ai is a natural layer to add. It helps you keep workflows moving without turning every provider issue into your problem.
Usually, yes. The free tier is limited, and most AI workflows need multi-step Zaps (Trigger + Formatter + Webhook + Action). Webhooks and other premium apps are commonly tied to paid plans.
If you use a unified gateway like LLMAPI, you keep the same Webhook URL and headers. You just change the model value in your JSON payload (for example, “gpt-4o” → “claude-3-5-sonnet”) and run a test.
Zapier has strong security/compliance, but your risk also depends on the AI provider. Use enterprise API endpoints when possible, and avoid sending sensitive PII unless you truly need it. Mask or redact data when you can.
Zapier steps can fail if they take longer than ~30 seconds. LLMAPI can help by routing requests away from slow providers and using fallback models, which improves the odds your Webhook responds in time.
Both. An image generation API typically returns an image URL. Zapier can pass that URL into actions like posting to social, saving to Drive, or attaching it to an email.
Power Apps already makes it easy to build internal tools fast. But at some point, a basic form or dashboard stops being enough. You want the app to do more. Summarize notes. Draft emails. Answer questions. Help people move faster.
That is where AI comes in.
If you use Microsoft Power Apps, you can connect your apps to outside APIs through connectors and custom connectors, which gives you a practical way to bring AI into your workflow. Power Apps is built for low-code business apps, and Microsoft’s connector system is what lets those apps talk to external services and APIs.
Microsoft also has native Copilot features in Power Apps, but external AI APIs give you more room to choose models, control the setup, and avoid tying everything to one path.
Below, let’s walk through how to connect AI APIs to a Power Apps setup step by step.
Power Apps already gives you a fast way to build internal apps. But when the AI part gets more serious, many teams want more than a basic built-in feature set. They want better model choice, more control over prompts, more predictable costs, and a setup they can swap later without rebuilding the app.
That is where external AI APIs start to make a lot of sense.
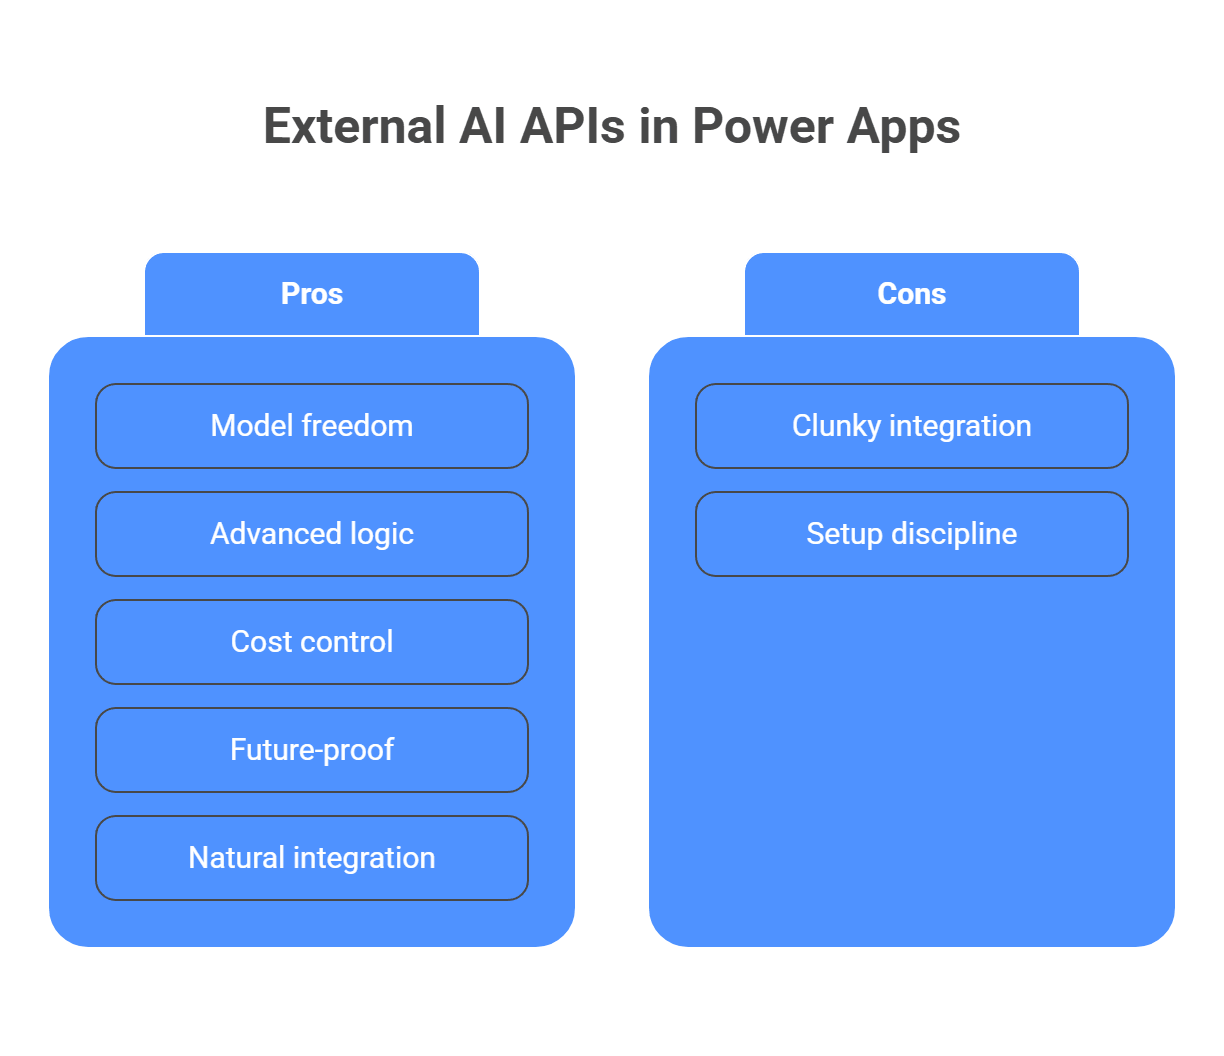
There is one honest downside, though: developers do complain that third-party API work in Power Apps can feel clunky at times. One Reddit thread flat-out says custom service integration can be the least fun part of the platform. So yes, external APIs give you more flexibility, but they also ask for a bit more setup discipline.
Before you build anything, it helps to know your options. There are really three common paths here, and each one fits a different kind of app. And yes, the right choice depends on one simple question: do you need a quick built-in feature, a background workflow, or a real-time AI experience inside the app?
This is the simplest route. Microsoft’s AI Builder already covers prebuilt tasks such as receipt processing, text recognition, and other ready-made AI components inside Power Apps. So if your need is fairly standard, this is usually the fastest path to a working result.
This route works best when you want:
This option makes sense when the AI task does not need to answer the user instantly on screen. Your app can trigger a flow, the flow can call an API, then save the result somewhere, send an email, or update a record.
This route works best when you want:
This is also a way where you can use something like LLMAPI if you want the flow to call one AI endpoint while still keeping access to different models behind the scenes. That way, if you later want to switch providers or compare outputs, you do not have to rebuild the full flow logic.
This is the most flexible option, and usually the most useful one for interactive AI features. A custom connector gives your app a direct bridge to an external API. In plain terms, that means your Canvas app can send data to an AI model and get the answer back right inside the interface.
This route works best when you want:
And this is also where LLMAPI fits especially well. Instead of wiring your custom connector to one model provider and locking the app into that choice, you can point it to a unified AI endpoint and keep more flexibility on the backend. So the Power App stays the same, while the model behind it can change later if needed.
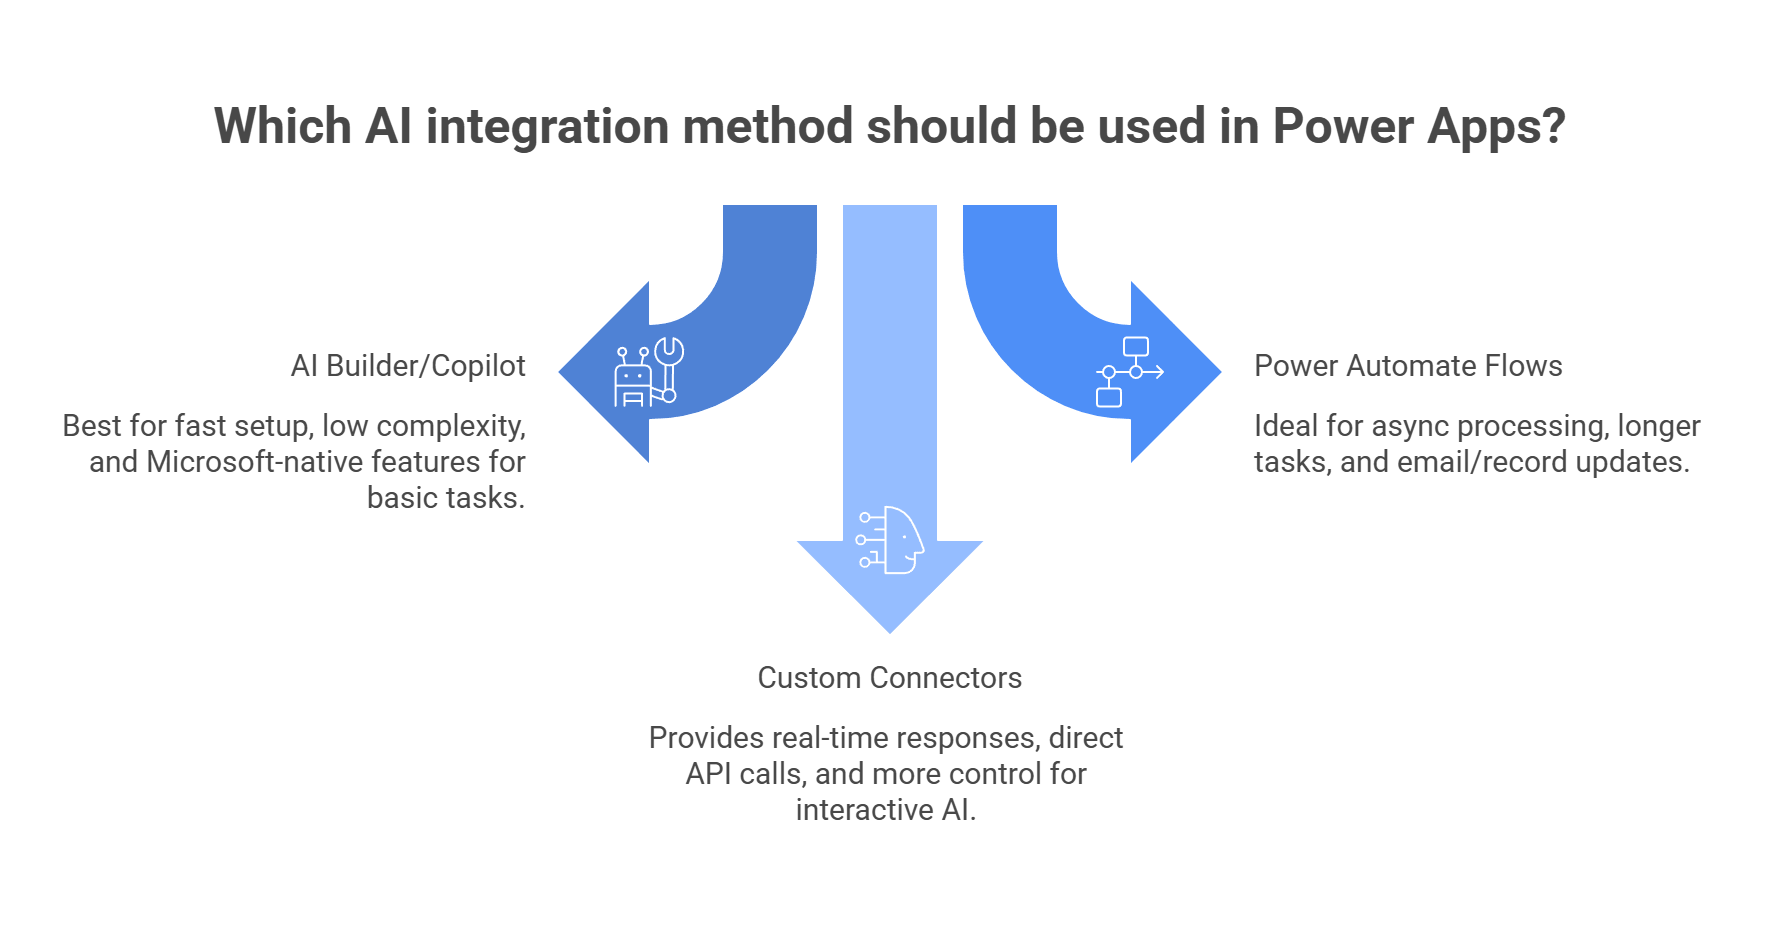
If you want something quick and standard, go with AI Builder. If the job can happen in the background, Power Automate is often enough. But if you want a real-time AI experience inside the app, something that reacts right away and feels like part of the interface, custom connectors are usually the strongest option.
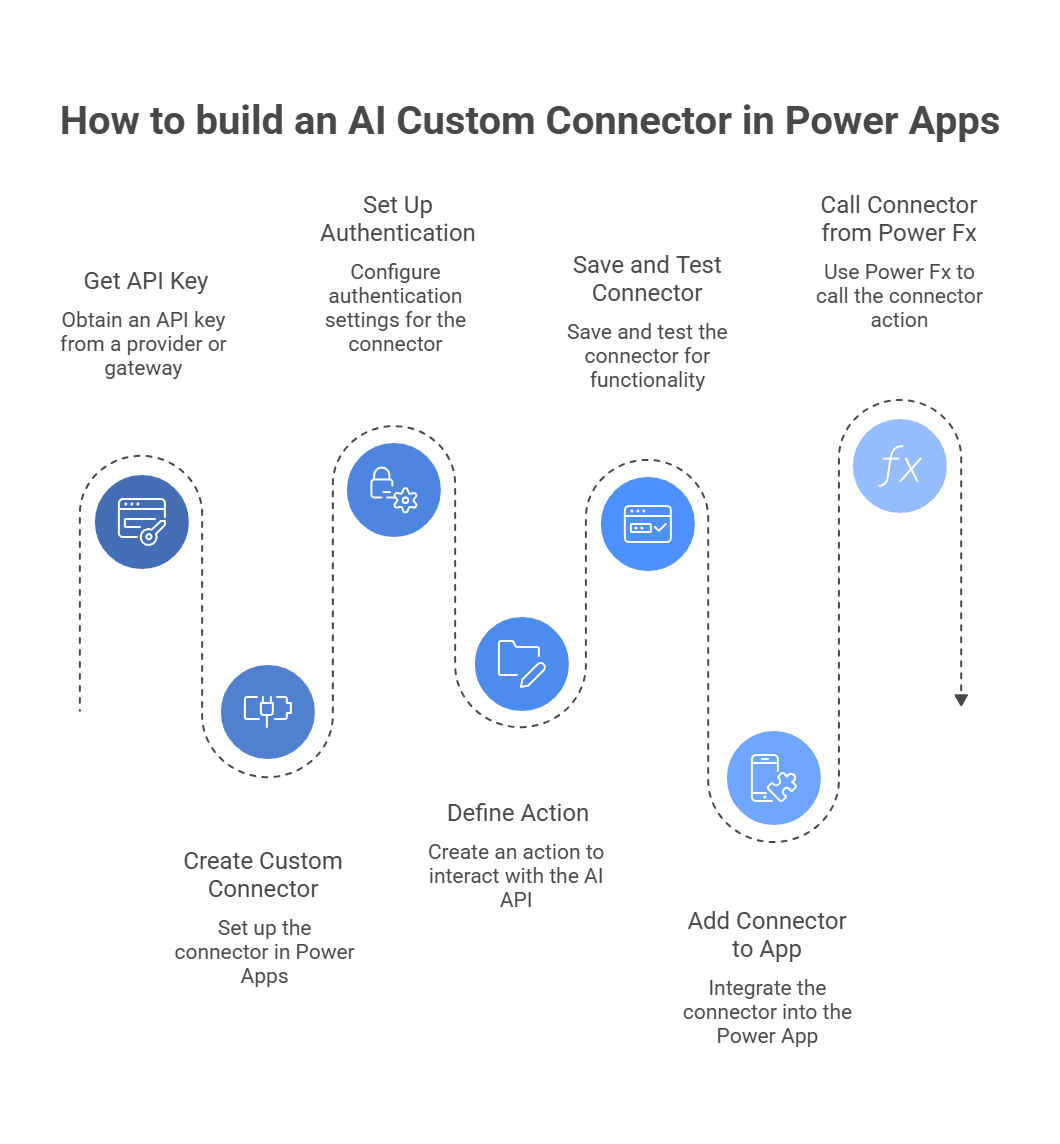
This is the route to take if you want your app to send a prompt to an AI API and show the answer right in the interface. In plain terms, you are building a custom connector that acts like a bridge between your Power App and the AI endpoint. Microsoft defines a custom connector as a wrapper around a REST API that Power Apps can call.
Before anything else, you need an API key. If you want one fixed provider, you can use that provider directly. If you want more flexibility later, you can use a unified gateway such as llmapi.ai, so your Power App points to one endpoint while you keep the option to change models behind it later.
The practical reason for this is simple: once a connector is live in an app, you usually do not want to rebuild it every time you want a different model or provider.
Go to make.powerapps.com, then open Data and Custom connectors. Choose New custom connector and Create from blank. Microsoft’s current docs for blank custom connectors follow this same flow.
Give the connector a clear name, such as GlobalAIAssistant.
In the General tab:
That host-and-path split is how Microsoft’s custom connector setup is designed to work.
Move to the Security tab.
If your AI endpoint uses a bearer token in the header, select API Key authentication, then set:
Microsoft’s custom connector docs explicitly note that for APIs requiring bearer authentication, you add Bearer plus a space before the API key when you create the connection.
Now go to the Definition tab and create a new action.
Add:
That Operation ID matters because it becomes the function name you call from Power Apps later. Microsoft’s docs on using custom connectors in Power Apps follow this same connector-action pattern.
Under Request, choose Import from sample.
Then:
A simple sample body like this is fine:
{
 "model": "gpt-4o",
 "messages": [
   {
     "role": "user",
     "content": "Sample prompt"
   }
 ]
}
Microsoft’s blank-connector guide uses this same “import from sample” approach to build the request shape from a real example.
Save the connector, then move to the Test tab. Create a New connection and enter your authorization value. Again, if the API expects bearer auth, Microsoft says to include Bearer before the key. Then test the action with sample input.
If all is set up correctly, you should get a 200 OK response and see the model’s reply in the response body.
Now open your Canvas app in edit mode.
From the Data pane:
Then add a few basic controls:
This follows Microsoft’s documented flow for using a custom connector from a Power Apps app.
Now wire up the button.
Your OnSelect formula can call the connector action and store the result in a variable. The exact response shape depends on how the connector reads the schema, so your formula may need a small adjustment after testing.
A simple pattern looks like this:
UpdateContext(
   {
       varAIResponse:
           GlobalAIAssistant.GenerateText(
               {
                   body: {
                       model: "gpt-4o",
                       messages: Table(
                           {
                               role: "user",
                               content: txtPrompt.Text
                           }
                       )
                   }
               }
           )
   }
)
Then set the label text to the response field that contains the generated message.
You now have the core connection in place. From here, you can shape the prompt, format the response, and turn it into a real app feature.
Once you connect external APIs to Power Apps, the same few problems show up again and again in community threads. Not because the idea is bad just because low-code platforms get awkward fast when the payloads are messy, the response takes too long, or the app starts making more calls than you expected. Reddit threads in r/PowerApps regularly point to nested JSON, timeout behavior, and scaling pain as the real friction points.
This is one of the biggest complaints. Power Apps can work with JSON, but once the response has deep arrays and nested objects, the formulas can turn into a headache. In one Reddit thread, users pointed out that custom connectors work much better when the response is already structured as typed data.
In another, a user had to use ParseJSON() to deal with the returned array from Power Automate. So if the response shape starts to feel painful, a very practical fix is to let Power Automate parse the heavy JSON first and return only the clean string or fields your app actually needs.
If you ask the model for something huge, the app may sit there waiting and then fail anyway. A recent Reddit post about gateway timeout issues in Power Apps described retries and waits still getting cut off around the 2-minute mark even after timeout-related settings were adjusted.
Another thread noted that Power Apps only hangs until it gets a quick accepted response, which is why long-running work is often better pushed into a flow. So if the task may take a while, such as long text generation or complex background processing, use Power Automate or another async path instead of making the app wait live on screen.
This one is simple, but people still run into it. If users can send blank text, half-finished prompts, or malformed values, you end up with bad API requests and confusing errors. The easiest fix is basic validation in the app before the connector ever runs: check for blank strings, set minimum input rules, and give the user a clear message before anything gets sent.
Community discussions around Power Apps integrations often frame this kind of lightweight guardrail as the difference between “it works in testing” and “real users break it in five minutes.”
One or two users testing an AI feature is one thing. A whole team pressing the same button all day is another. Power Apps community threads often shift from “How do I connect this API?” to “How do I control usage and licensing once this grows?” That is why it helps to track API usage early, limit unnecessary calls, and think about caching or routing lighter tasks to cheaper models where possible.
A good rule here is pretty simple: if the response is too nested, clean it before it reaches the app. If the request is too slow, move it to a flow. If the input is too unpredictable, validate it first. And if adoption starts to grow, watch usage before the bill surprises you.
Adding generative AI to Microsoft Power Apps can turn internal tools from simple data-entry forms into more useful assistants. With Custom Connectors, teams can go beyond native limitations and connect their apps to a wider range of language models, which makes it easier to build faster, more capable workflows.
The real challenge is reliability. If your app depends on one provider only, any outage, pricing shift, or model change can create problems fast. That kind of setup can make a business tool feel fragile, especially when teams depend on it every day.
That is why routing Power Apps requests through llmapi.ai can be a practical move. It gives you one OpenAI-compatible API, access to 200+ models, multi-provider support, cost-aware routing, and monitoring for errors, reliability, and usage. That means you can keep your connector setup more flexible without constantly reworking your app logic.
Why use LLMAPI?
If you want to build Power Apps workflows that are smart, fast, and easier to maintain, LLMAPI is a natural fit. It helps you keep the AI layer flexible underneath, so your team can focus more on the app experience and less on provider-related headaches.
AI Builder gives you pre-trained, low-code models inside Microsoft (great for things like invoice extraction). A Custom Connector lets you call external LLMs (OpenAI, Anthropic, Gemini) for more flexible tasks like chat, long-form text, and complex reasoning.
With LLMAPI’s unified endpoint, you usually keep the same connector and auth setup. In your app, you change the model value in the request (for example, from “gpt-4o” to “claude-3.5-sonnet”).
No. You need basic API understanding (JSON body + headers). Most setup is point-and-click, and you’ll use simple Power Fx logic to send requests and parse responses.
Canvas apps have tight time limits. For longer AI outputs, route the request through Power Automate: trigger a Flow, let it wait for the response, then send results back to the app (or email/notify the user).
If you hardcode one provider, the app can fail during outages. Using LLMAPI allows automatic failover so requests can route to a backup model when the primary one errors or times out.
Want to bring AI into the tools your team already uses every day? You do not need a full backend, a complex app, or an enterprise setup to do it.
If your work happens in Google Sheets, Docs, Gmail, or Forms, Google Apps Script gives you a simple way to connect those apps to modern AI APIs and automate useful tasks right inside Google Workspace.
Google Apps Script is Google’s cloud-based JavaScript platform for extending Workspace apps. In plain terms, it lets you add custom logic to Google tools and send API requests to outside services. So you can use AI to analyze data in Sheets, draft emails in Gmail, summarize form responses, or build reports in Docs, all without building a separate web app.
Below, let’s walk through how to connect Google Apps Script to AI step by step.
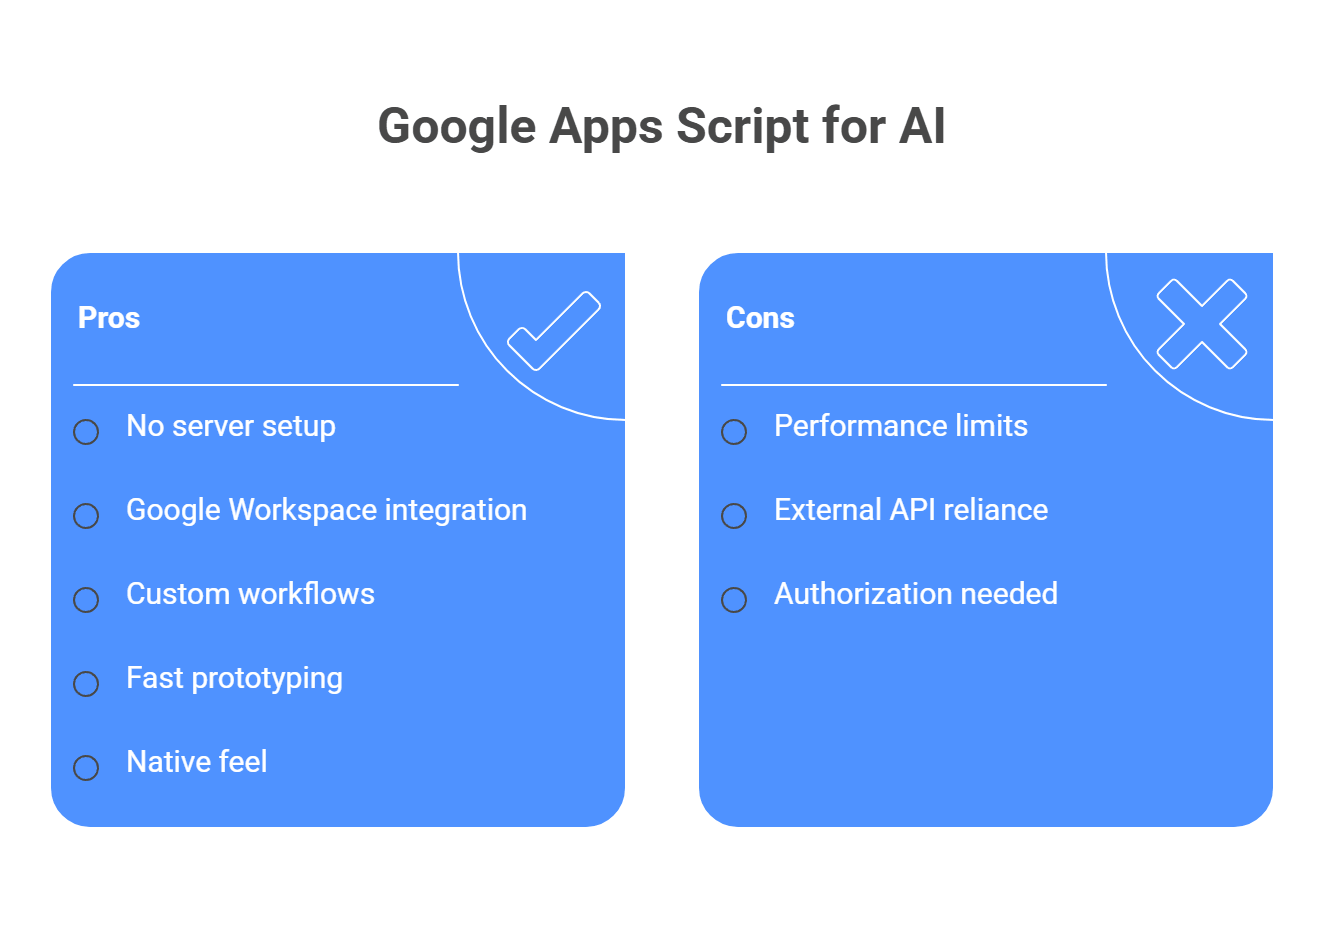
Why use Google Apps Script for this at all? Because it lets you add AI right where your team already works, without turning the project into a full-blown app build.
A few reasons it works so well:
One thing to keep in mind: Apps Script is great for lightweight to medium workflows, but Google’s own best-practices guide says performance improves when you minimize calls to external services and batch operations where possible. So it is powerful, but you still want to build it smart.
Before you write any code, make sure a few basics are in place. Nothing too dramatic, but it will save you a lot of “why is this not working?” later.
Here is the setup:
One small heads-up: Apps Script also has quotas and limits, so if you plan to run lots of AI requests, it is smart to keep that in mind from the start.
First, you need an API key so Apps Script can talk to an AI model. You can get one from a single provider, or use a unified gateway if you want the freedom to switch models later without rewriting your whole script. That matters more than it seems at first. Today you may test one model. A month later, you may want a cheaper one for bulk tasks or a stronger one for harder prompts.
Keep that key private. Apps Script can call outside APIs with UrlFetchApp, but the safer place for secrets is PropertiesService, not a hardcoded string inside your file. Google’s docs also show script properties as the standard way to store values like this inside the project.
Now open the Google app where you want the AI feature to live. For this guide, Google Sheets is the easiest place to start.
Open a new or existing sheet, click Extensions, then Apps Script. A new tab will open with the Apps Script editor and a default Code.gs file. Rename the project to something clear, such as AI Sheets Integration, so you do not end up with five mystery projects later. Google’s bound-script guide and Sheets custom-function docs both support this kind of setup.
This is where the real connection happens. Apps Script uses UrlFetchApp to send HTTP requests to outside APIs, so this is the service that lets your spreadsheet talk to an AI model. Google’s external API guide also points to UrlFetchApp as the standard way to work with third-party APIs, JSON payloads, and JSON responses.
Replace the default code in Code.gs with a function that:
/**
 * Custom function to ask an AI a question based on a prompt.
 * * @param {string} prompt The instruction or question for the AI.
 * @param {string} context Optional additional data to provide to the AI.
 * @return The generated text from the AI.
 * @customfunction
 */
function ASK_AI(prompt, context) {
  if (!prompt) return "Error: Please provide a prompt.";
  const apiKey = 'YOUR_API_KEY_HERE';
  const apiUrl = 'https://api.yourprovider.com/v1/chat/completions';
  const fullMessage = context ? `${prompt}\n\nContext: ${context}` : prompt;

  const payload = {
    model: "your-chosen-model", //e.g., "gpt-4o" or "gemini-1.5-pro"
    messages: [
      { role: "system", content: "You are a helpful data assistant." },
      { role: "user", content: fullMessage }
    ],
    temperature: 0.7
  };

  const options = {
    method: "post",
    contentType: "application/json",
    headers: {
      "Authorization": "Bearer " + apiKey
    },
    payload: JSON.stringify(payload),
    muteHttpExceptions: true //Helps with debugging errors instead of crashing
  };

  try {
    const response = UrlFetchApp.fetch(apiUrl, options);
    const json = JSON.parse(response.getContentText());
    if (json.choices && json.choices.length > 0) {
      return json.choices[0].message.content.trim();
    } else {
      return "Error: Unexpected API response structure.";
    }
  } catch (e) {
    return "Request failed: " + e.toString();
  }
}
For quick tests, a hardcoded key is okay. For anything shared or long-term, move it into Script Properties and read it with PropertiesService.getScriptProperties(). That keeps the key out of the code itself.
Before the script can make outside requests, you need to authorize it.
In the Apps Script editor:
Google’s authorization docs say that when a script needs new permissions, you usually have to run a function manually once in the editor to trigger the consent screen. The required external-request scope is also part of UrlFetchApp.
If something breaks, check the execution log and response body. That is usually where the useful clue lives.
One thing worth knowing before you go too far: custom functions in Google Sheets have limits. Google says a custom function must return within 30 seconds, or the cell throws an error. So this setup is great for light and medium AI tasks, but not ideal for very slow or heavy workflows.
Now comes the fun part. Go back to your sheet and use the function like a formula.
For example:
That lets the sheet send the row data to the model and return the result right into the cell. If it works, you can drag the formula down and process many rows at once.
That said, there is one catch: Google’s custom-function docs make it clear that custom functions have restricted behavior and are not always the best fit for more advanced workflows. They cannot edit other cells freely, and some authorization-heavy services do not work in custom functions. So for bigger jobs, it is often smarter to use a custom menu or button that runs a normal Apps Script function instead of relying on a sheet formula.
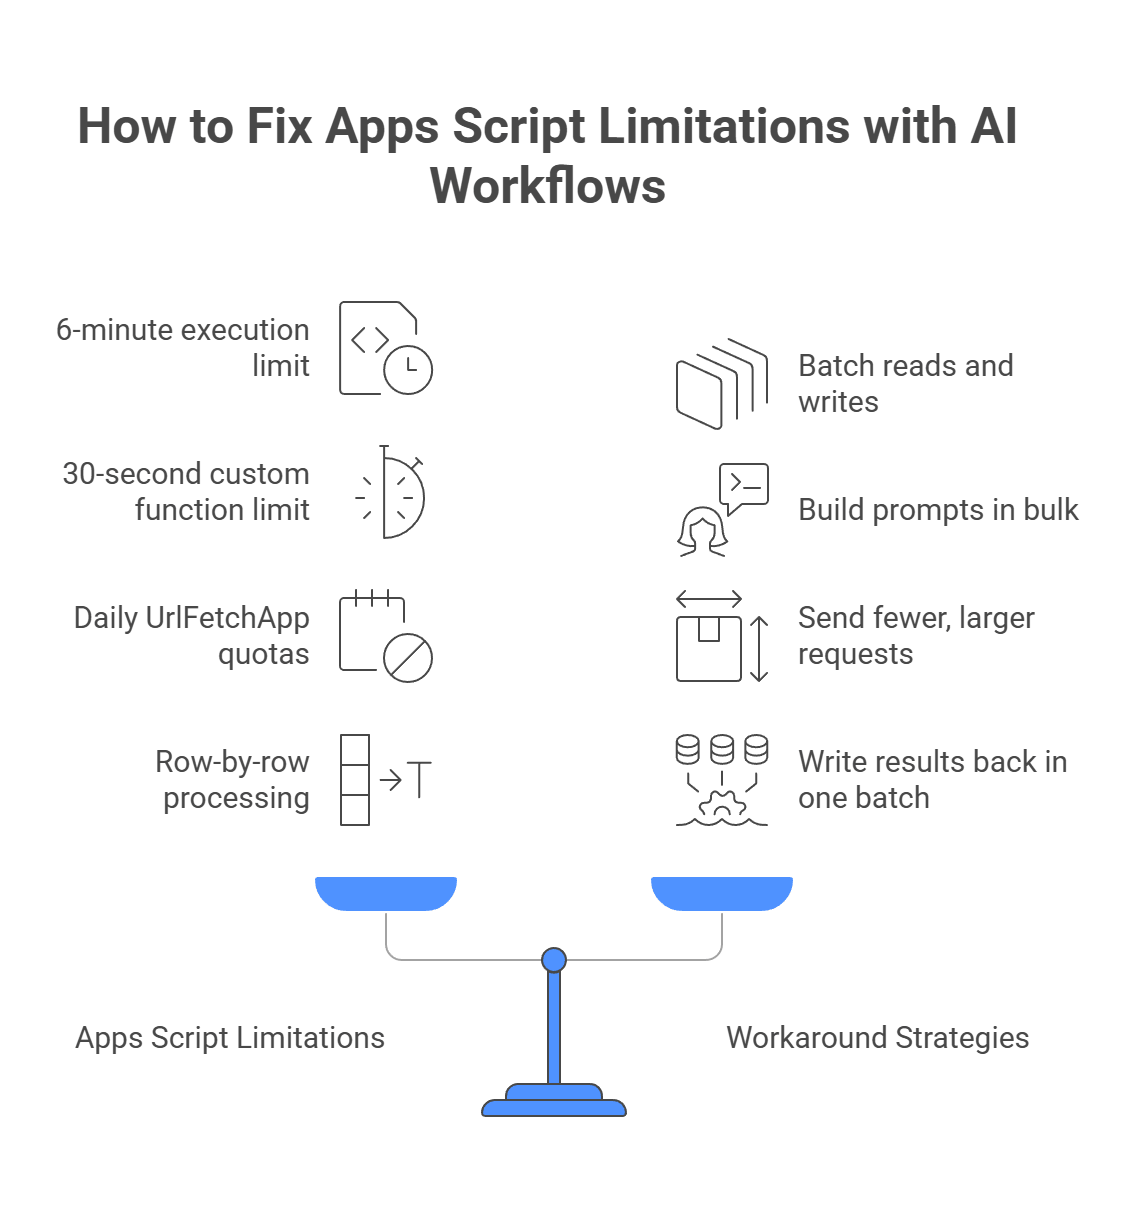
Google Apps Script is great for quick AI workflows, but it does have limits. And yes, developers complain about the same few issues over and over on Stack Overflow: scripts time out, custom functions choke on large sheets, and row-by-row API calls turn into a mess fast.
Here are the main pain points to watch for:
So how do you fix it?
The better approach is to stop treating each cell like its own tiny app. Instead:
That advice lines up with both Google’s best practices for Apps Script and the way experienced developers handle timeout problems in forum threads. Google recommends minimizing calls to external services and batching operations whenever possible.
Using AI inside Google Apps Script is a high-leverage way to improve everyday workflows. It helps teams turn raw data into useful automation without leaving the tools they already use. That makes it a practical way to build lightweight, customized AI solutions right inside your existing workspace.
The harder part starts later. Rate limits, slow responses, and model changes can turn a simple script into something that needs constant attention. What starts as a quick automation can become another thing your team has to babysit.
That is why it helps to add a smoother layer between your script and the model providers. A tool like llmapi.ai can make your UrlFetchApp requests easier to manage by giving you one consistent API, more flexibility across models, and a simpler way to keep automations running without extra backend mess.
Why use the LLM API?
If you want your Apps Script automations to stay simple on your side while still being flexible underneath, LLM API is a natural next step. It helps you spend less time dealing with AI infrastructure and more time building workflows people actually use.
Yes. Apps Script is included with personal Google accounts and Google Workspace. It has daily quotas, but there’s no extra cost for using it. You still pay for whatever AI API you call.
Yes. Use GmailApp to read emails and create drafts, and UrlFetchApp to send the email text to an AI API (for summaries, reply drafts, tagging, etc.).
Apps Script has a strict ~60-second limit on external requests. Routing through LLMAPI lets you switch to a faster model when a slower one lags, which reduces timeouts.
Most of the time it’s a bad request format or an invalid API key. Set muteHttpExceptions: true in your UrlFetchApp options so Apps Script returns the real HTTP error (like 401 or 429) and you can debug it.
If your script already calls LLMAPI’s OpenAI-compatible endpoint, you usually only change the model value in the JSON payload (for example, from “gpt-4o” to “gemini-1.5-pro”). Your URL, headers, and auth flow stay the same.
A few years ago, AI APIs felt like a cool extra. Now? They are part of the actual product stack.
So what changed? Teams use them every day for search, support, content, automation, and internal tools. And the market feels way more real now too: lower costs, bigger context windows, and less interest in staying stuck with one provider.
So if you build software in 2026, the question is no longer “Should we use AI APIs?” It is more like: which ones are worth it, how much do they cost, and how do you avoid a messy setup?
Below, let’s look at the current AI API space, the main players, and the trends that are shaping where all of this goes next.
So what actually changed this year? A lot, honestly. Three shifts stand out most: bigger context windows, multimodal input as a normal thing, and way less trust in the “one provider for everything” setup.
A big one is context size. APIs can now handle huge inputs, so developers can pass in large docs, long histories, or big chunks of code in one go instead of cutting everything into tiny pieces. Google’s Gemini docs now talk openly about workflows with 1M+ tokens of context, which shows how far this has moved from the old limits.
Why does that matter? Because it changes the way people build. Instead of asking, “How do I slice this into twenty small parts?” the question is now more like, “Can I just give the model the whole thing?” For some use cases, yes. That can mean less pipeline mess and less RAG glue code.
Text-only APIs feel a lot less exciting now. More platforms expect mixed input: text, images, audio, video, documents, sometimes all in the same workflow. Google’s current API docs say Gemini can generate text from text, images, video, and audio inputs, and its newer API docs describe the models as multimodal from the ground up.
So what does that change for developers? It means fewer separate systems. One API can now read a screenshot, listen to audio, inspect a video, and answer in structured text. That is a lot closer to real product work than the old “text in, text out” model.
This one is easy to understand. What happens if your main provider goes down, changes pricing, or deprecates a model you built around? Teams have seen that risk up close, so more of them now want routing, failover, and multi-provider setups. Portkey’s support content and docs now frame unified APIs and failover as a practical way to avoid custom retry logic and reduce provider risk.
You can see the same thing in community posts too. Developers talk about outages, limits, and the need for fallback paths often enough that multi-provider routing no longer feels like a “nice extra.” It feels like basic infrastructure.
So yes, AI APIs in 2026 are bigger, more mixed, and less tied to one vendor. And that changes the real question for buyers: not just which model is best, but which setup is least painful to run?
So who runs the general-purpose LLM market right now? A few huge names still lead it, but the gap is tighter now, and cheaper challengers keep pushing prices down.
OpenAI is still one of the main choices for teams that want strong reasoning, coding help, and structured outputs. Its current API docs position GPT-5.4 as the top model for agentic, coding, and professional workflows, while GPT-5.4 nano sits at the cheaper end for high-volume work. OpenAI’s pricing page lists GPT-5.4 nano at $0.20 per 1M input tokens and $1.25 per 1M output tokens.
Best for: coding-heavy apps, multi-step workflows, and products that need reliable JSON output.
Anthropic keeps a strong spot with teams that care about document work, coding, and safer enterprise use. Claude Sonnet 4.6 pricing starts at $3 per 1M input tokens and $15 per 1M output tokens, while Claude Opus 4.6 starts at $5/$25 and supports up to 90% savings with prompt caching. Anthropic also reports strong SWE-bench Verified results for Sonnet 4.6.
Best for: long documents, coding tasks, and teams that run lots of repeated prompts.
Google stays strong on multimodal work and very large context. Its Gemini docs describe 1M+ token workflows, and Google’s API docs position Gemini as multimodal across text, image, audio, and video tasks. That makes it a strong fit for teams that deal with huge files, mixed media, or long-context search and analysis.
Best for: multimodal apps, large document analysis, and big-context workflows.
This is where things get interesting.
DeepSeek keeps getting attention for price. Its official API docs show per-million-token pricing, and outside comparisons keep framing it as one of the budget-friendly options for coding and reasoning workloads.
xAI / Grok shows up in pricing comparisons mostly because of its large context and low-cost “fast” tier. I did not find an official xAI pricing page in this pass, but current third-party comparisons describe Grok 4.1 Fast as offering up to a 2M token context window at low input cost. I’d treat that part as worth double-checking before publishing as a hard claim.
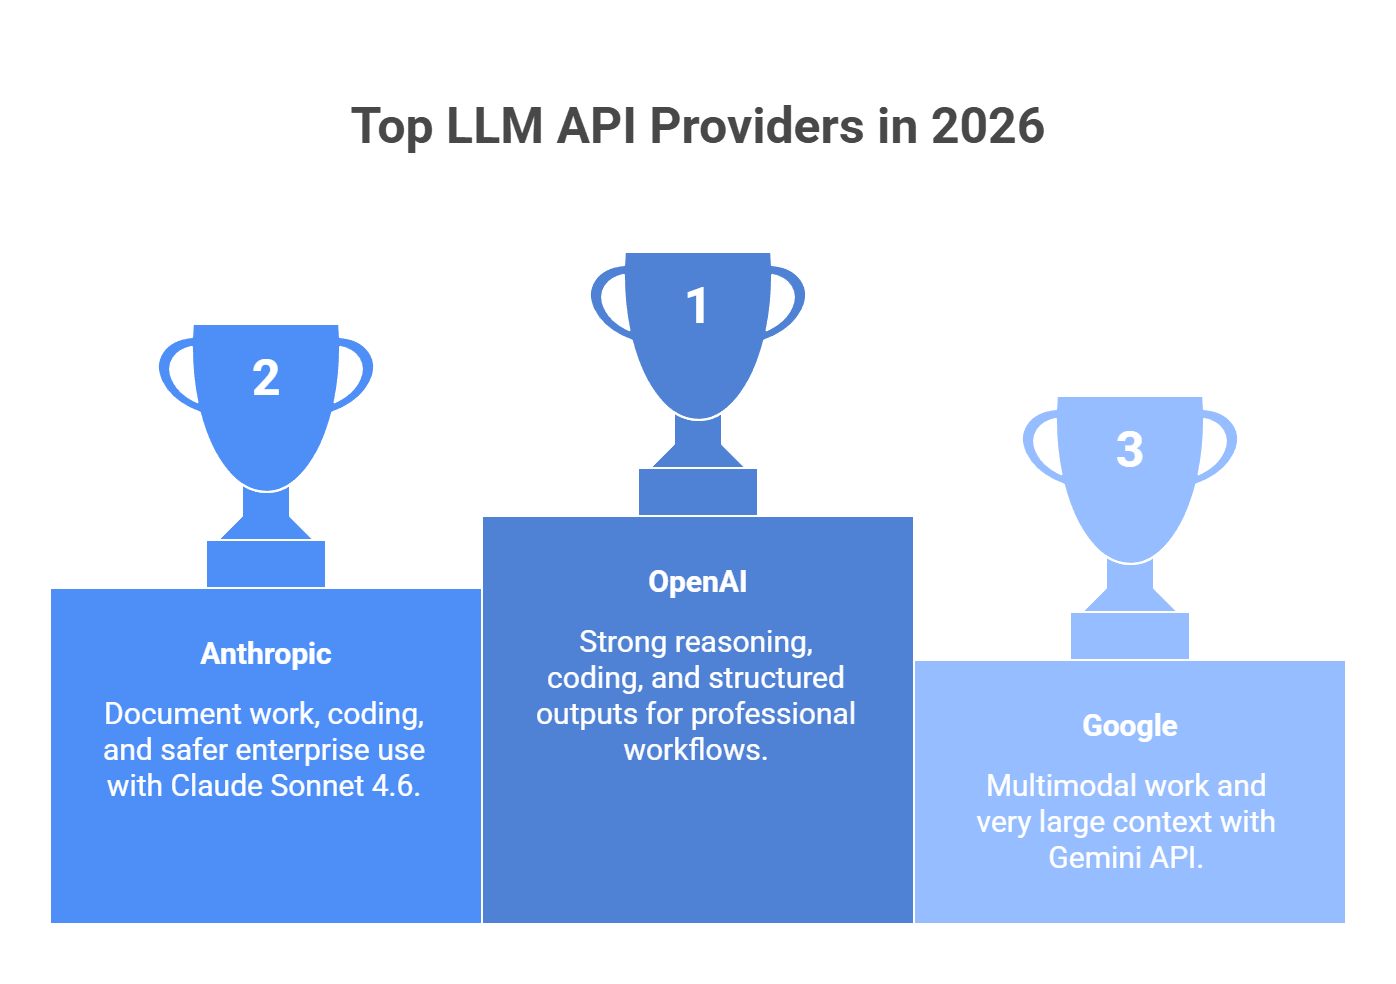
So what is the real takeaway here? If you want a safe default, the big three still dominate. If cost matters a lot, DeepSeek is hard to ignore. And if you care about flexibility, this is exactly why more teams now avoid building everything around one provider.
Not every team wants all of its data to flow through the biggest closed-model vendors. Sometimes the goal is lower cost. Sometimes it is privacy. Sometimes it is just more freedom to choose the model you want without rebuilding the whole app.
That is a big reason open-model API providers have gained so much attention in 2026. They let teams use open-weight models through hosted APIs, often with OpenAI-compatible endpoints, so switching feels a lot less painful. A recent Reddit thread on cheaper LLM providers even called out Together AI and Fireworks as strong options for open-source model hosting with competitive pricing.
Together AI fits teams that want open models without managing their own infra. Its support docs say the API is compatible with OpenAI libraries, and its pricing page shows both serverless inference and dedicated deployment options. That makes it a practical choice for teams that want flexibility without a full self-hosted setup.
Fireworks AI gets a lot of attention for speed. Its homepage focuses on fast inference for open-source LLMs and image models, and customer quotes on the page mention noticeable response-time gains after migration. It also positions itself as a strong place to run open-source alternatives to closed models.
Groq stands out for one thing: latency. Its platform is built around LPUs rather than standard GPUs, and both its site and support docs frame low latency as the main selling point. That makes Groq especially attractive for real-time use cases, such as voice agents or apps where delay ruins the experience. Groq’s own community support also explicitly points to real-time voice agents as a strong fit.
So what is the bigger shift here? Teams want more room to choose. They want open models, faster endpoints, cleaner migration paths, and less dependence on one closed provider. That is why this part of the market keeps growing.
A simple way to think about it:
And honestly, that is what makes this category more interesting now: it gives teams more options without forcing them to run everything from scratch.
The biggest AI wins do not always come from giant general models. A lot of the useful stuff happens in narrower tools built for one type of job, one document flow, or one industry. And honestly, that is often exactly why they work so well.
Why use a general model for everything if a smaller, focused API can do the job faster, cheaper, and with fewer weird mistakes?
Here are a few areas where vertical AI APIs stand out:
So yes, general LLMs get the attention. But vertical APIs are often the tools that do the boring, high-value work companies actually need every day.
Let’s be honest: once you start testing more than one model, things get messy fast. Different API keys. Different pricing. Different quirks. Different fallback logic. And suddenly a simple AI feature turns into infrastructure babysitting.
That is why API aggregators have become a much bigger deal. Tools such as LLMAPI, OpenRouter, and Krater API give developers one layer between their app and a pile of model providers. OpenRouter’s docs describe this pretty clearly: one API, provider routing, fallback support, and consolidated billing. Krater also frames its API as one key for access to hundreds of models.
So why do developers actually use them?
That is the real appeal here. Not hype. Not “access to 350+ models” just for the sake of it. Just less chaos, better uptime, and a cleaner way to manage cost once your app grows.
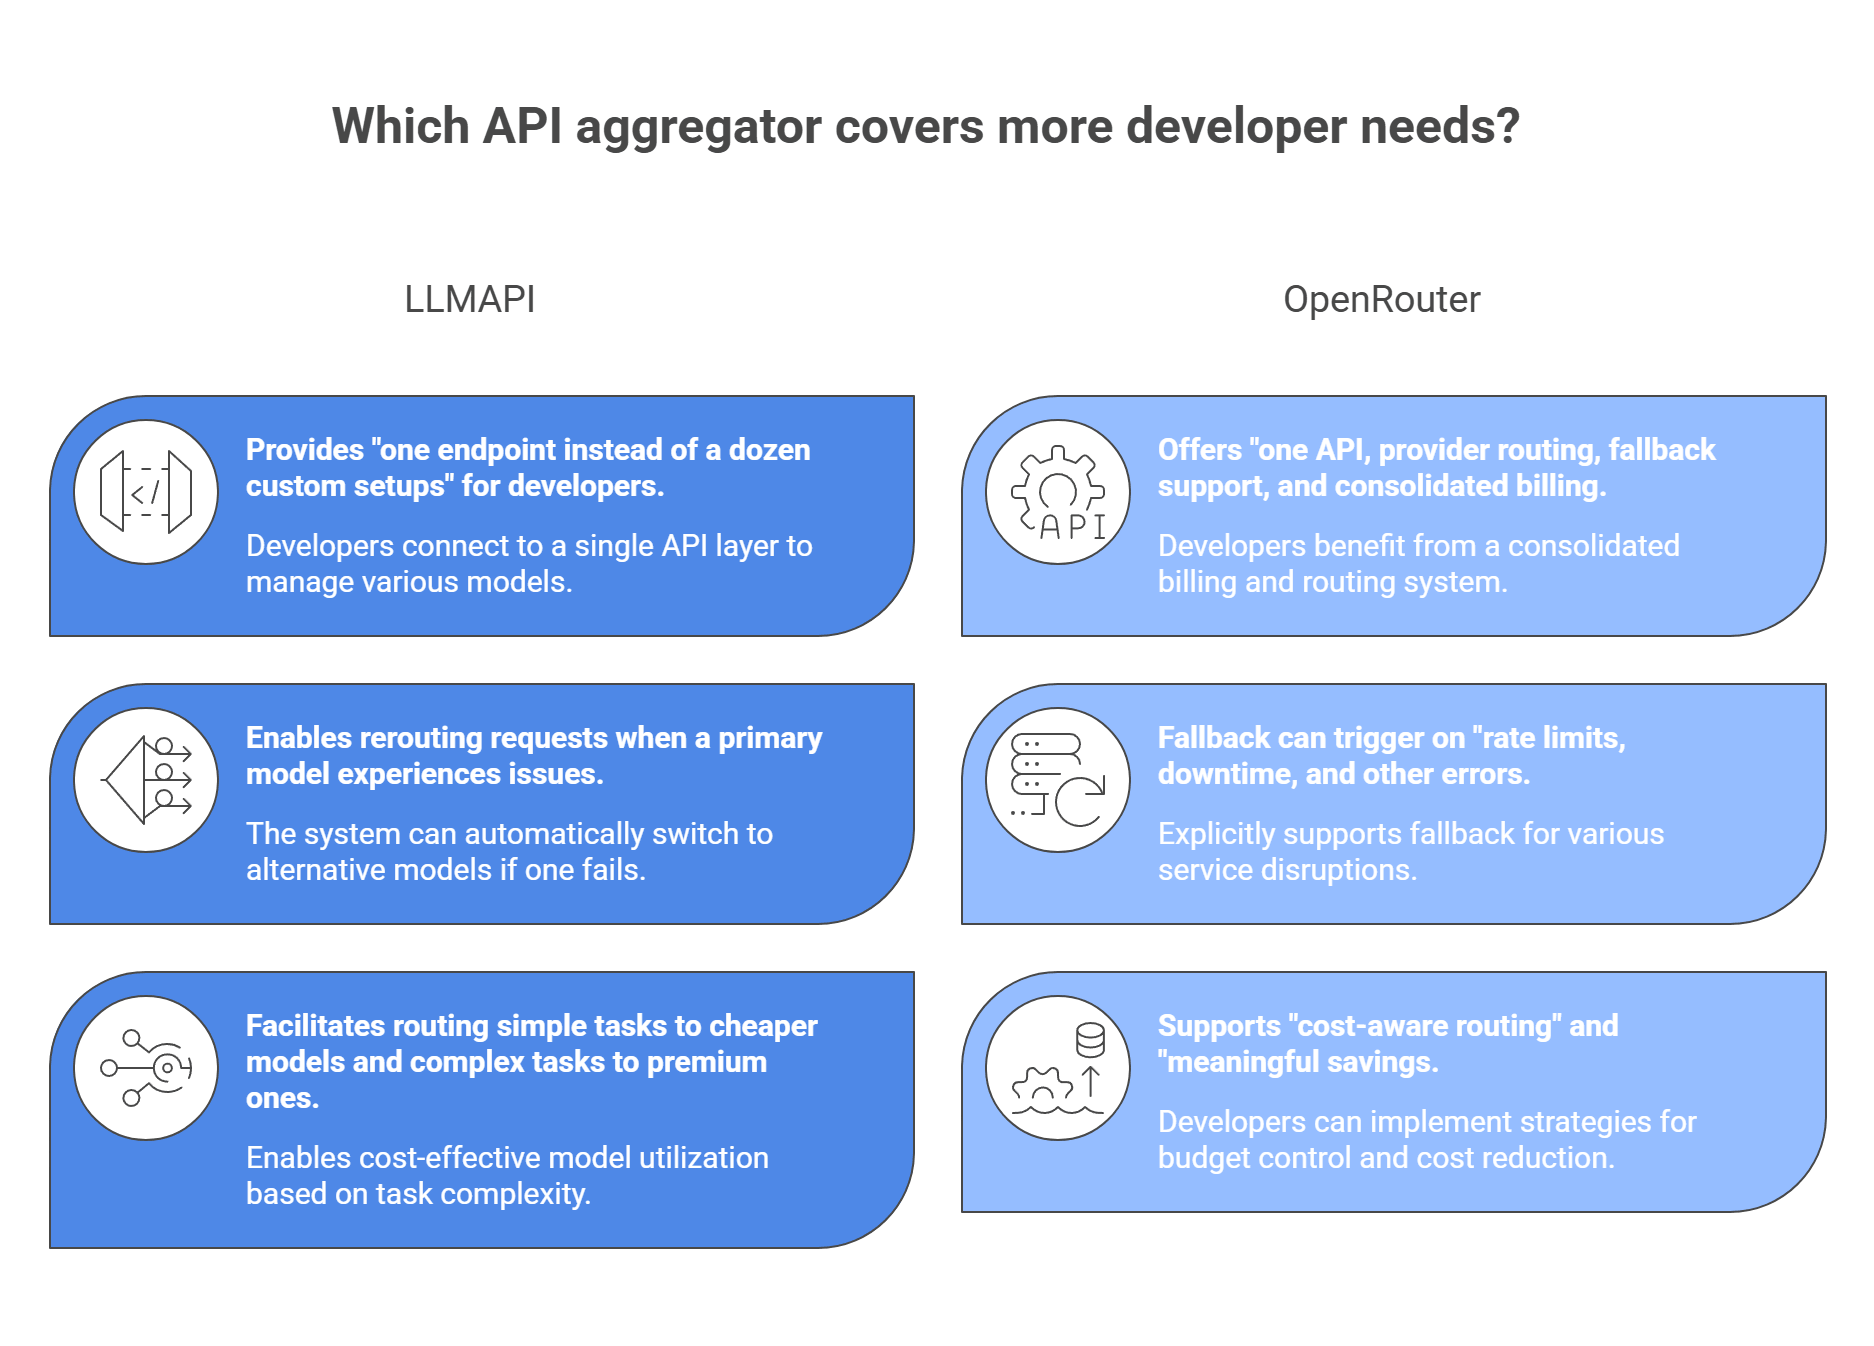
The AI API market in 2026 gives teams far more choice than before. Premium pricing and hard lock-in are no longer the only path. Whether you need enterprise-grade security, fast open-model inference, or a unified layer to handle large-scale traffic, there are now more capable and cost-effective options across the board.
The bigger challenge is not picking one “best” model and sticking with it. Models change too fast for that. What matters more is having infrastructure that lets your team test, swap, and deploy new models quickly without rebuilding everything each time.
That is why flexibility matters so much. A strong AI stack should make it easier to compare providers, control costs, and adapt as the market keeps moving.
Why build for flexibility first using LLMAPI?
If you want long-term success with AI APIs, the goal is not to chase one model forever. It is to build a setup that helps you adapt fast, scale smoothly, and stay ready for whatever changes next.
A normal LLM API (like OpenAI) gives you access to one provider’s models. A unified API (aggregator) is a middleware gateway: you integrate once and can route to multiple providers (OpenAI, Google, Anthropic, open-source) under one setup and billing flow.
Because AI workloads vary a lot. A short prompt costs very different compute than a huge document or long context. Usage-based (token-based) billing lets you pay for what you actually consume, which scales more predictably.
It gives you one endpoint instead of many. Your team avoids juggling multiple API keys, SDKs, and billing accounts, while still getting access to top models across providers.
Use routing. When one provider hits a rate limit (like a 429 error), a unified gateway can automatically route requests to another comparable model so your app keeps working.
Yes. With load balancing and fallbacks, requests can shift to a backup model if your primary provider is down or throttling, helping prevent downtime for users.
Prompt engineering has grown into real product work. Once an AI feature moves past early tests, the prompt itself becomes something your team has to track, review, improve, and protect from careless changes. A random note in a doc or an old spreadsheet stops being enough very fast.
So what do teams need instead?
They need platforms that help them test prompts against edge cases, keep version history clean, compare results across models, and watch what happens in production. That is why tools such as Langfuse and LangSmith now focus on prompt management, experiments, tracing, evaluation, and monitoring as core parts of LLM development.
Below, we break down 8 platforms worth a look, how to choose the right one, and which common problems they can help you solve before those prompt issues turn into app issues.
A prompt platform helps you test and improve prompts. LLM API helps you send them through one endpoint with routing, failover, and simpler model management. So when one provider has issues, your app does not have to.
Based on market presence, developer adoption, and robust feature sets, here are the leading tools in the prompt engineering ecosystem.
Braintrust is built for teams that want strong quality control before anything reaches production. Its site focuses on evals, experiments, playgrounds, production monitoring, and turning traces into evals, which makes it a serious option for larger teams with real release processes. Braintrust also has a free starter tier on its public pricing page.
Key features:
Pricing: Free tier available; Pro plan starts at $249/month.
Best for: Enterprise teams that need strict quality gates and CI/CD integration before a prompt goes live.
| Pros | Cons |
| First-class CI/CD and GitHub integration | High cost for the Pro tier compared to others |
| Strong environment separation prevents bad prompt deployments | Steeper learning curve for non-engineers |
| AI co-pilot helps automate test dataset creation | Overkill for simple, single-prompt projects |
| Excellent live traffic monitoring | |
| Seamless collaboration between devs and product managers |
PromptLayer is easier to understand at first glance. It sits between your app and the model layer, then logs requests, versions prompts, supports evals, and gives teams a visual editor. Its pricing page shows a free plan and paid tiers, while its product pages highlight testing, monitoring, and regression sets.
Key features:
Pricing: Free tier available; Pro plan at $49/month.
Best for: Teams that want lightweight prompt tracking, cost analytics, and an easy-to-use visual editor.
| Pros | Cons |
| Highly intuitive visual editor for non-coders | Lacks deeply advanced evaluation frameworks |
| Painless setup; sits cleanly in the API layer | Self-hosting requires a pricey Enterprise license |
| Excellent A/B testing out-of-the-box | Tracing is less granular than LangSmith |
| Granular tracking of API costs and token usage | |
| Strong template support for dynamic variables |
LangSmith is one of the strongest choices for teams that build with LangChain or LangGraph. Its core pitch is debugging, evaluating, tracing, and shipping reliable agents, and its pricing is usage-based rather than a simple flat monthly seat model.
Key features:
Pricing: Free tier available; Plus plan at $39/user/month.
Best for: Developers already building heavily within the LangChain or LangGraph ecosystems.
| Pros | Cons |
| Unmatched tracing depth for multi-step agents | UI and workflows heavily favor developers over product managers |
| Pinpoints exactly where an AI chain failed | Best features are tightly coupled to LangChain |
| Huge community library of shared prompts | Can feel overly complex for simple applications |
| Fast side-by-side model comparisons | |
| High-quality human annotation queues |
Confident AI leans hard into Git-style prompt management. Its docs and product pages highlight branching, merge-style workflows, eval gates, and prompt versioning tied closely to engineering habits. It also now has a public pricing page with free and paid tiers.
Key features:
Pricing: Custom pricing.
Best for: Software engineering teams that want to apply strict, code-like governance and parallel experimentation to their prompts.
| Pros | Cons |
| Solves the “linear versioning” overwrite problem | Requires developers to learn a Git-like flow for prompts |
| Peer review through prompt PRs | Pricing is generally aimed at larger teams |
| Automated evaluations on every commit | Setup is more involved than lightweight loggers |
| Eliminates merge conflicts in team settings | |
| Massive library of pre-built evaluation metrics |
Vellum is often the easier sell for cross-functional teams. Its docs and recent product coverage emphasize visual workflows, prompt management, experimentation, and no-markup model pricing. It also has a public pricing page.
Key features:
Pricing: Free tier available; Pro plan at $25/month.
Best for: Cross-functional teams where non-technical stakeholders (marketing, product) take the lead on prompt design.
| Pros | Cons |
| Exceptionally user-friendly for non-technical users | Lacks the deep tracing needed for complex agent debugging |
| Makes side-by-side model testing effortless | Less suited for code-heavy, dynamic prompt generation |
| Excellent test case management | Limited CI/CD guardrails compared to Braintrust |
| Smooth handoff between product and engineering | |
| Cost-effective entry pricing |
Maxim AI is built more around agent quality than plain prompt storage. Its product pages focus on simulation, evaluation, observability, and testing agents across many scenarios, and it currently offers a public free developer tier.
Key features:
Pricing: Custom Enterprise pricing.
Best for: Teams building autonomous AI agents that require massive simulation and multi-step debugging.
| Pros | Cons |
| Incredible simulation tools for AI agents | Can be overwhelmingly feature-dense |
| Creates a continuous feedback loop from production | Geared mostly toward Enterprise budgets |
| Strong support for multi-step reasoning evaluation | Custom evaluators require setup time |
| High-quality data engine for curation | |
| Seamless UI for cross-functional collaboration |
Langfuse stays popular because it is open source, self-hostable, and now covers prompt management, evals, observability, and metrics in one platform. Its docs also make a point that prompt retrieval is cached client-side, which helps lower latency risk.
Key features:
Pricing: Free/Open Source (MIT license); Cloud hosting available.
Best for: Open-source advocates and teams with strict data privacy requirements who need to self-host their observability stack.
| Pros | Cons |
| Free and self-hostable for complete data privacy | Linear versioning only (no branching) |
| Beautiful, clean developer UI | Requires custom implementation for automated CI/CD evals |
| Excellent latency and cost attribution | Lacks native prompt approval workflows |
| Active community and frequent updates | |
| Agnostic tracing works across most frameworks |
PromptHub focuses on bringing structure to fast-moving teams. It offers Git-style branching and a hosted API so you can retrieve your prompts at runtime dynamically.
Key features:
Pricing: Free tier available; Paid plans from $12/user/month.
Best for: Teams that want to decouple their prompts from their codebase entirely and fetch them as a managed service via API.
| Pros | Cons |
| Decouples prompts from the codebase beautifully | Relying on an external API for prompts adds minor latency |
| Very affordable per-user pricing | Tracing is less robust than dedicated observability tools |
| Great guardrails for safety and regression testing | Playground lacks some advanced simulation features |
| Clean UI for visual prompt chaining | |
| Easy dynamic variable injection |
The “top platform” lists are useful, but they do not cover the whole space. Some tools are built for teams that think more like ML engineers. Others focus on self-hosted tracing or security testing.
So where do these other tools fit?
Some teams do not treat prompts like simple text snippets. They treat them more like tracked assets inside a bigger ML workflow. If that sounds closer to your setup, pipeline tools may fit better.
These tools make more sense when the real question is not just “Which prompt worked best?” but also “Which dataset, model, and run did this prompt belong to?”
Some teams care less about polished hosted dashboards and more about control. If privacy is a big concern, self-hosted tracing tools usually get more attention.
A Reddit thread in r/selfhosted even framed Phoenix as one of the tools people compare when they want self-hosted LLM observability rather than a cloud-only setup.
Other teams care most about one thing: how to break the system before real users do.
And this matches how people talk about these tools in the wild. In a recent Reddit thread on LLM app security testing, one commenter described Promptfoo as useful for generating attack cases and running regressions before production. Another Reddit comment on AI agent red teaming mentioned Promptfoo for automated jailbreak and prompt-injection tests, alongside manual breaking attempts.
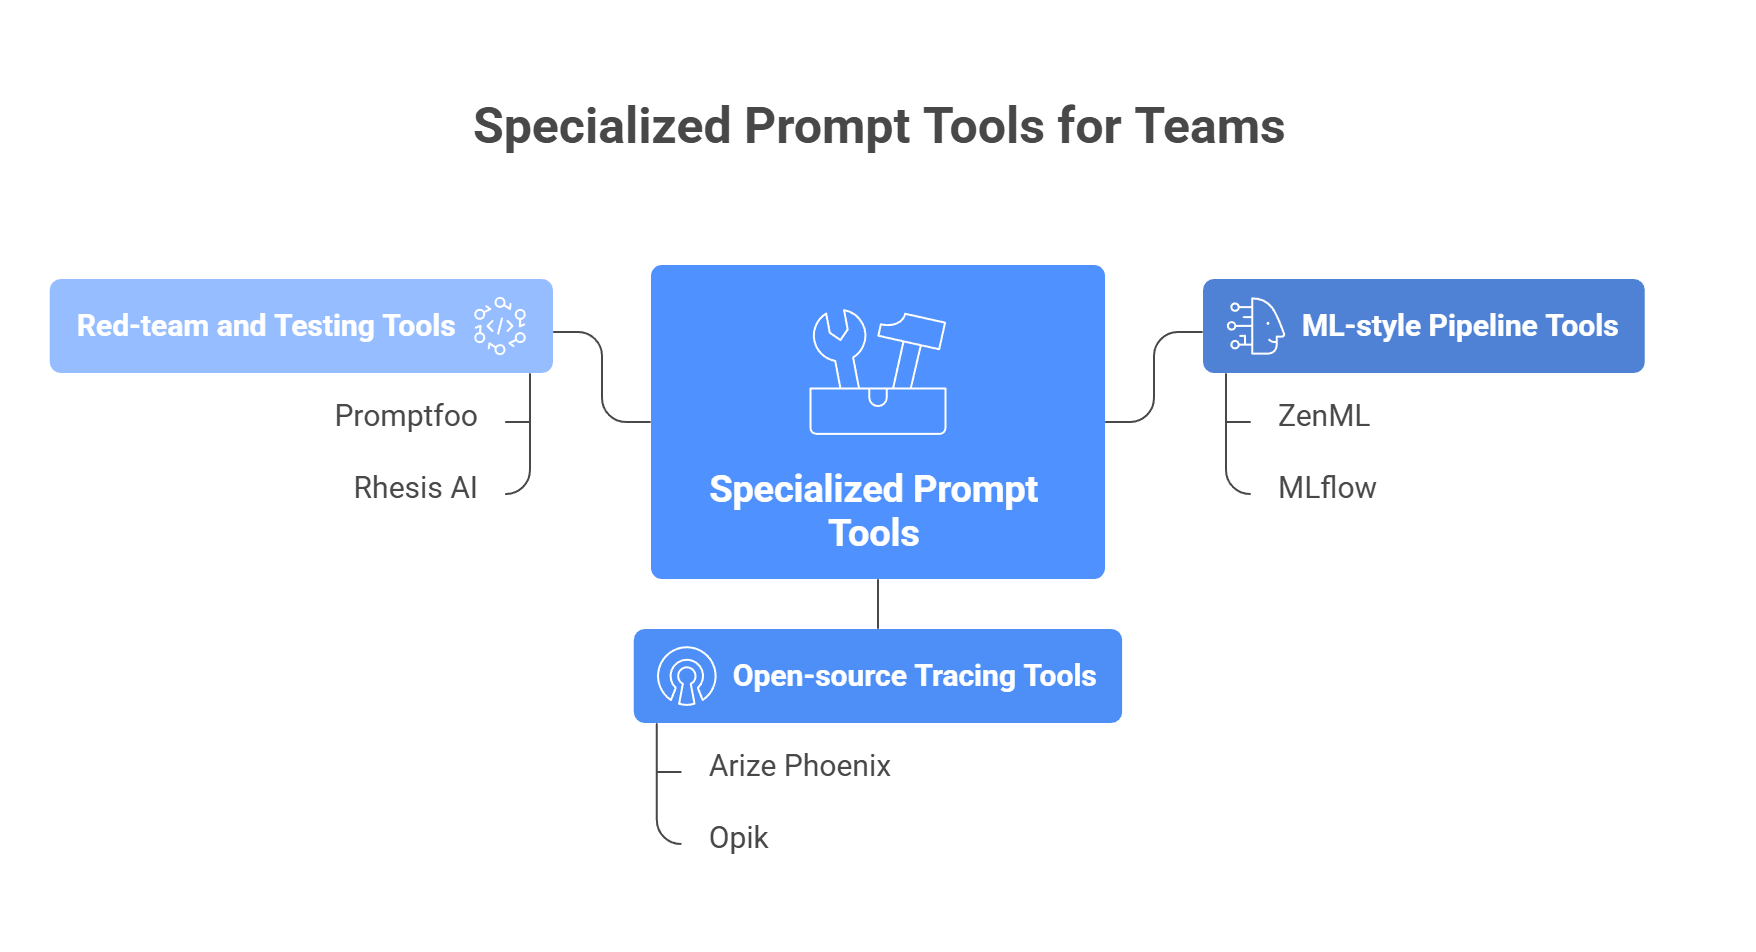
So the niche usually looks like this:
So the real niche is less about “which tool is best?” and more about which problem you are actually trying to solve.
The best tool depends less on hype and more on how your team actually works. Who writes prompts? How complex is the app? Do you need simple testing, or full tracing and version control? Do you want to update prompts inside the app without a new deploy?
These questions usually make the choice much easier.
This is one of the first things to figure out. A tool that feels easy for an engineer may feel messy to a product team, and the other way around.
If product managers, marketers, or operations teams will write and edit prompts, a visual tool usually works better. Tools such as Vellum fit this setup because they are easier to use without heavy code work.
If prompts live mostly in the hands of engineers, a more technical tool may make more sense. In that case, platforms such as Confident AI or PromptHub can fit better because they give teams more structured version control and cleaner review flows.
Not every team needs deep tracing and agent debugging. Sometimes the workflow is simple. Sometimes it is much more layered.
If your use case is mostly single-step work, such as:
Then a lighter tool can be enough. A platform such as PromptLayer may cover what you need without extra complexity.
But if your app runs through several steps, such as:
Then you need stronger visibility. That is where tools such as LangSmith or Maxim AI become more useful, because they help teams track where the workflow failed and which step caused the issue.
This part matters more than many teams expect.
Some teams are fine with prompts inside the codebase. That works best when prompts do not change often and engineering owns every update.
Other teams want to adjust prompts without pushing a new app release each time. In that case, a tool with runtime prompt delivery makes more sense. Platforms such as PromptHub are useful here because they let teams fetch prompts through an API instead of hardcoding everything.
So the real question is: do you want prompts locked into the app, or do you want them easier to swap and update later?
Some tools are built for speed. Others are built for stricter control.
If your team wants:
Then a more structured platform is usually the better pick.
If your team mostly wants:
Then a simpler tool may be the smarter choice.
A small team with one workflow usually does not need the same setup as a larger company with several teams touching prompts at once.
This part is simple, but people skip it. A powerful tool is not always the right tool.
If your team moves fast and wants to test ideas quickly, a lighter platform may help more.
If your team works with approvals, reviews, and multiple environments, then a more structured system will save trouble later.
A good tool should fit the way your team already works, not force everyone into a workflow that feels too heavy.
Before you choose anything, stop and ask:
The answer usually points to the right category faster than any feature list.
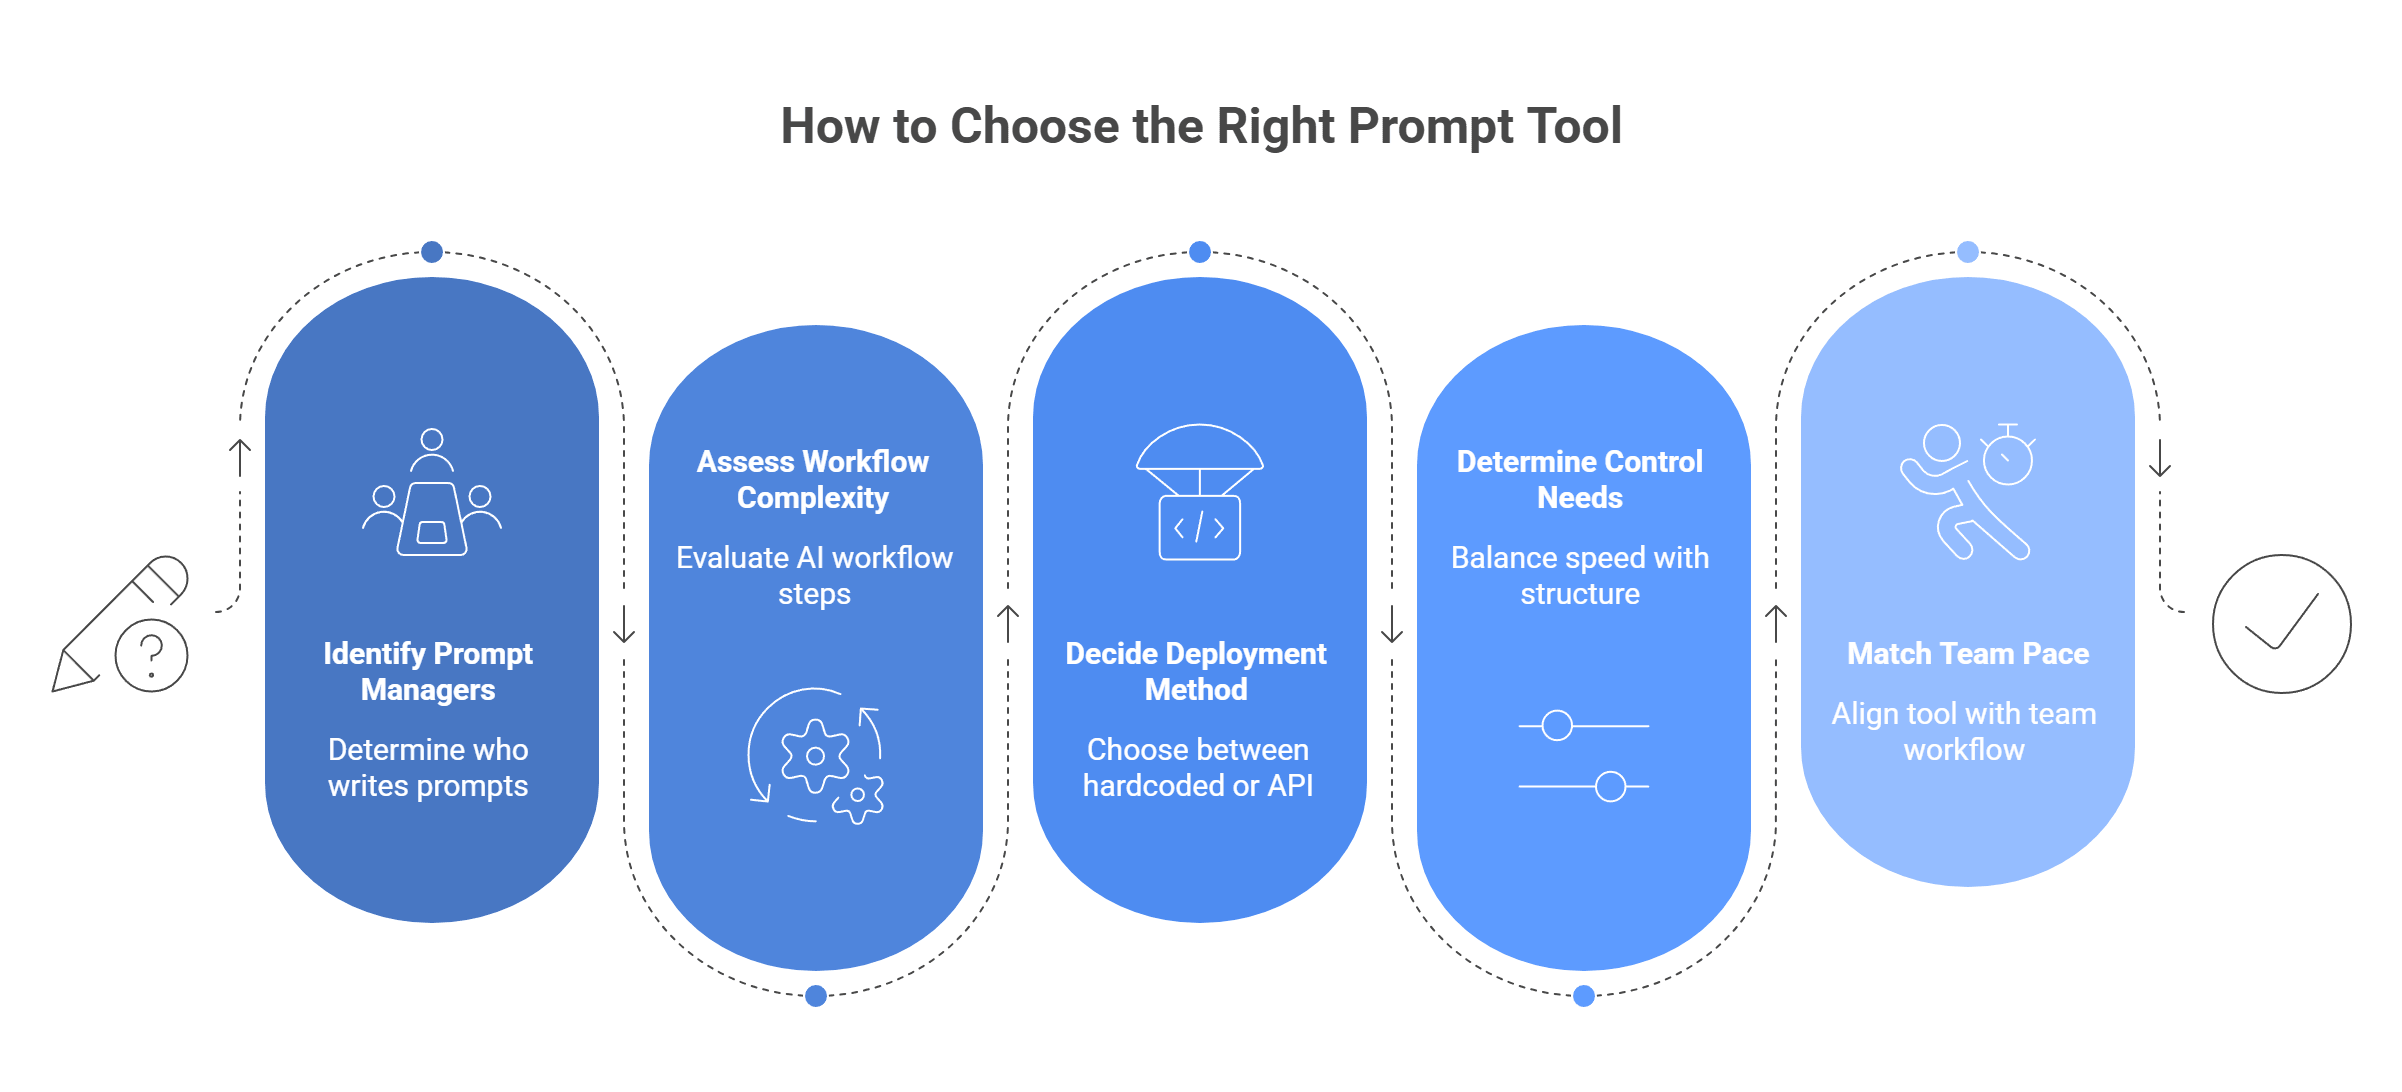
Here is the short version:
The best prompt tool is usually not the one with the most features. It is the one that fits your team, your workflow, and the way you plan to ship AI in real life.
A lot of the same complaints show up in Reddit threads about prompt work. The pattern is pretty clear: people get stuck in random trial and error, teams step on each other’s versions, and production breaks because the model path fails at the infrastructure level, not because the prompt was bad.
So the core lesson is simple: better prompts help, but structure, version control, and reliable routing usually solve the bigger problems first.
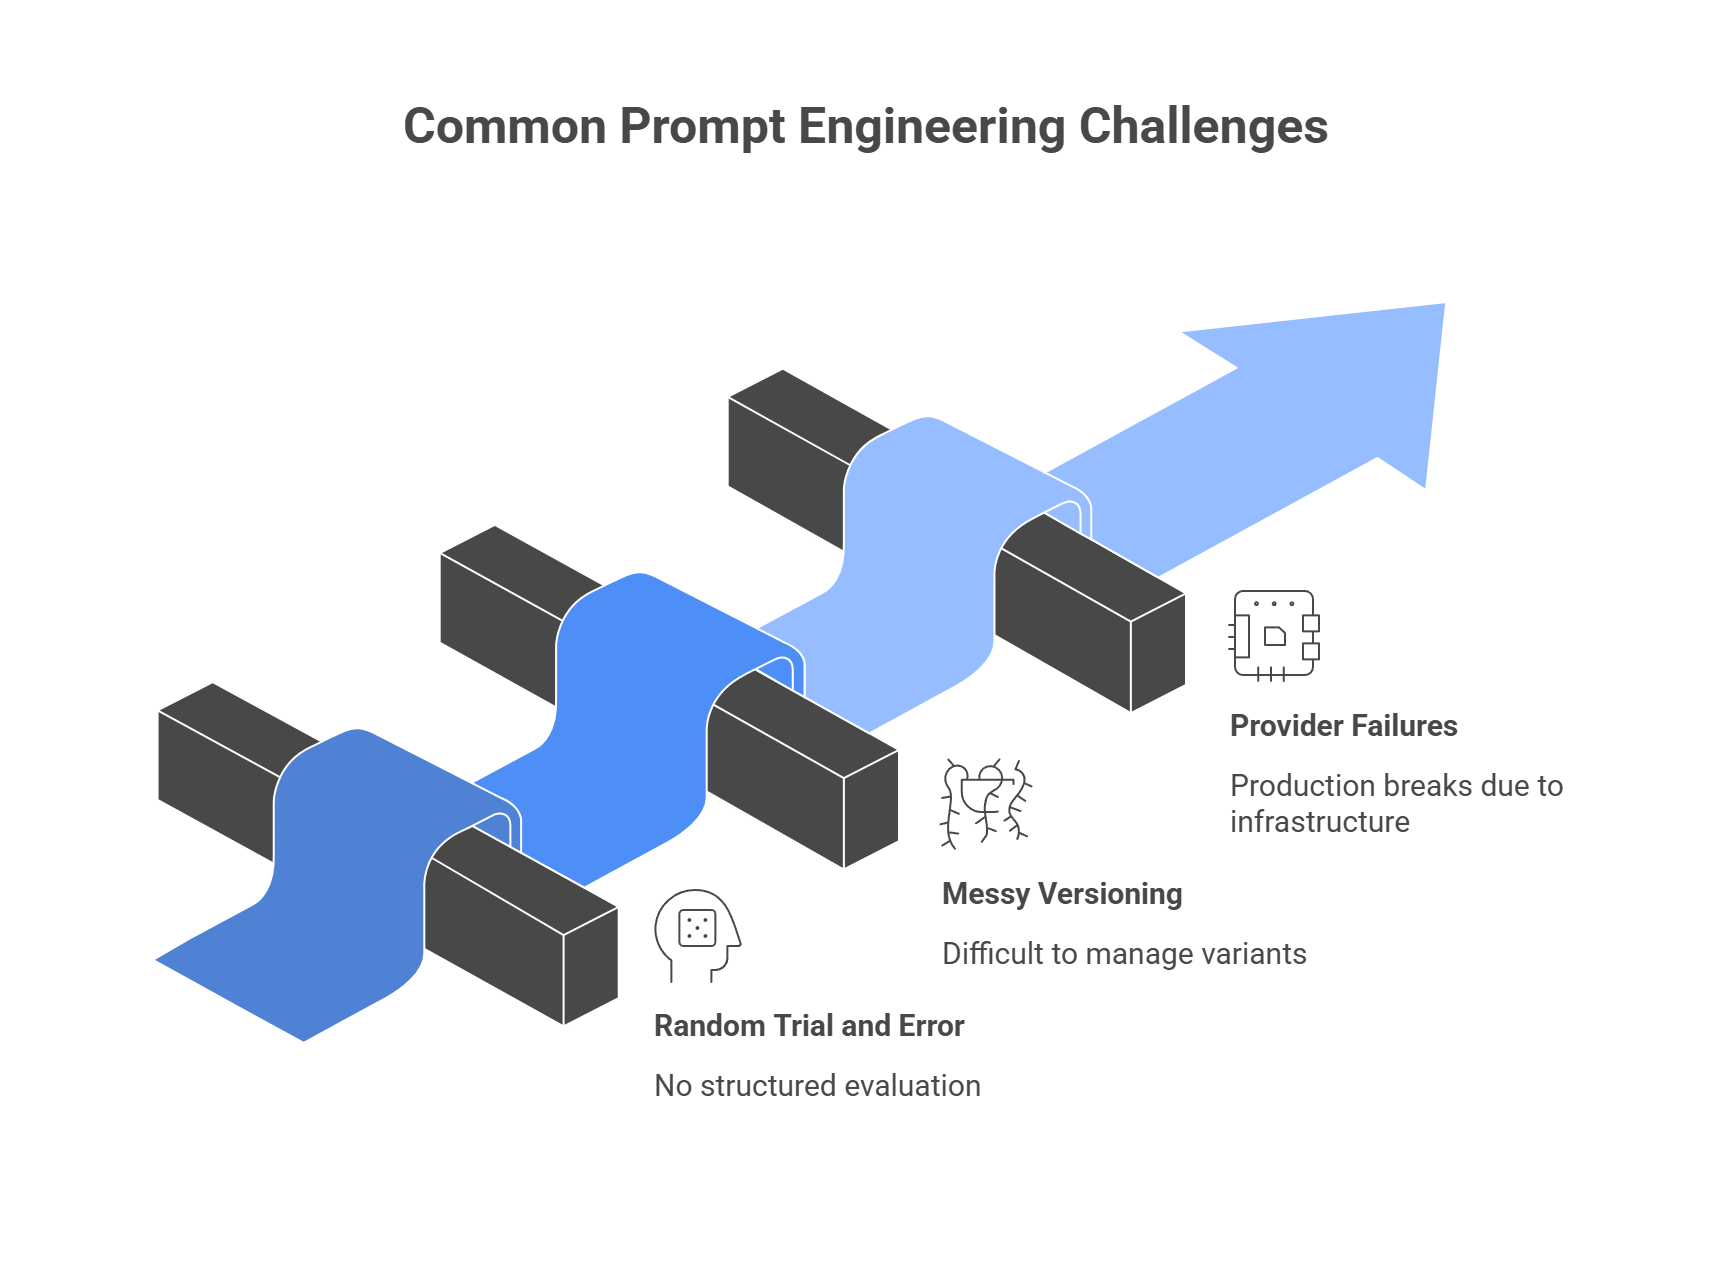
Treating prompts like a last-step detail is one of the easiest ways to end up with an unreliable AI product. A dedicated prompt management tool adds more structure, better teamwork, and stronger testing to your workflow. Whether you want deep tracing, a simple visual builder, or stricter version control, there is a platform that can fit your stack.
But writing a strong prompt is only part of the job. You also need a reliable way to deliver it in production, especially when models, pricing, and provider uptime can change fast.
That is where llmapi.ai can help. It positions itself as an OpenAI-compatible unified gateway with multi-provider access, model routing, performance monitoring, secure key management, cost-aware analytics, and provider/model usage breakdowns. Its site also highlights semantic caching and routing to more cost-effective models, which can help reduce waste as AI usage grows.
Why choose LLM API?
If you pair a solid prompt management platform with llmapi.ai, you get a setup that is easier to test, easier to run, and easier to scale. That means less time spent dealing with provider chaos and more time improving the AI features users actually see.
Prompt versioning means tracking prompt changes over time, like code version control. It matters because even a small prompt tweak can change outputs a lot. With versioning, you can test safely and roll back fast if results get worse.
Yes. Many prompt tools let you compare the same prompt across models side by side (for example, OpenAI vs Anthropic). For production routing, a single endpoint like the LLM API can help you switch providers without rewriting your integration.
Prompt tools (like Vellum or LangSmith) help you write, test, evaluate, and store prompts. An API aggregator like LLM API handles delivery and infrastructure: routing, fallback, load balancing, and cost tracking across providers.
Usually with a mix of:
No. Some are built for engineers, but many offer no-code or visual flows. That lets product managers, marketers, and domain experts improve prompts without touching application code.
AI has moved past the hype stage. It is now part of how companies save time, cut repetitive work, and handle tasks that used to take hours. Customer support, report writing, research, data analysis, internal search, all of this can now move faster with the right setup.
But here is the hard part: how do you go from “we tried a few AI tools” to a workflow your team can actually use every day?
Below, we look at the real value of AI adoption, a practical 7-step path to make it work, and how tools like LLM API can make the whole process much easier.
So, why do companies bother with AI workflows in the first place? Because the payoff is not abstract. The value usually shows up in support queues, reporting time, routine back-office tasks, and how fast teams can react.
Here is where the gains tend to show up first:
AI is good at repetitive work with clear rules, such as ticket sorting, first-pass replies, document summaries, and data entry checks. In customer support, that can mean AI handles simple requests first, while human agents focus on edge cases, angry customers, or high-value accounts.
Once part of a workflow moves from manual work to automated steps, the cost per task often drops. A practical example: instead of paying people to manually tag every support ticket or build the same weekly report by hand, AI can do the first pass and cut down rework.
In IBM’s 2025 research on intelligent automation, organizations attributed a 31% reduction in IT costs to automation. McKinsey’s 2025 AI survey also found that respondents most often reported cost benefits from AI in software engineering, manufacturing, and IT.
AI workflows do not clock out at 5 p.m. A support bot can answer common questions overnight. A document pipeline can process incoming files while your team sleeps. A global company can cover more time zones without hiring a full team for each one. Intercom’s 2026 customer service research describes support teams reshaping around AI agents as part of everyday operations.
AI can also speed up the path from raw data to action. Instead of waiting days for someone to clean data, build slides, and write a summary, leaders can get faster drafts and real-time signals.
Microsoft shared one 2025 example where a bank reduced report errors by 40%, cut analytics time, and sped up decision-making by 50% after rolling out Microsoft Fabric and Power BI. McKinsey also points to AI and data-driven systems as tools that improve decision-making and automate recurring decisions.
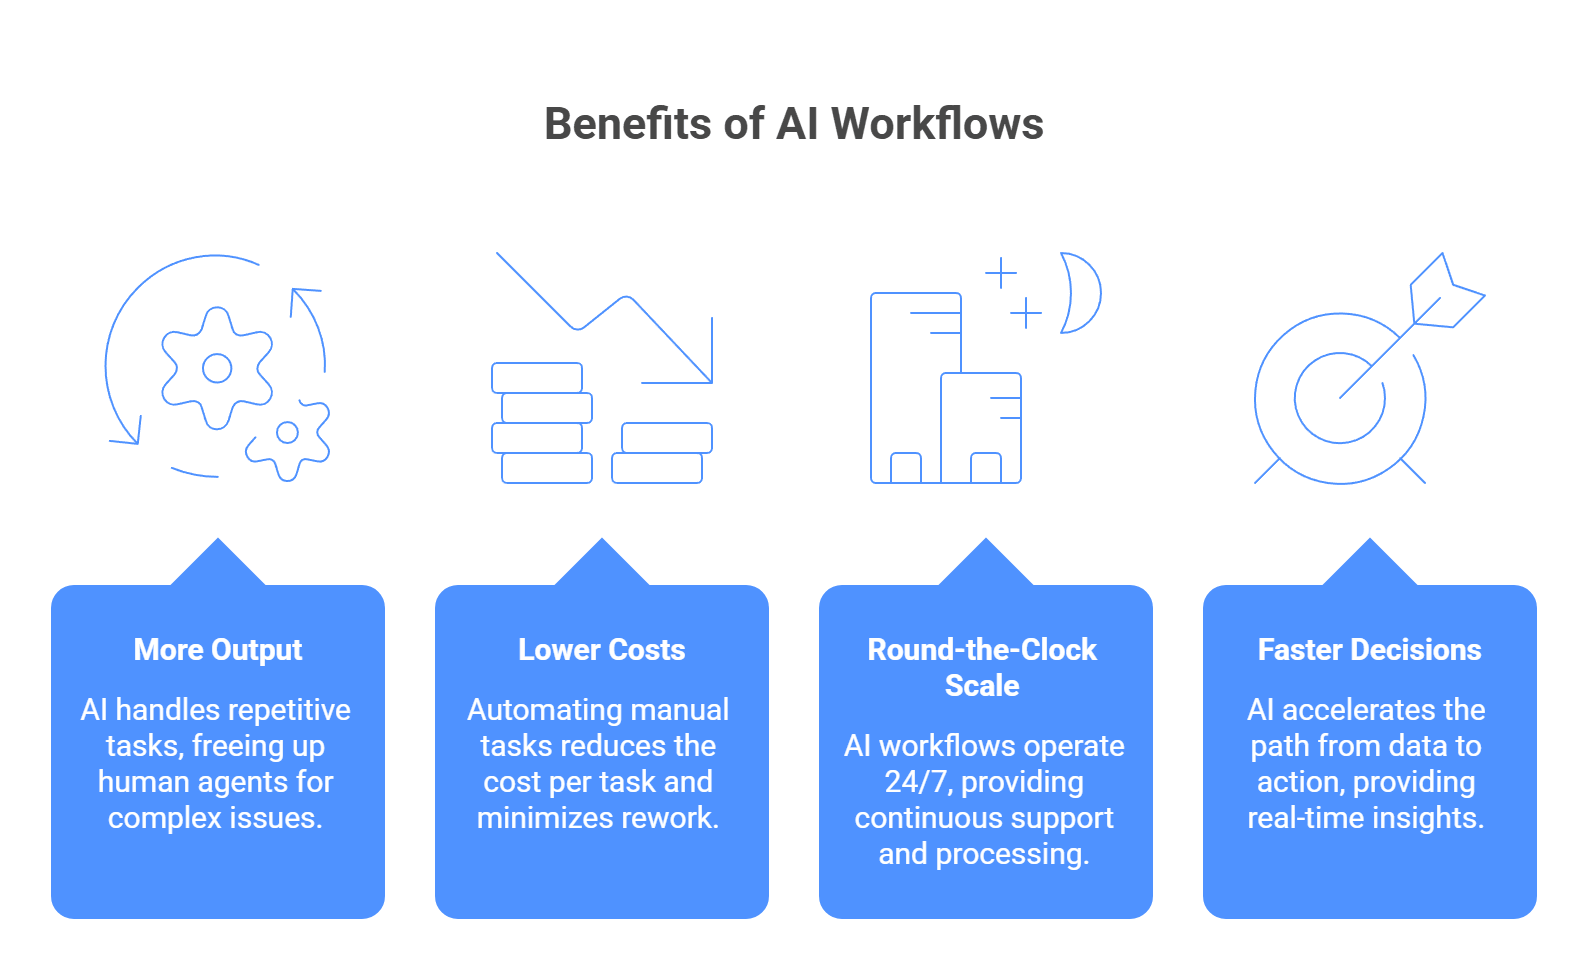
So the real question is less “Why adopt AI?” and more “Which part of your work still eats hours every week for no good reason?” That is usually where the first useful AI workflow starts.
AI adoption works best when it follows a clear path. Not a giant company-wide jump. Not ten tools at once. Just a smart rollout with a real use case, clean data, the right setup, and room to learn.
Here is a simpler way to approach it, with real examples that fit each step.
Do not try to automate half the company on day one. Start where the work is repetitive, easy to spot, and annoying enough that people will gladly hand it over.
A good example is meeting follow-up. Microsoft Teams Recap already helps teams review transcripts, files, and shared content after meetings, and Microsoft Copilot for Sales now lets sellers save AI-generated meeting summaries straight into CRM from Teams. That is a very practical first workflow: less manual note logging, less context switching, and faster follow-up.
Want AI to answer questions from your company docs? Then those docs need some order first. If the source is messy, outdated, or full of contradictions, the output will be messy too.
AWS makes this point very clearly in its RAG guidance. Better parsing, chunking, and query reformulation help improve answer quality, which tells you the same basic truth: document prep matters. This step is less flashy, but it saves a lot of pain later.
Most businesses do not need to build a model from scratch. They need a reliable way to access the right models for the job, whether that means text, search, summaries, or structured output.
That is why many teams prefer flexible model access instead of tying everything to one provider. OpenRouter, for example, offers one API across many model providers and normalizes requests and responses, which shows why aggregator-style setups appeal to teams that want fewer rewrites later.
Before you roll anything out to the whole company, try it with one team, one workflow, and one goal. Ask a simple question: did this save time, cut manual work, or improve response speed?
Even a strong tool can flop if the team does not know what to do with it. People need examples, guardrails, and time to build confidence.
Microsoft has written openly about this part too. Its AI skilling and adoption materials focus on training teams, growing internal AI skills, and helping employees work with Copilot in a more practical way. One example: Bupa upskilled teams with Microsoft 365 Copilot and GitHub Copilot, then scaled many AI use cases across the company. That is a good reminder that adoption is not just about software. It is also about habits.
The real value shows up once AI becomes part of the tools your team already opens every day. CRM, support platform, internal search, dashboards, email, docs, that is where it starts to feel useful instead of experimental.
Microsoft’s Salesforce CRM connector for Microsoft 365 Copilot is a simple example. It lets organizations index Salesforce contacts, leads, cases, and accounts so users can search that content from Microsoft Search and Copilot. Salesforce also highlights AI call summaries and predictive features inside CRM workflows. That is what integration should look like: fewer app jumps, more useful context inside the system people already use.
Once a workflow is live, the job is not over. You still need to watch quality, cost, latency, and bad outputs. Otherwise, small issues grow quietly. In plain terms: check what the model says, how much it costs, where it fails, and whether it still helps enough to justify expansion into other teams.
A simple way to think about the whole process: pick one annoying task, clean the data, choose flexible infrastructure, test on a small team, train people, plug it into your stack, then keep a close eye on quality and cost. That is usually how AI stops being a side experiment and starts becoming part of real work.
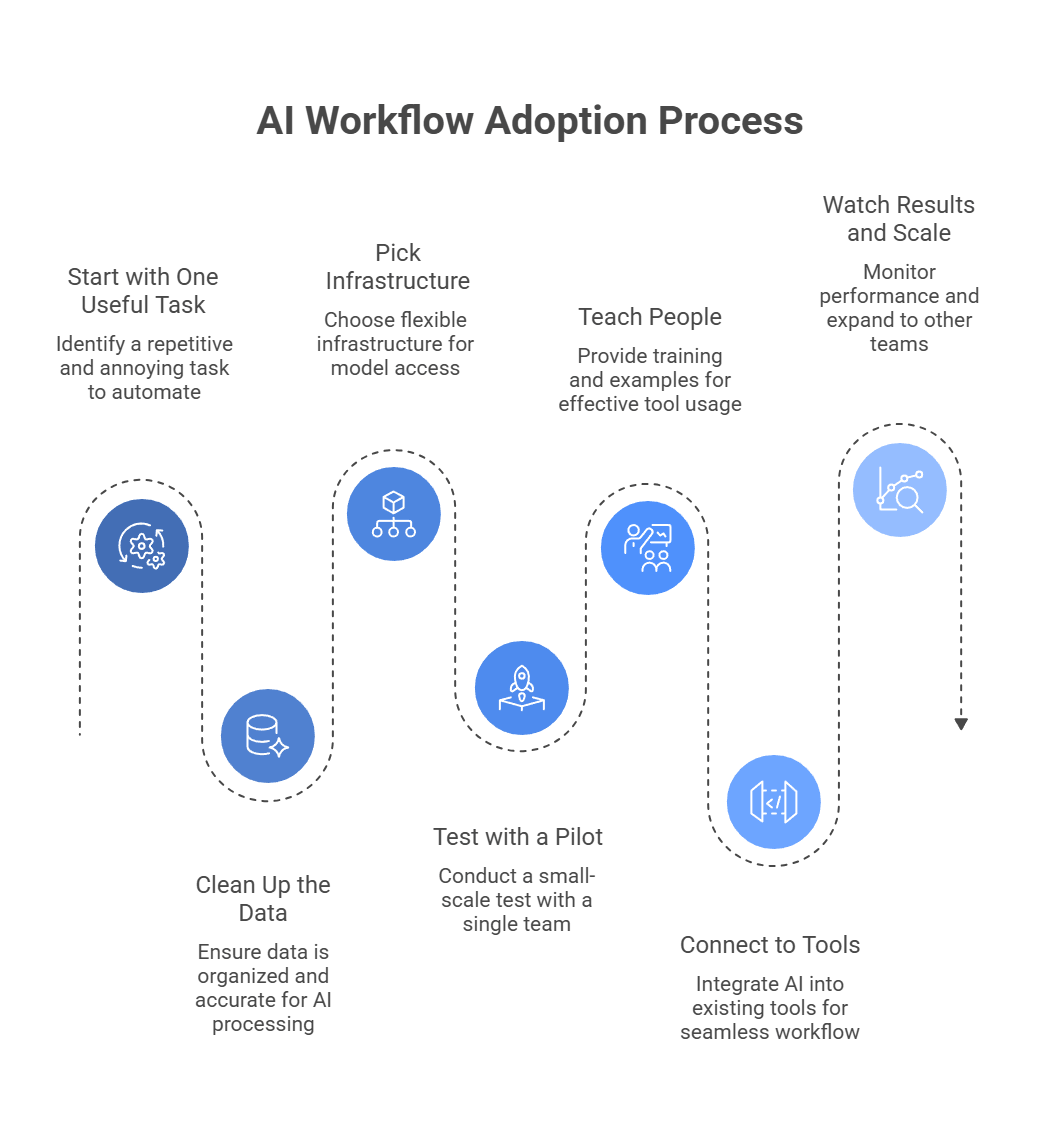
Even with a good plan, problems can still show up. A workflow may fail during peak hours, someone may paste sensitive data into the wrong tool, or the model may return an answer that sounds right but is not. These are some of the most common issues teams run into early on.
| Common issue | What this can look like | How to fix it |
| API rate limits and downtime | Your support bot works in the morning, then fails once traffic spikes. Some users get answers, others get errors. | Add routing and failover, so requests can move to another model if the first one fails. A unified router such as LLM API makes this much easier. |
| Data privacy concerns | An employee pastes a customer message with names, emails, or account details into a public AI tool. | Use enterprise-grade API access, limit who can send data, and redact sensitive details before requests go out. |
| Model hallucinations | AI answers a policy question and adds a rule that does not exist. The text sounds polished, so nobody notices right away. | Add human review for important tasks. Use strict prompts and RAG, so the model works from approved sources instead of guessing. |
| Prompt injection and bad inputs | A document contains hidden instructions that try to override your system rules. | Treat outside content as untrusted. Filter inputs and keep system instructions separate from retrieved content. |
| Messy or contradictory source data | The assistant pulls from two old docs that say different things, so the answer comes out mixed or wrong. | Clean the source data first. Remove outdated files and keep one clear source of truth for each topic. |
Once the strategy is clear, the next question is simple: what tools do you actually need to make it work?
Most teams do not need a huge stack. They need a few solid tools that cover three jobs: model access, workflow automation, and custom AI logic. That is the core setup for most real AI workflows.
This part matters once you use more than one model. Without a shared layer, teams end up with too many API keys, messy billing, custom failover logic, and extra work every time they want to test a new provider.
This is the layer that connects AI to the tools your team already uses. Think Slack, Gmail, CRMs, docs, forms, support tools, and internal alerts.
This category comes in when a simple prompt is no longer enough. If you want AI to work with your own documents, databases, tools, or multi-step tasks, this is where frameworks start to matter.
A simple way to choose: If you need one place to manage models, look at LLMAPI, Portkey, or LiteLLM. If you need AI to connect with business apps, look at Make, Zapier, or n8n. If you need custom RAG or agent behavior, look at LangChain, LlamaIndex, or Flowise.
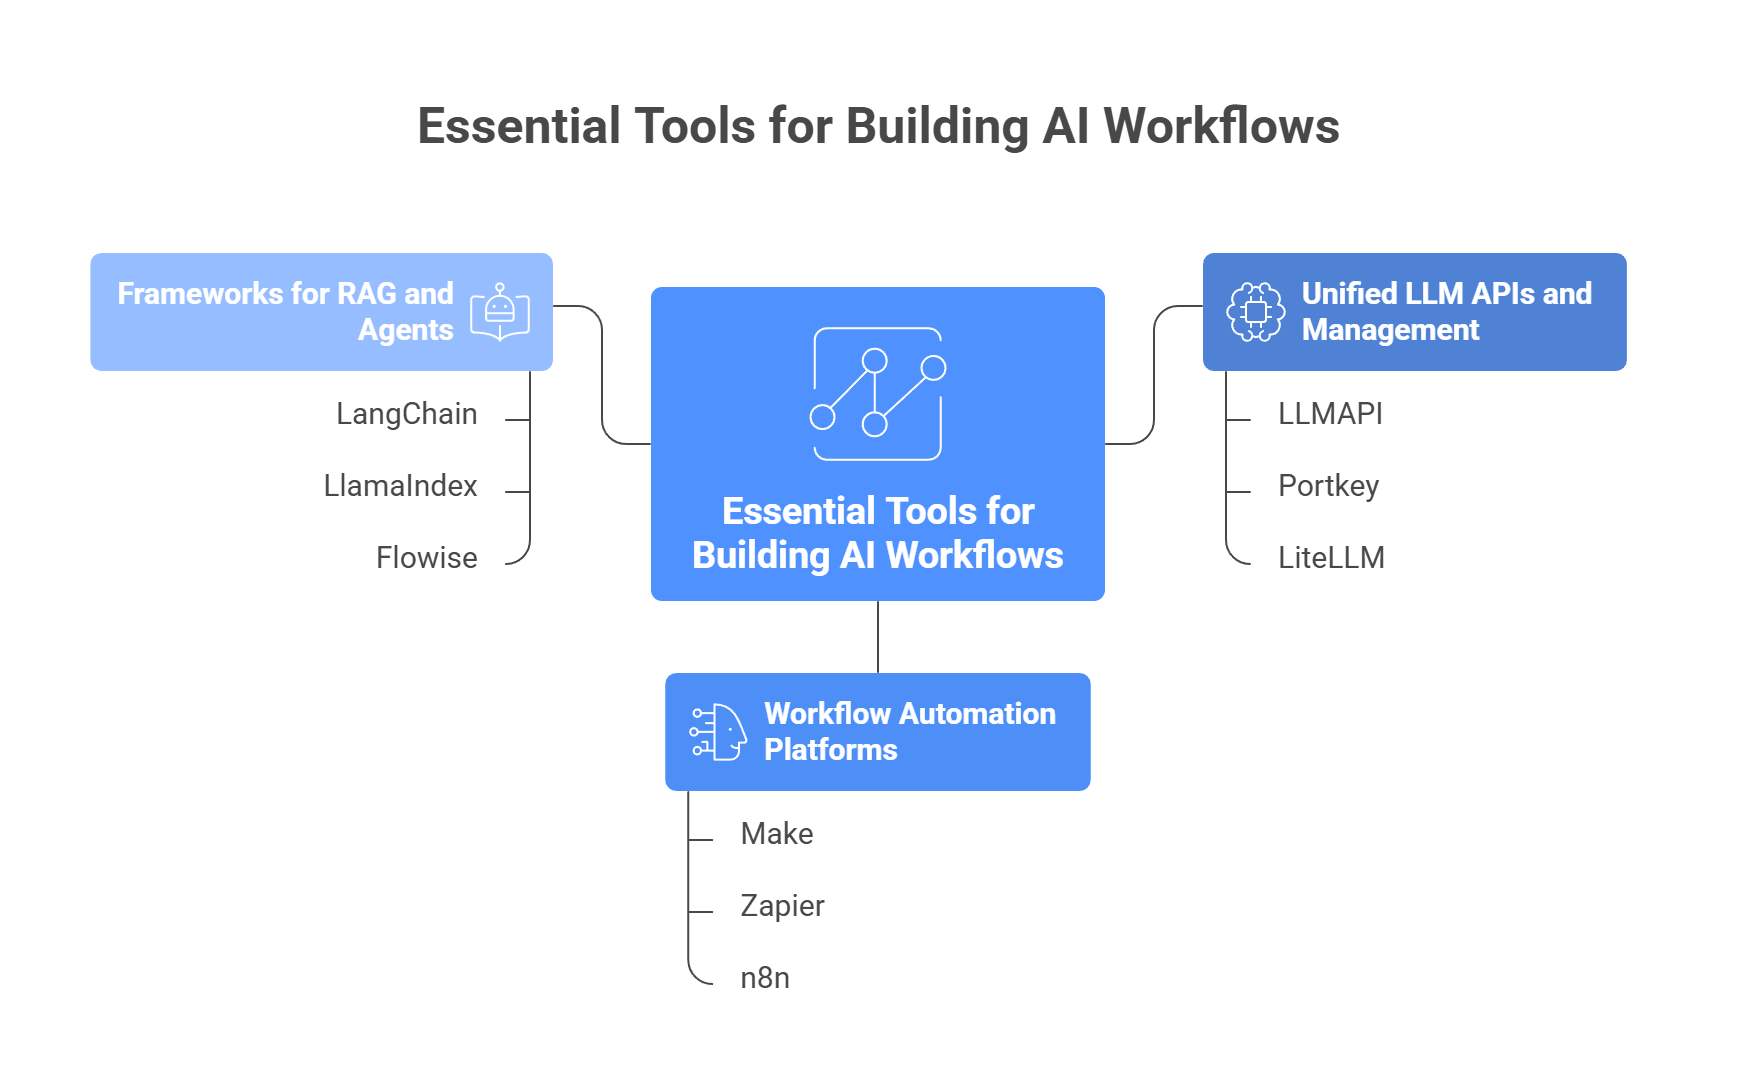
Before you scale an AI workflow, you need a simple way to prove that it is worth the cost. The easiest way is to track three things: time saved, cost per task, and error reduction. Those are the numbers that show whether the workflow helps the business or just looks impressive.
A practical formula many teams use is:
(Time saved per task × number of tasks × hourly labor cost) − AI cost
That gives you a basic efficiency ROI view. A 2025 ROI guide from Writer uses this same approach for generative AI programs.
Start with one task. Measure how long it takes a person to do it without AI, then compare that with the AI-assisted version.
For example:
Now multiply that by volume.
Then attach labor cost.
This kind of measurement is not just theoretical. Zapier’s 2025 case study on Remote says its AI-powered help desk saved 616 hours per month on IT support tickets and auto-resolved 27.5% of IT help desk tickets.
Once you know the labor cost of the old process, compare it to the AI cost.
A simple check:
This is where many teams get tripped up. They measure output, but forget usage costs, retries, failed calls, and tool subscriptions. ROI works best when you compare the full monthly AI cost against the full monthly labor cost avoided. That is also why cost tracking and budget controls matter in production AI setups. LiteLLM, for example, highlights budget tracking as part of its platform, and Writer’s ROI framework also treats solution cost as part of the core ROI formula.
This metric is easy to miss, but it matters a lot. If AI cuts typos, wrong tags, missing fields, or formatting mistakes, your team spends less time fixing work later.
A simple way to measure it:
Example:
That kind of drop matters because bad output costs time twice: once to create it, and again to fix it. Workflow optimization guides now regularly treat error reduction as a core AI performance metric alongside time saved and cost.
Use this before you call the workflow a success:
A good AI workflow should answer three questions clearly:
If the answer is yes to all three, you have something worth scaling. If not, the workflow probably needs a better use case, cleaner inputs, or tighter controls.
Adopting AI workflows can shift a business from reacting to problems to handling them earlier and more efficiently. The best way to start is usually simple: focus on a few high-value use cases, help your team get comfortable with the tools, and build on infrastructure that can adapt as AI keeps changing.
But even strong AI plans can get slowed down by technical complexity. Managing providers, APIs, and infrastructure across different tools can create extra work that pulls attention away from actual business goals.
That is where centralized API solutions can help. Instead of spending time on integration headaches, businesses can simplify access to models, reduce operational friction, and stay more flexible as their AI needs grow.
Why choose a centralized API like the LLM API solution?
If your goal is to build AI workflows that are practical, scalable, and easier to manage, a centralized API layer can make that process much smoother. It lets your team spend less time fixing infrastructure and more time creating better experiences for customers and employees.
With modern low-code tools and unified APIs, simple workflows (like email categorization or document summarization) can go live in days. Bigger, company-wide rollouts usually take a few months.
No. Data scientists help when you build custom models, but many useful workflows run on pre-trained models via APIs, which regular engineers can integrate. Ops teams can also build a lot with no-code tools.
LLM API works like a single gateway to multiple LLM providers. Instead of maintaining separate integrations, contracts, and billing for OpenAI, Google, and Anthropic, your team uses one standardized API.
If you rely on one provider, workflows can stop. With LLM API, you can set up automatic fallbacks so requests reroute to another model and your workflow keeps running.
Enterprise API endpoints typically have stronger privacy terms than consumer chat apps, and providers often say they don’t train on your data for those services. Still, it’s smart to mask PII before sending anything sensitive to an external API.
Data is at the center of almost every modern product. But good data is hard to get, hard to share, and often risky to use. That becomes a real problem when you need to train machine learning models, test software, debug databases, or fill staging environments with realistic records.
This is where synthetic data generation APIs come in. These tools create artificial data that looks and behaves like real data. The goal is to match the structure, patterns, and relationships in the original dataset without exposing personal or sensitive information.
Below, we break down what synthetic data is, why more developers now rely on these APIs, and 10 tools worth a closer look.
Synthetic data generation is the process of creating artificial data with AI models such as large language models, GANs, and diffusion models. The idea is simple: the data is new, but it still reflects the structure, logic, and patterns of real-world data.
Unlike masking or obfuscation, synthetic data does not depend on edited copies of existing records. It creates brand-new datasets from scratch, which lowers the risk of someone tracing the data back to real people or original entries.
Synthetic data can take many forms, such as:
The main value is that you still get useful data without the same privacy risks tied to real customer or user information. That makes synthetic data a practical option for teams that need to work around rules such as GDPR or CCPA while still keeping their projects useful and realistic.
Most regular APIs return data that already exists. You send a request, and the system gives you a specific record, such as a user profile, order, or product entry.
Synthetic data APIs work in a different way. They create new data on demand based on the rules, examples, seed data, or schema you give them. So instead of pulling one saved record, they produce fresh records that match the logic and shape of the original dataset.
What makes them stand out:
For example, if a synthetic profile includes a US state and ZIP code, those values should still make sense together. The same goes for dates, transactions, product data, or linked records across tables. That is a big part of what makes these APIs useful. They actually help teams create realistic datasets that still behave like the real thing.
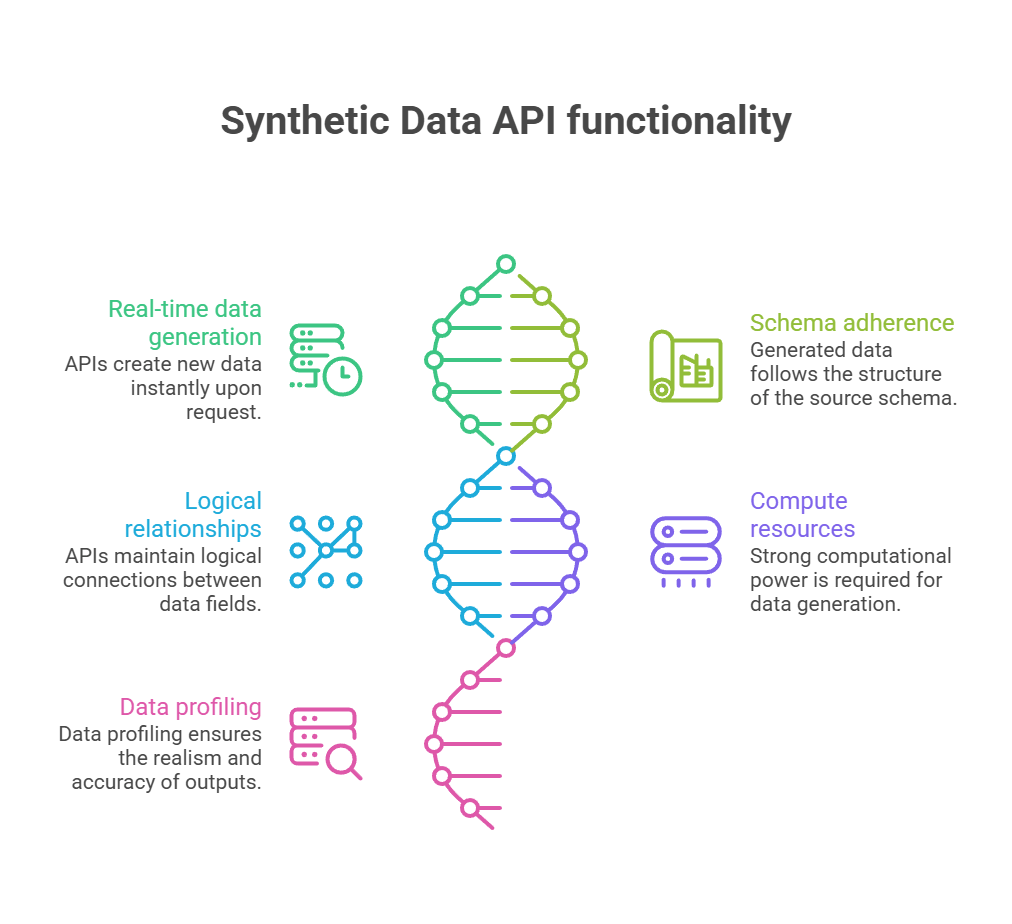
Developers rarely stay with one synthetic data API for years. The market moves fast, project needs shift, and what works well for one stage can feel limiting later.
Here is what usually pushes teams to look elsewhere:
A few real examples make this easier to see:
This is also why API gateways and aggregators have become more useful. Instead of hard-wiring your app to one model or one provider, a gateway can give you one endpoint, model routing, retries, and fallback options.
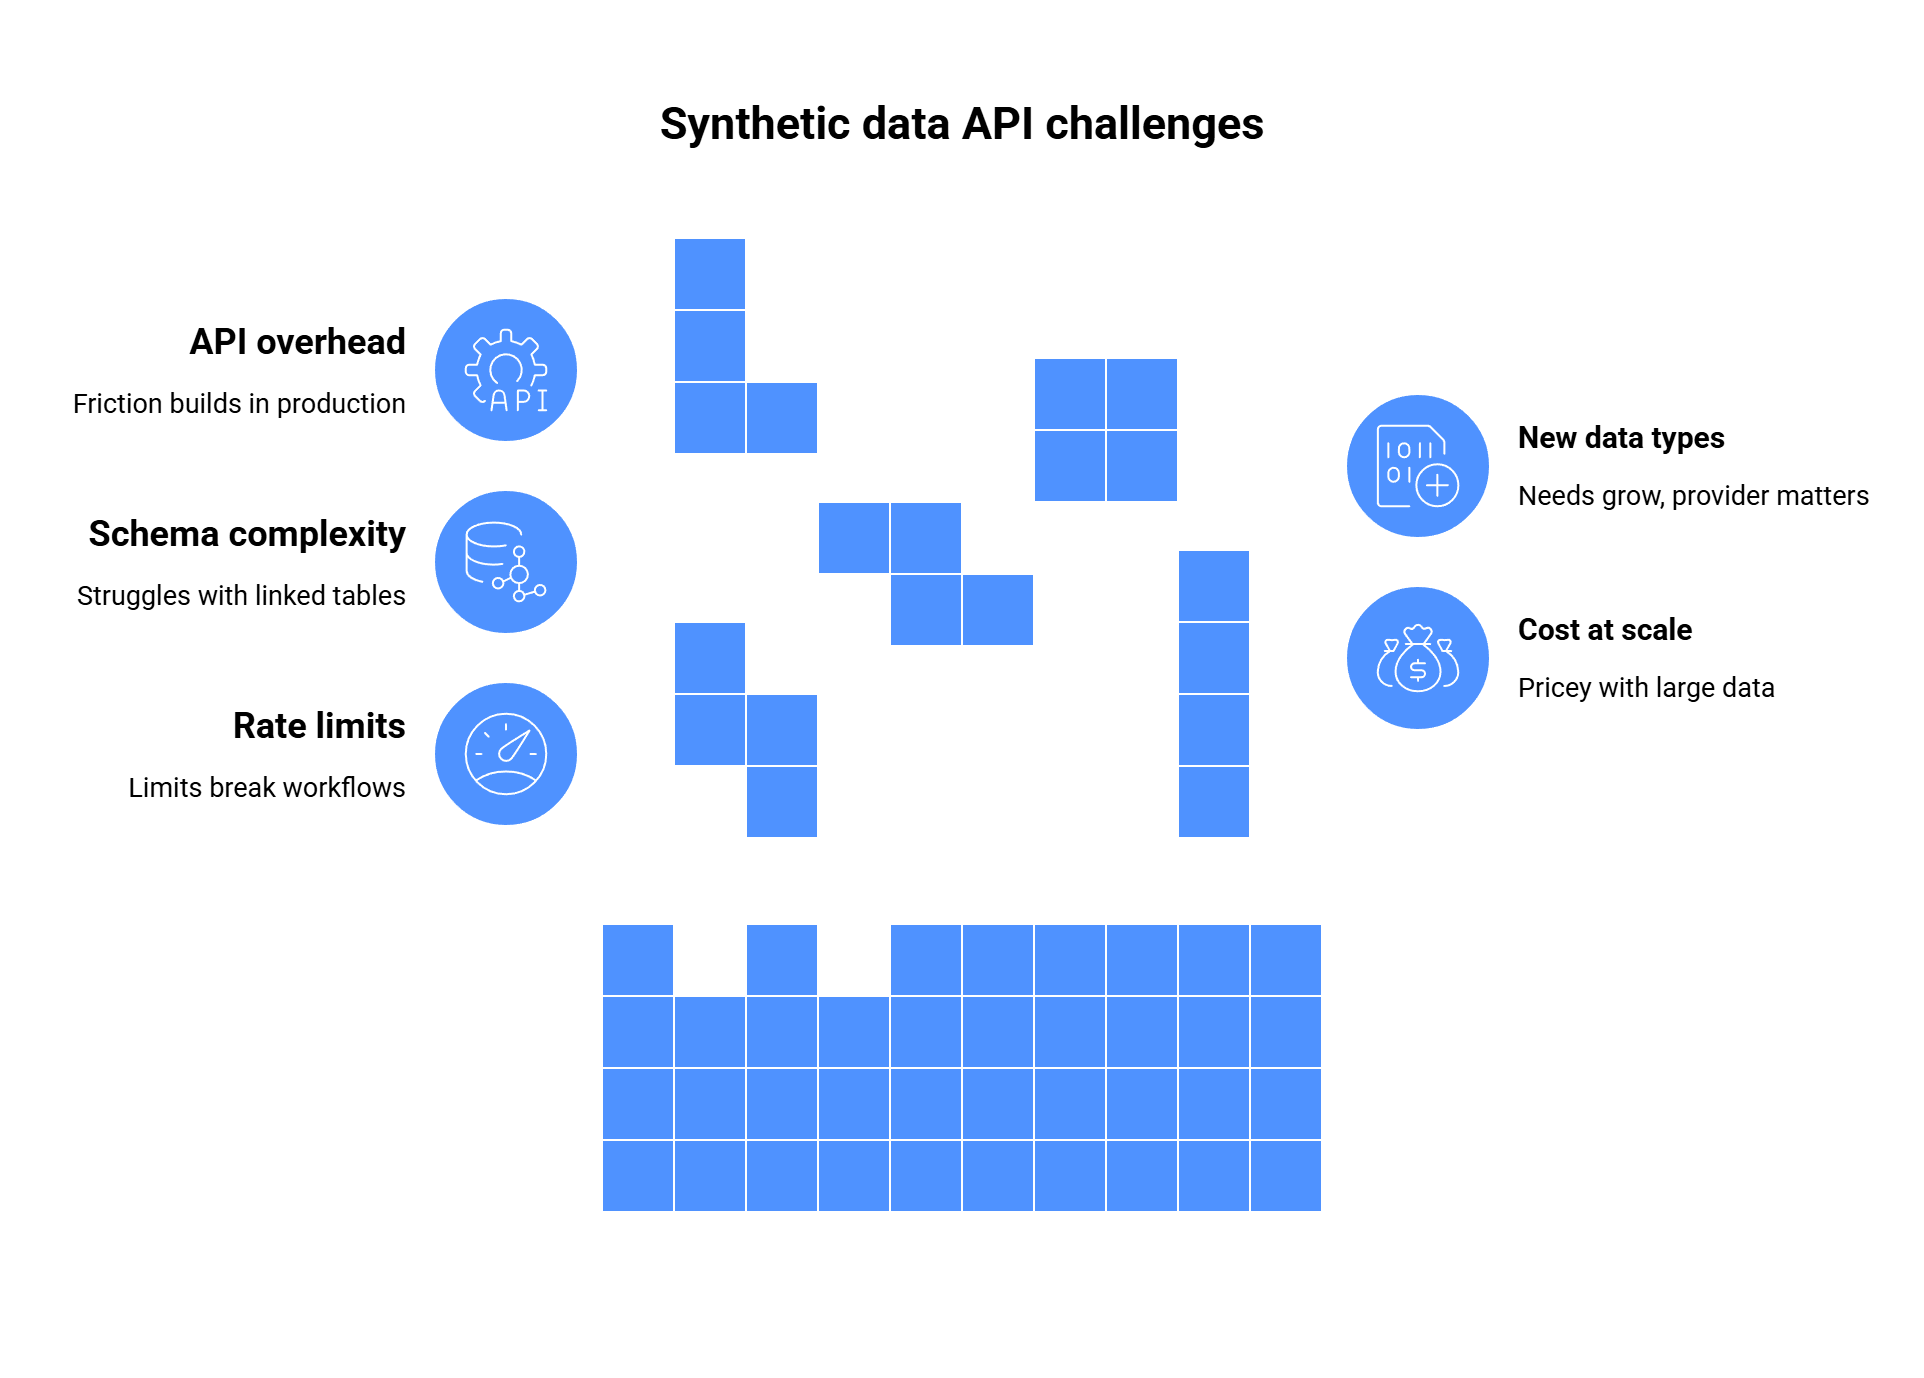
So when developers switch synthetic data APIs, the reason is usually practical: they need better scale, lower cost, stronger support for complex schemas, or a setup that does not fall apart once production traffic hits.
Based on current market research, user reviews, and developer forums, here is an in-depth breakdown of the top 10 APIs for generating synthetic data.
Gretel.ai is a massive favorite among developers for privacy engineering. It offers a suite of APIs to synthesize, transform, and classify data. It excels at taking a small sample of your real data and generating terabytes of safe, statistically similar data.
Key features:
Pricing: Free developer tier (2 concurrent jobs). The Team plan starts at $295/month.
Best for: Developer teams needing to integrate tabular and time-series data synthesis directly into CI/CD pipelines.
What users say: Users on G2 and PeerSpot praise its ability to efficiently generate terabytes of data and its excellent developer documentation. Some note that the initial setup curve can be steep for non-technical users.
| Pros | Cons |
| Highly developer-focused with great SDKs | Steeper learning curve |
| Excellent privacy-preserving metrics | Can get expensive for massive enterprise jobs |
MOSTLY AI is the pioneer of structured synthetic data. It allows users to generate highly realistic mock data for prototyping and testing. They focus heavily on ensuring AI models don’t memorize real data.
Key features:
Pricing: Free tier (up to 5 credits/day). Paid tiers start around $3/month for basic team needs, scaling to custom enterprise pricing (often quoted via AWS Marketplace at ~$3,000/mo for managed instances).
Best for: Non-engineers and data scientists who need reliable tabular data fast, without writing complex code.
What users say: Reviewers rave about the intuitive UI and the speed of results. A common piece of feedback is that the UI is fast to learn, though advanced shaping based on deep data hierarchies can sometimes be tricky.
| Pros | Cons |
| Very user-friendly, great for non-coders | Sometimes struggles with deeply nested hierarchies |
| Generous free tier for basic daily use | Enterprise self-hosting is a premium add-on |
Tonic.ai provides a comprehensive suite to mimic production data safely. It is an enterprise heavy-hitter that uses data masking, subsetting, and synthesis to provide perfect test environments.
Key features:
Pricing: Custom enterprise pricing. Contract values typically range from $15,000–$30,000 annually for small setups, scaling to $100k+ for large enterprises.
Best for: Large enterprises and highly regulated industries (finance, healthcare) needing to clone complex production databases safely.
What users say: Reviewers describe it as a “game changer for test data” and praise their customer service. However, many point out that the implementation is complex and the price tag makes it prohibitive for small startups.
| Pros | Cons |
| Flawless mimicking of complex database schemas | High enterprise cost |
| Top-tier customer support and white-glove setup | Setup and configuration can be very complicated |
YData focuses heavily on data-centric AI, offering automated data profiling alongside synthetic data generation to fix biases and improve machine learning model accuracy.
Key features:
Pricing: Custom enterprise pricing (no publicly listed tiers).
Best for: Data science teams focused on improving the quality of their machine learning training data.
What users say: Users highly rate its ability to clean and synthesize financial and telecom data to prevent fraud. They love the ease of use, though some mention performance can lag slightly when processing massive datasets locally.
| Pros | Cons |
| Excellent at identifying and fixing data bias | Pricing lacks transparency for smaller teams |
| Strong visual data profiling tools | On-premise deployment can be complex |
While fundamentally an LLM, OpenAI’s API is one of the most widely used tools for generating synthetic unstructured data, such as conversational logs, JSON objects, user reviews, and customer support tickets.
| Pros | Cons |
| Unmatched text generation quality | Not designed for massive relational database syncs |
| Highly versatile (JSON, text, code) | Can become expensive at high volume |
Similar to OpenAI, Anthropic’s Claude API is heavily used for synthetic text data generation. It is particularly known for its massive context window and strict adherence to formatting rules, making it great for complex data structures.
Key features:
Pricing: Pay-as-you-go based on token usage.
Best for: Generating complex, long-form synthetic documents (e.g., synthetic medical records, legal contracts) for AI training.
What users say: Developers love Claude’s ability to follow complex generation instructions perfectly. However, its strict safety filters sometimes trigger false positives, blocking benign synthetic data generation.
| Pros | Cons |
| Massive context window for large data generation | Aggressive safety filters can interrupt workflows |
| Exceptional at following rigid output schemas | Slower generation speed on largest models |
SDV is an open-source ecosystem for synthetic data generation, with enterprise APIs and support provided by DataCebo. It’s a favorite among hands-on Python developers.
Key features:
Pricing: Core SDV is free/open-source. Enterprise features and API support via DataCebo require a custom quote.
Best for: Python developers and data scientists who want to build and run synthetic data models locally or in air-gapped environments.
What users say: The community loves that it’s free and deeply customizable in Python. The downside is that it lacks the polished, out-of-the-box UI that competitors offer.
| Pros | Cons |
| Free and open-source core | Requires strong Python/coding skills |
| Great for air-gapped, local generation | Lacks a dedicated visual interface |
Google’s Gemini API is a powerhouse for multimodal synthetic data. If you need to generate synthetic text, structured JSON, or analyze images to generate synthetic descriptions, Gemini is highly capable.
Key features:
Pricing: Pay-as-you-go (generous free tier available with rate limits).
Best for: Workflows that require generating synthetic data based on multimodal inputs (e.g., generating synthetic user reviews based on product images).
What users say: Developers appreciate the generous free tier and fast speeds, but note the API ecosystem can sometimes be fragmented to navigate compared to competitors.
| Pros | Cons |
| Native multimodal capabilities | API documentation can be overwhelming |
| Generous free tier for testing | Output consistency can vary |
Stepping away from tabular and text data, Synthesia provides a unique API for generating synthetic video data. It allows developers to create realistic AI avatars speaking text dynamically.
Key features:
Pricing: Custom API pricing based on video minutes generated.
Best for: EdTech, marketing, and corporate training platforms that need to generate thousands of personalized, synthetic video messages programmatically.
What users say: Rated incredibly high for the realism of the avatars. The main limitation is that it strictly generates video/audio, not traditional database data.
| Pros | Cons |
| Industry-leading synthetic video quality | Niche use case (video only) |
| Supports localization natively | Rendering times can bottleneck live apps |
Cohere is heavily focused on enterprise AI and is a fantastic choice for generating synthetic data to test Retrieval-Augmented Generation (RAG) systems and enterprise search.
Key features:
Pricing: Pay-as-you-go based on tokens.
Best for: Generating synthetic search queries, testing enterprise RAG architectures, and synthetic text classification.
What users say: Developers highlight Cohere’s secure, enterprise-first approach and excellent embedding quality, though it lacks the multimodal flair of OpenAI or Gemini.
| Pros | Cons |
| Highly optimized for RAG and search data | Text only (no multimodal or deep tabular) |
| Enterprise-grade security focus | Smaller developer community |
The best option depends on the kind of data you work with and the way your team builds, tests, or trains models. Some tools are better for large relational databases. Others fit Python workflows, text generation, RAG evaluation, bias work, or synthetic video.
A simple way to think about it:
Here is the clearer breakdown:
For teams that use several LLMs for synthetic text, a gateway such as LLM API can also make model switching easier, since it gives you one layer between your app and multiple providers.
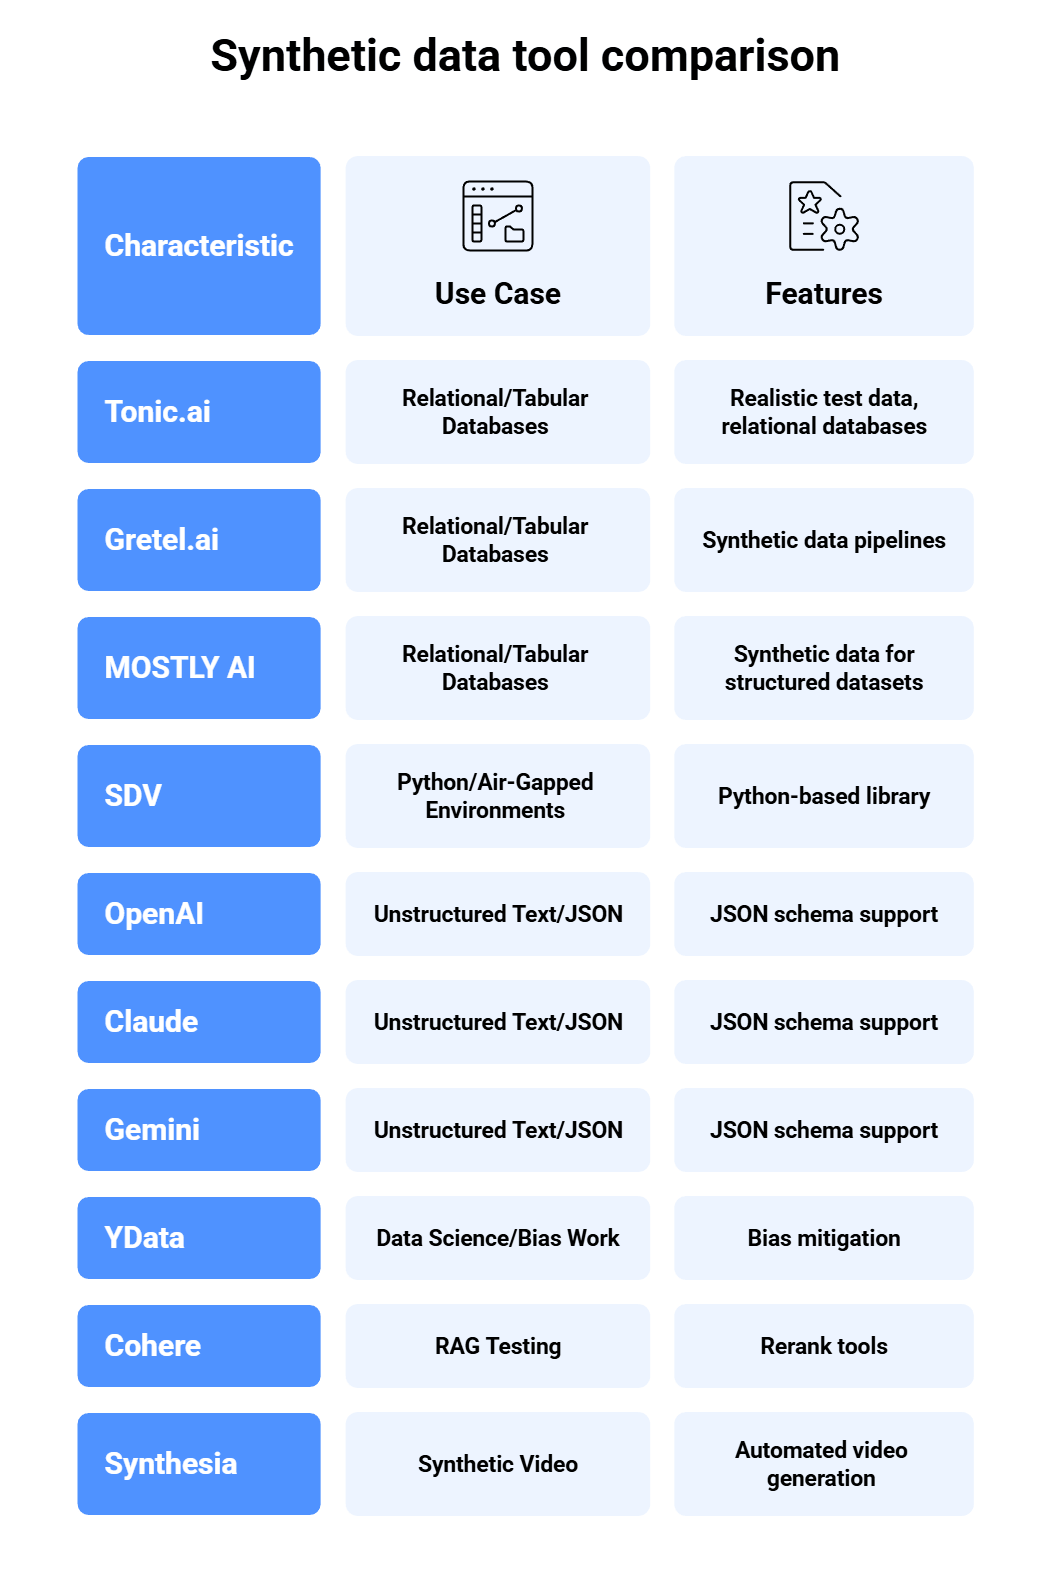
Most synthetic data APIs follow a similar setup. The names may change from one platform to another, but the flow stays close: define the data structure, train the model, generate new records, then send the output where your team needs it.
A simple workflow looks like this:
First, you connect the tool to a sample dataset or provide a schema in JSON, CSV, or database form. This gives the model the structure, field types, and data logic it needs to study.
After that, you start a training job. At this stage, the model learns patterns in the source data, such as formats, distributions, and links between fields. For relational datasets, this part matters a lot because the tool has to keep table relationships usable.
Once the model is ready, you call the generation endpoint and choose how much data you want. That may mean rows for a database, records for a test environment, or structured output for an app workflow.
If your synthetic data comes from LLMs, such as fake support chats, summaries, or JSON records, it helps to standardize the way your app talks to those models. OpenAI, for example, supports structured outputs with JSON Schema, which makes text and JSON generation more predictable.
The last step is delivery. Teams usually push synthetic data into a staging database, test environment, cloud bucket, or data lake so developers, QA teams, and ML teams can use it right away.
In practice, the full process is pretty direct: give the API a schema or sample, let it learn the patterns, generate fresh data, then move that data into the environment where your team tests or builds. For text-heavy use cases, one more layer for model routing can save a lot of friction once traffic grows.
Synthetic data APIs have become a practical tool for modern teams. They help solve two key problems: limited usable data and privacy concerns. Whether you are masking a database, building realistic test environments, or generating synthetic chats and personas with LLMs, there is a tool for the job.
But once you use LLMs for synthetic text generation, API management can get messy fast. Multiple providers, pricing models, and reliability issues can slow everything down.
That is where llmapi.ai helps. It offers one OpenAI-compatible API for 200+ models, plus usage analytics, secure key management, team controls, and cost-aware routing.
Why choose LLMAPI?
If your team uses LLMs to create synthetic text datasets, LLMAPI can help you simplify the stack, test models faster, and scale with less friction.
The main benefit is the ability to generate unlimited, highly realistic data for testing, development, and AI training without risking data breaches or violating privacy laws.
If you are using multiple LLMs (like OpenAI, Claude, and Gemini) to generate synthetic text, you can use a unified platform like LLMAPI. It allows you to access multiple models through a single API endpoint, meaning you don’t have to rewrite your integration code every time you switch providers.
Yes. Because properly generated synthetic data does not contain a 1-to-1 mapping of any real person’s information, it is generally considered anonymized data and falls outside the scope of strict privacy regulations like GDPR and CCPA.
Absolutely. When running high-volume synthetic text generation jobs, you can hit provider rate limits quickly. LLMAPI provides built-in load balancing and fallback mechanisms, automatically routing your requests to available models so your data generation pipeline never stalls.
Pricing varies wildly based on your needs. Open-source tools like SDV are free, LLM APIs are pay-as-you-go (often fractions of a cent per token), while enterprise database tools like Tonic.ai can cost tens of thousands of dollars annually. Most providers offer free tiers to test the waters.